All the wrong things
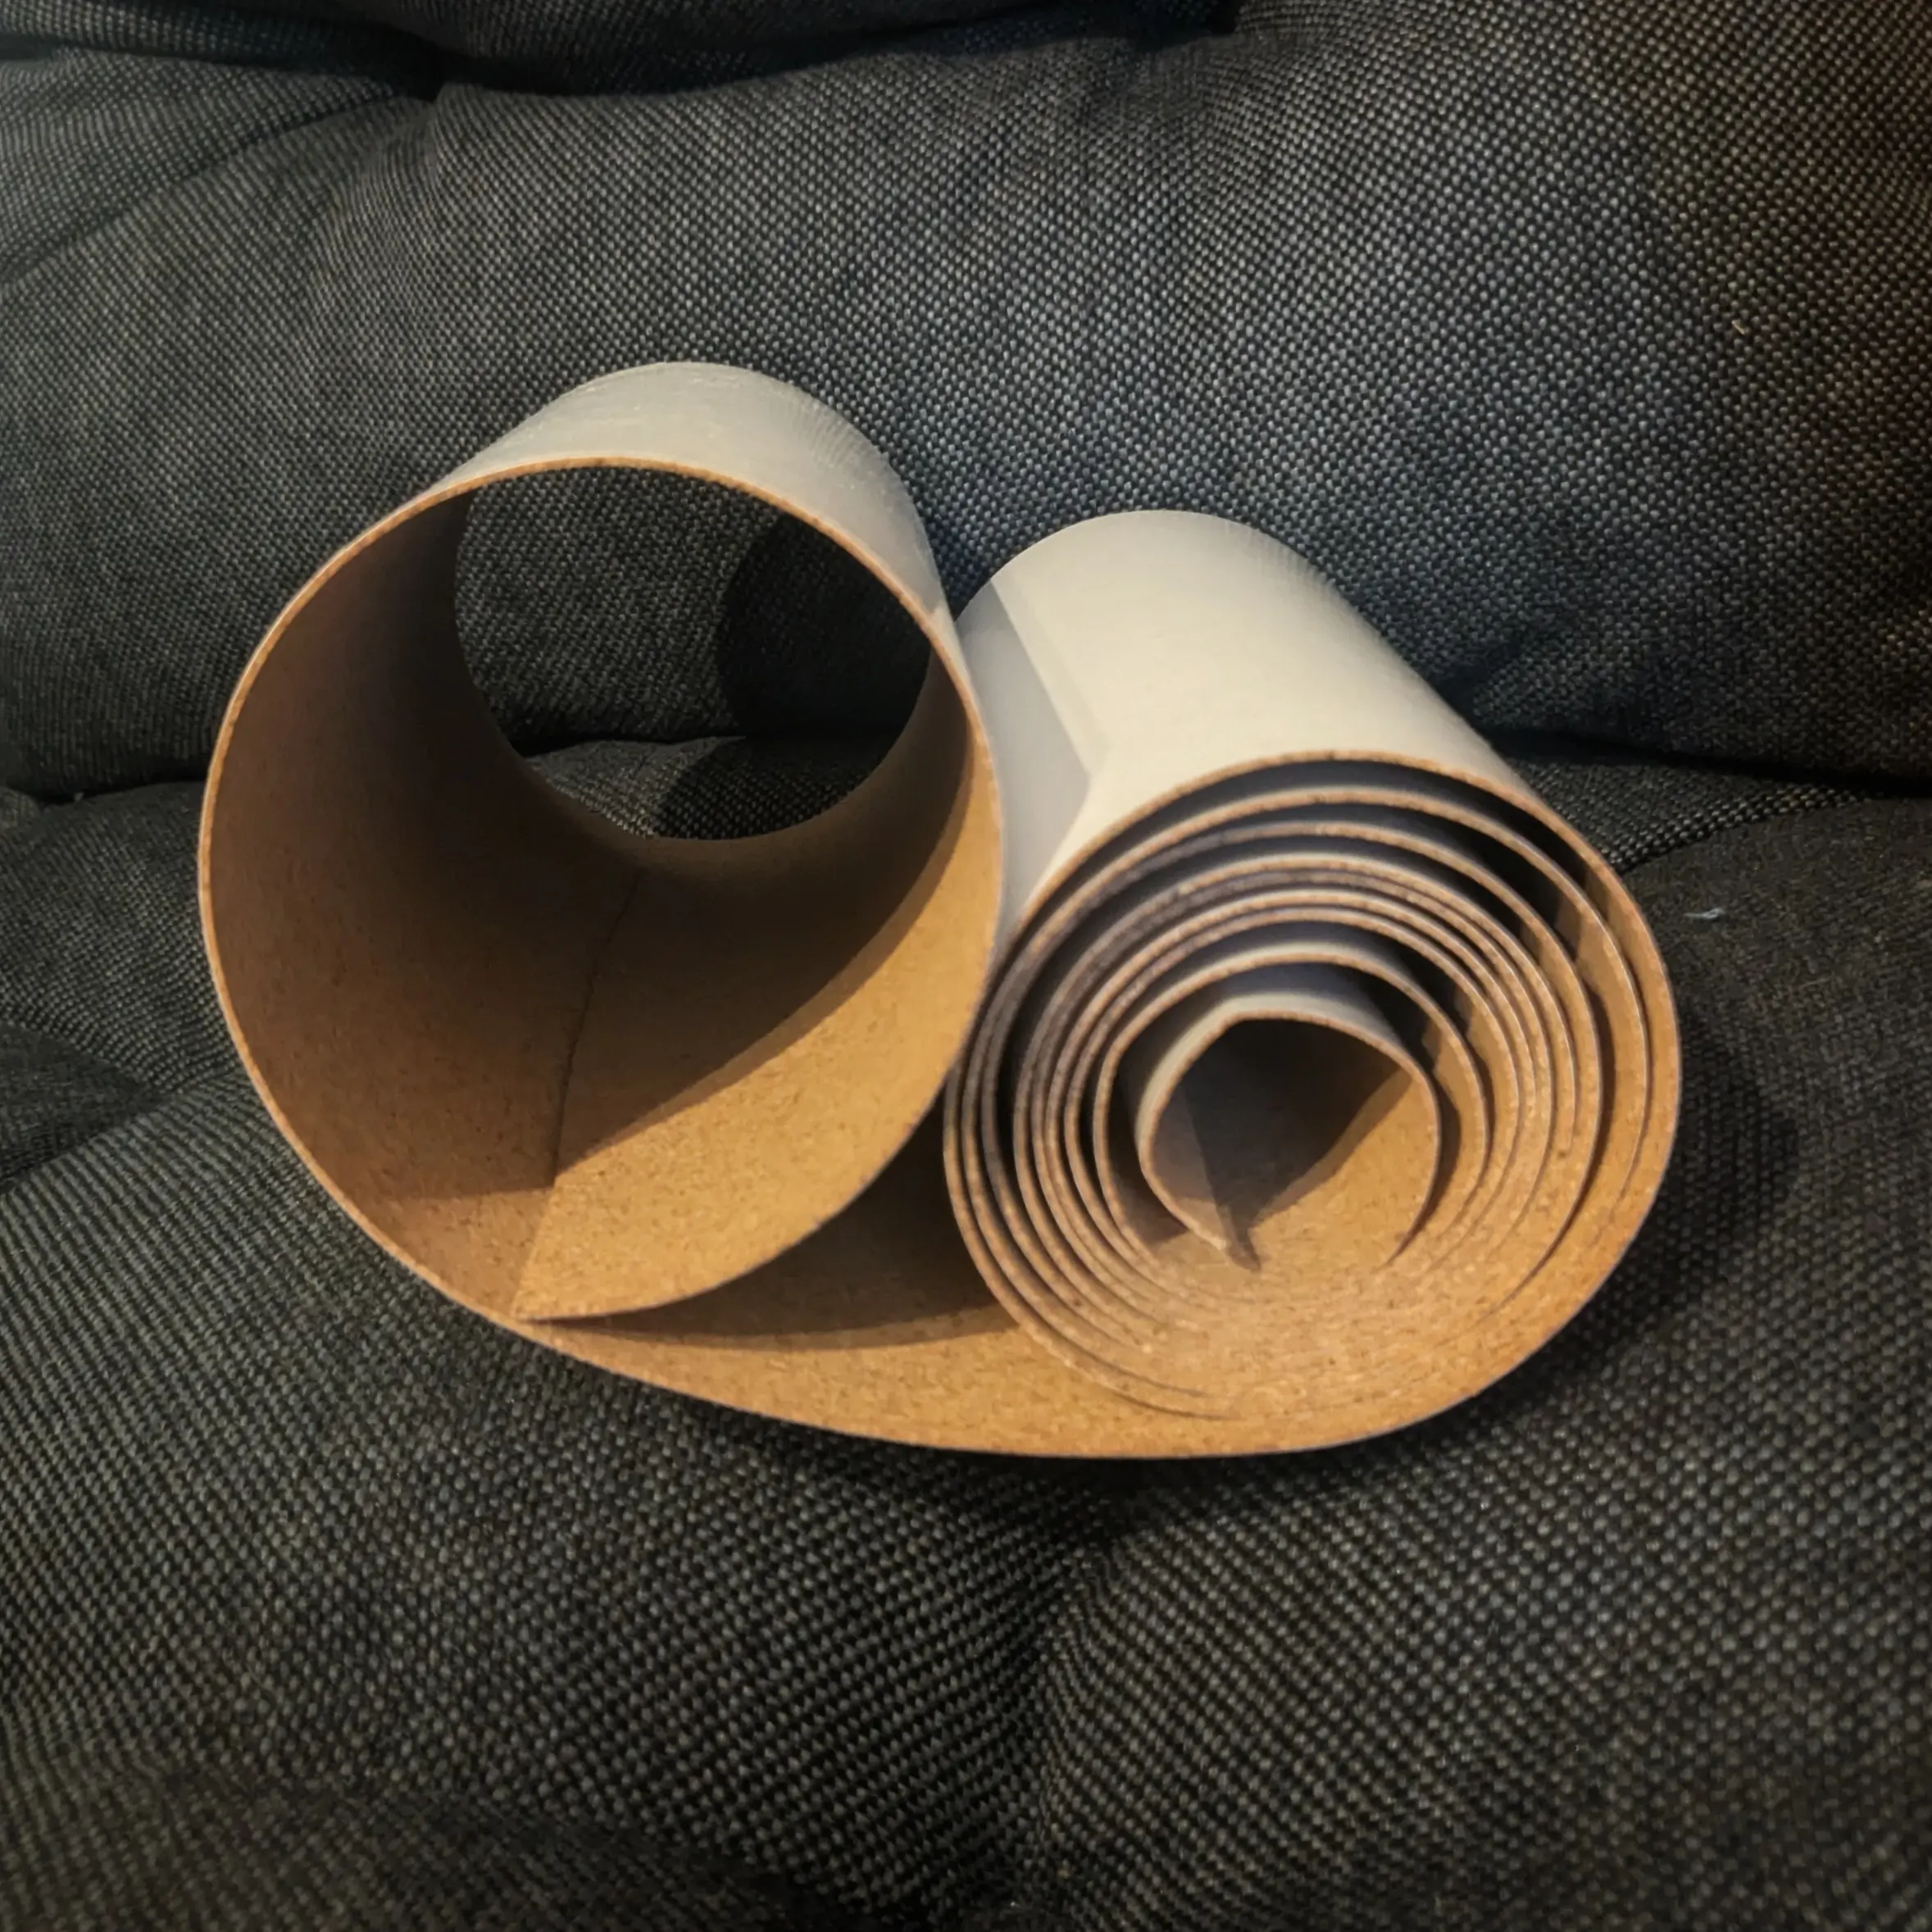
August 25, 2026In my recent Random Stuff post, I mentioned buying a roll of cork with an adhesive backing.
Well, this is that roll, and today we are going to make use of it:
Background
On our first visit to Madeira, my mom bought her first cork wallet.
As you might expect from thin cork sheets, these wallets wear out quite a bit over time, and my mom has had to buy a couple replacements since.
However, finding a cork wallet that actually looks nice and has a somewhat decent quality can be quite hard.
And there are probably not that many that beat the ones you buy in Madeira.
I’ve had my Ethnotek wallet, made from hand-crafted fabric, for years now and absolutely love it.
But being super into arts and crafts, making a wallet from cork is something that intrigues me, something I would love to make myself.
So I figured I’d try - what could go wrong?
Materials
Well, things started going wrong when I was ordering supplies for this project.
I only started working on it because I found thin, adhesive cork rolls on Amazon and figured that they would be what I was looking for.
Ohh - how I was wrong.
Not only did I order a roll that is 1 mm thick and later found out that there were 0.5 mm thick rolls on sale as well.
No! I also discovered that there is “cork fabric”, which is even thinner.
And going by the pictures I’ve seen, pretty much exactly the material my mom’s wallet is made out of.
Unfortunately for me, I only learned all of that after I got the 1 mm thin cork roll in the mail,
and so I figured I’d make this work.
Besides the cork roll, I also ordered a cheap snap button kit, which I definitely came to regret in the making process. It is so hard to work with, and I don’t see how the buttons can come out not looking crooked or breaking.
Well, at least the paper and white yarn I have are nice.
Prototyping
On my mom’s wallet, the cork is bent 180 degrees on the edges to hide the internal structure and give an all-round cork aesthetic.
This is obviously something I wanted to mimic on my version, but I was very fearful that the cork sheets would break or split when under this much pressure.
The easiest way to figure out if they would, was to try it out on a small test piece, so that is exactly what I did.
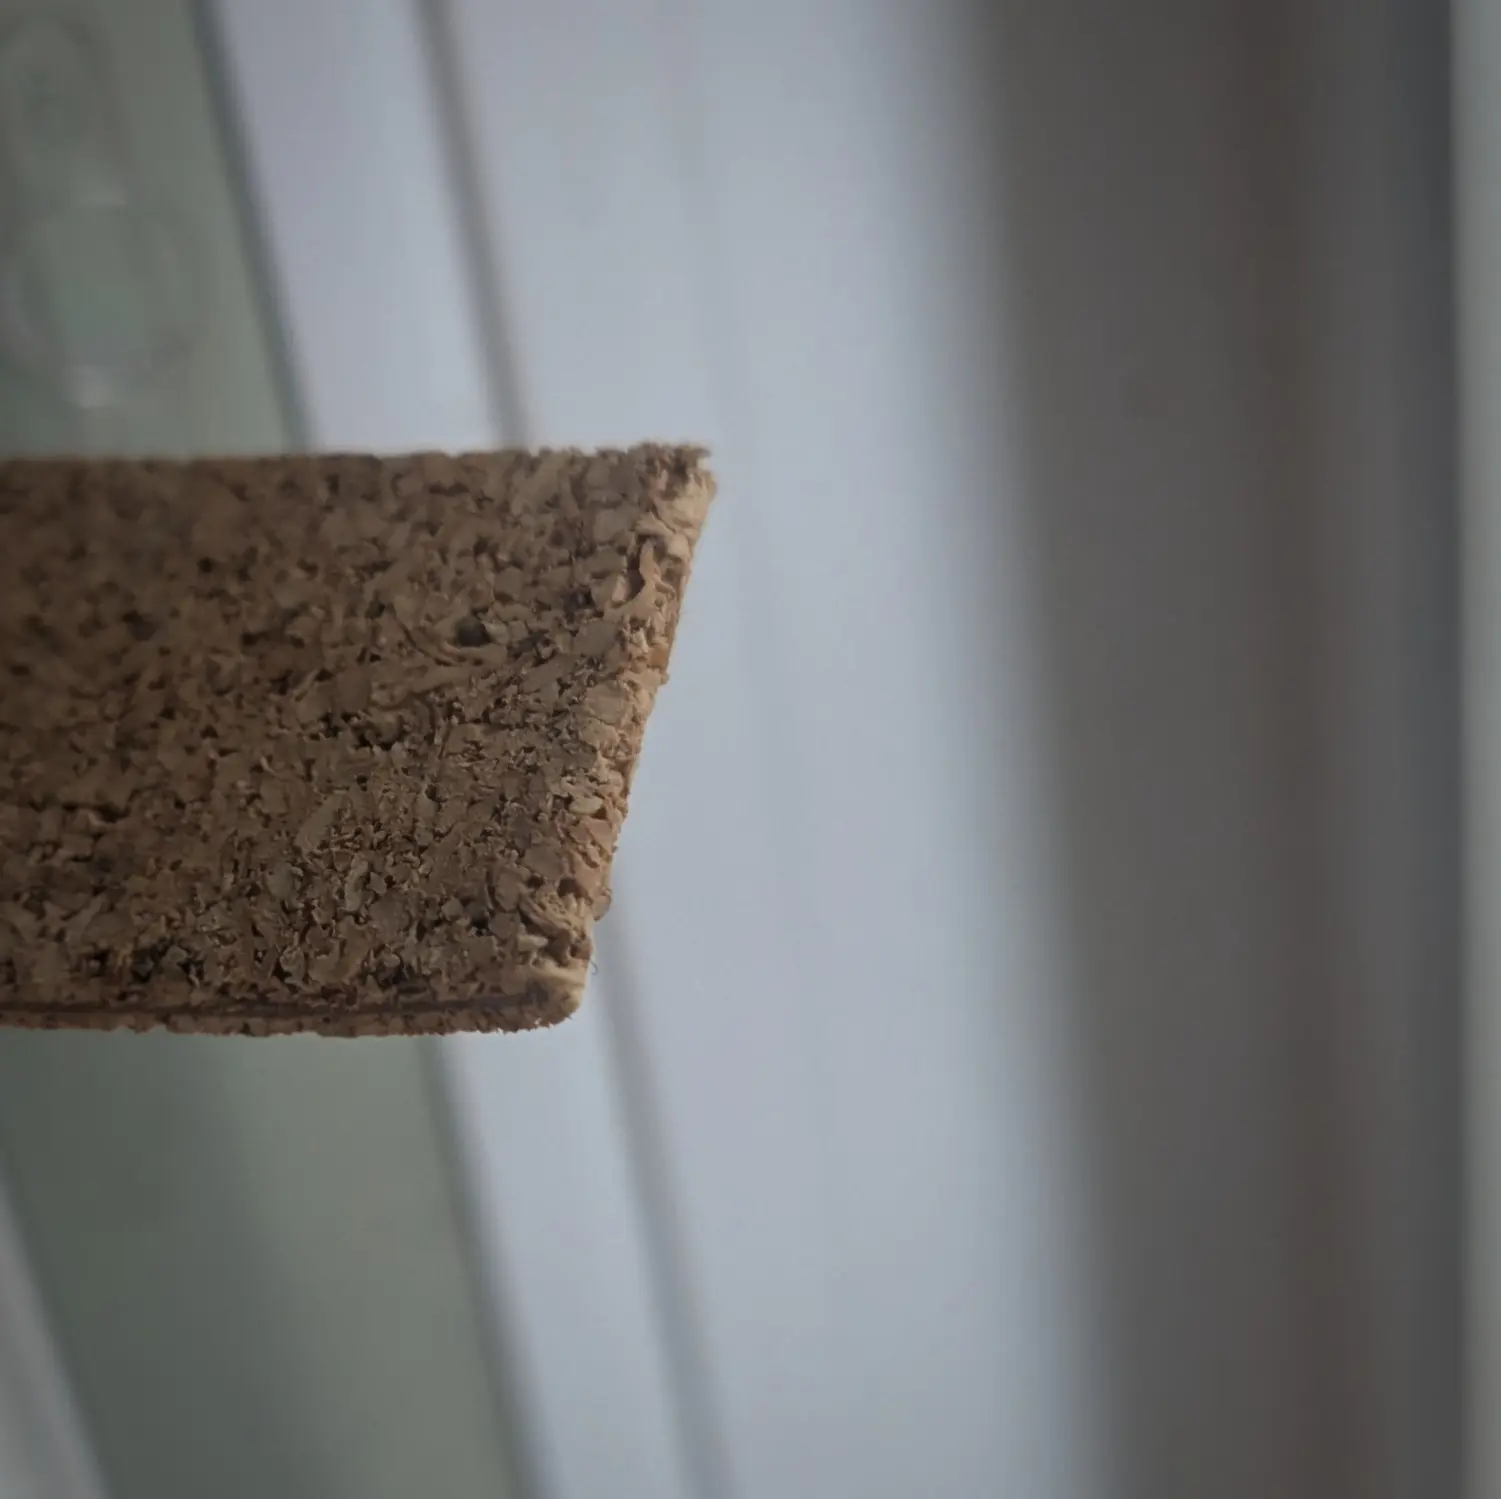
As you can see, the cork does come off from the strip, and once you move your finger over the edge, it gets even worse,
which makes it impossible for me to fold the cork like that.
I obviously tried wetting the area beforehand, but that only helped a little bit, and that didn’t last long either.
However, I was surprised to see that the adhesive is actually quite strong, which allows the wallet to be constructed by simply gluing together the inside and outside shell.
Whilst this doesn’t leave the nicest edge, it should certainly look pretty good from both the inside and outside.
To improve the appearance and mix up the pretty fine-grained cork,
I was also planning on copying yet another stylistic element from my mom’s wallet:
Using white yarn to stitch around the panels.
The wallet won’t need the stitches for structural integrity, but I think they’ll look nice, add some color, and round off the edges.
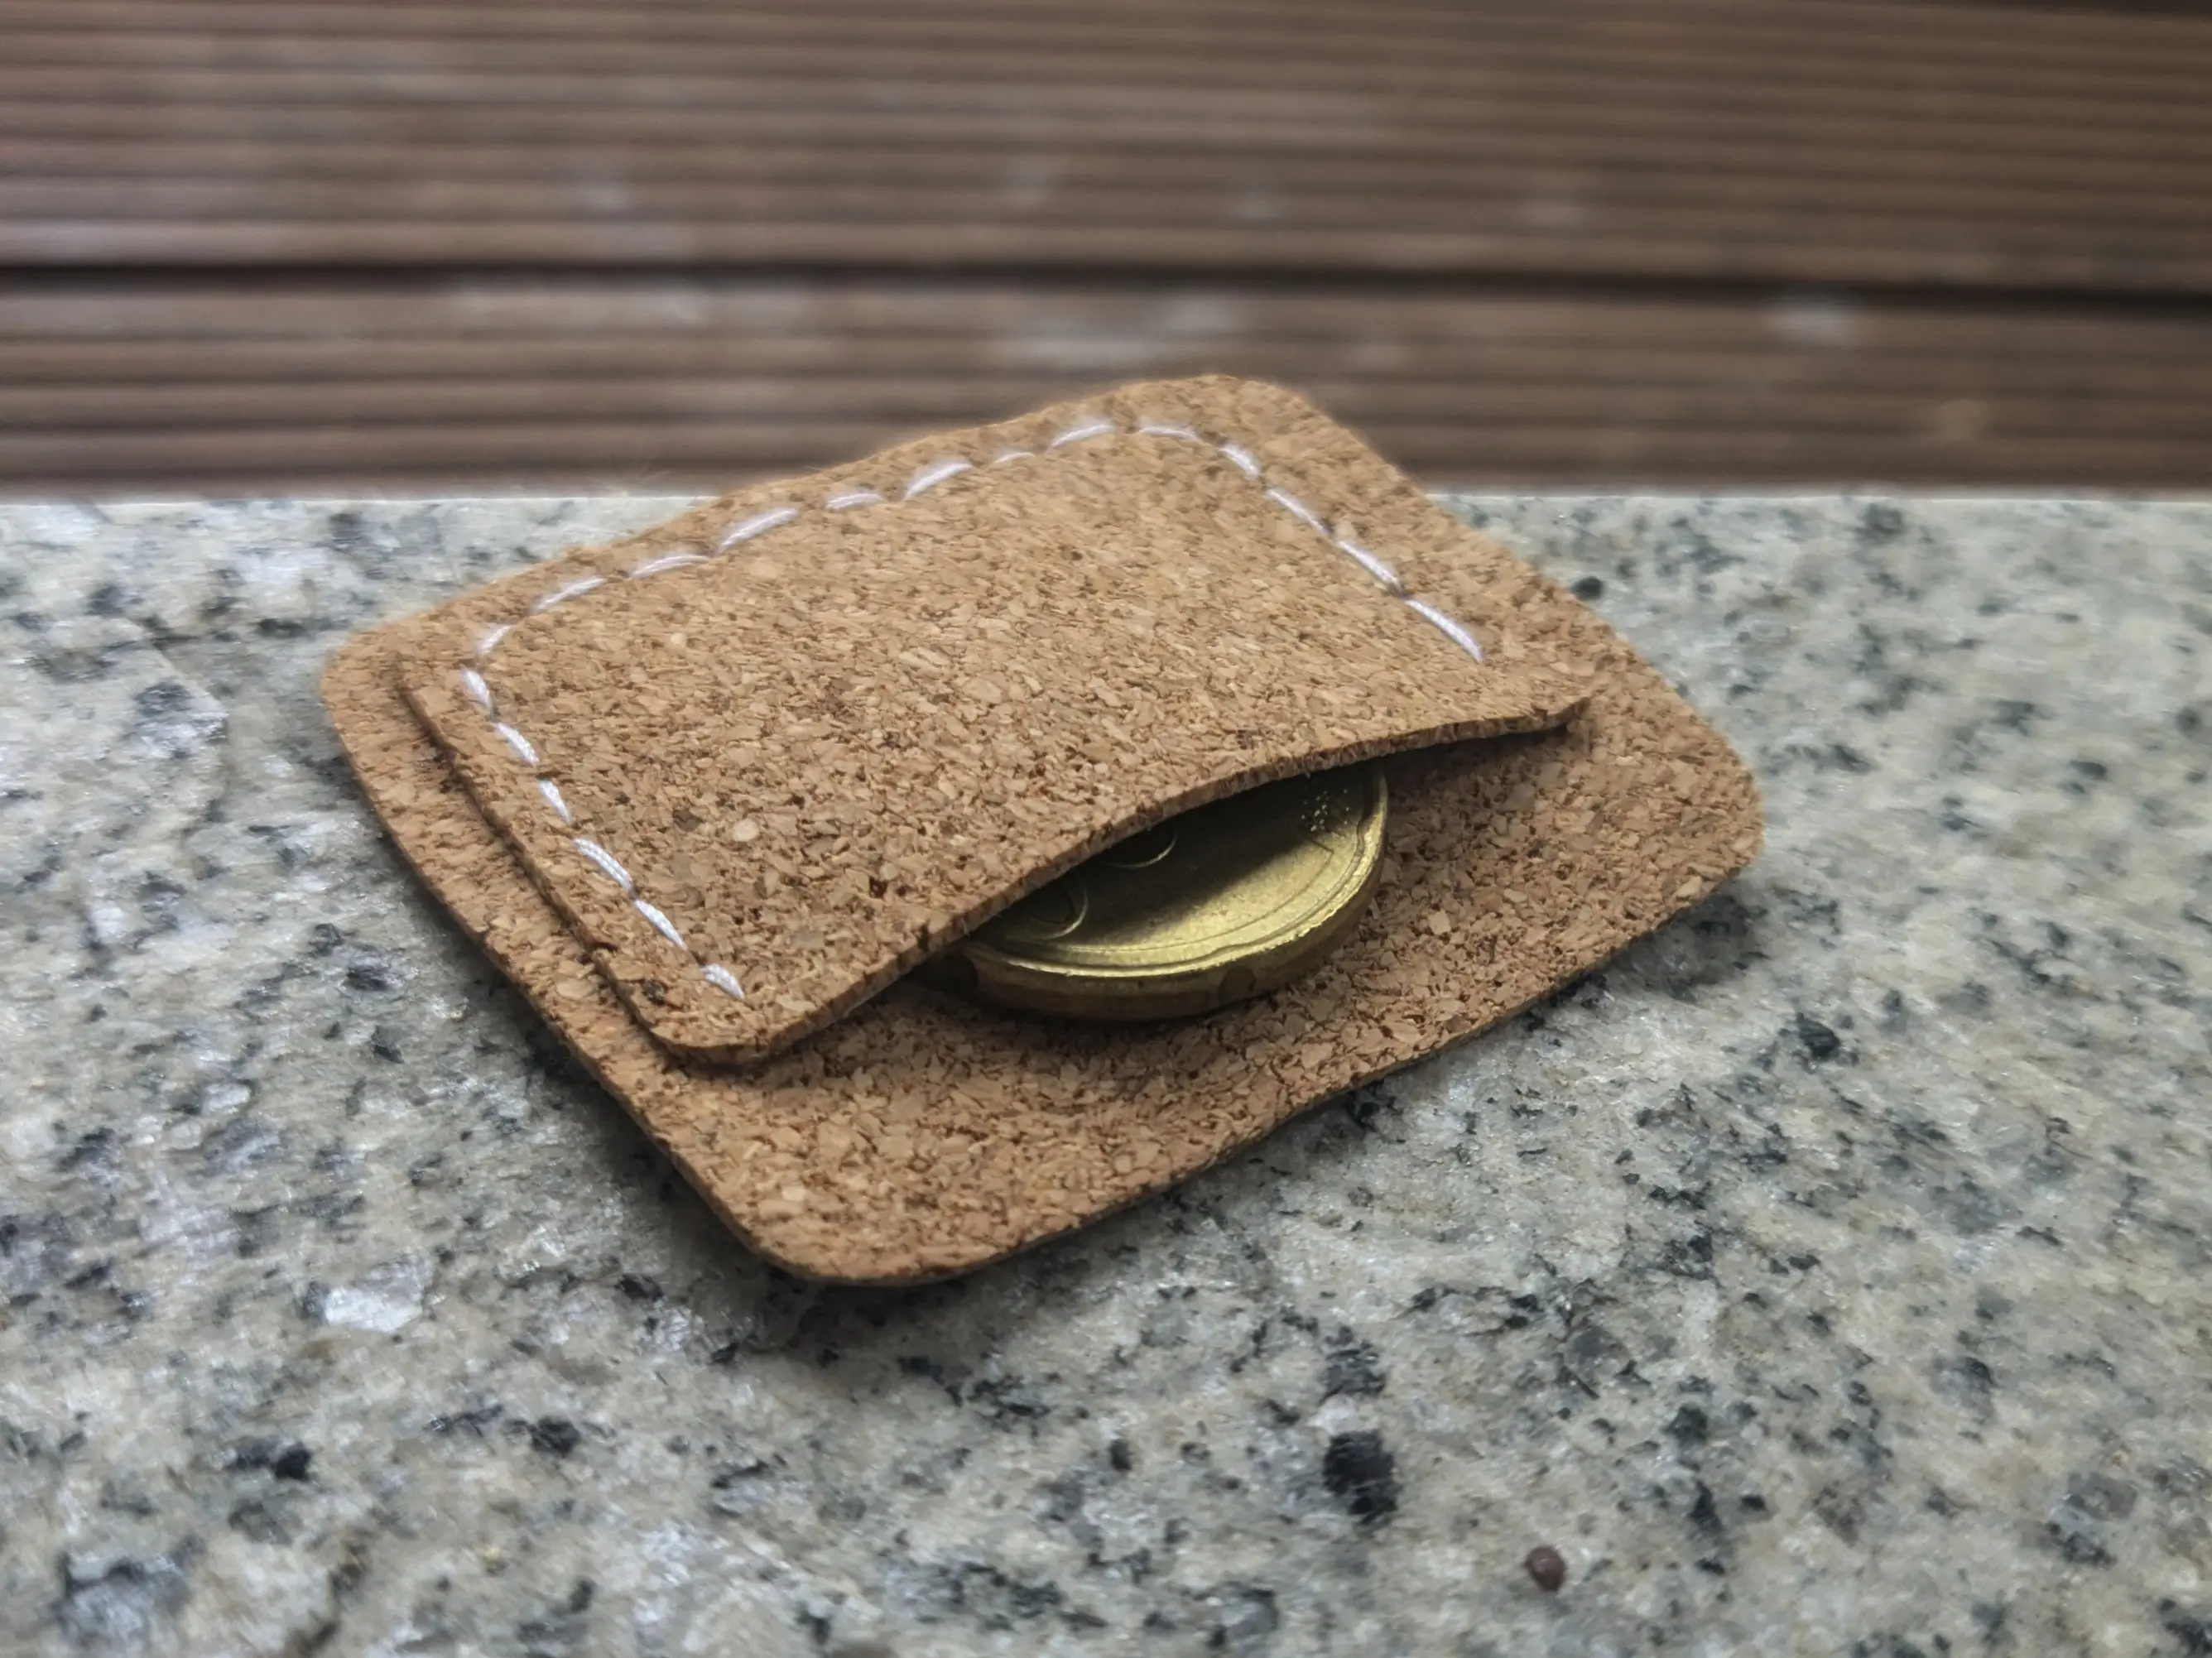
To test my ability to create a pocket and the appearance of the white yarn accent againt the brown cork,
I made another small-scale prototype.
Because it’s only supposed to be a proof of concept, it can be small, to minimize waste.
I’ve used normal printer paper as a backing piece for the areas that are not supposed to be sticky.
And to be honest, it turned out pretty cute.
This made me feel a little more confident that while I could not build the wallet I originally wanted,
I could at least build a wallet.
But before committing myself to making the entire cork wallet, I decided to make a final full-scale prototype out of foam.
I chose 1 mm thick foam because I have a lot of it sitting around unused, and it seems to be about as stiff as the cork roll.
Ideally this should highlight the areas that need improving, before I work on the final version.
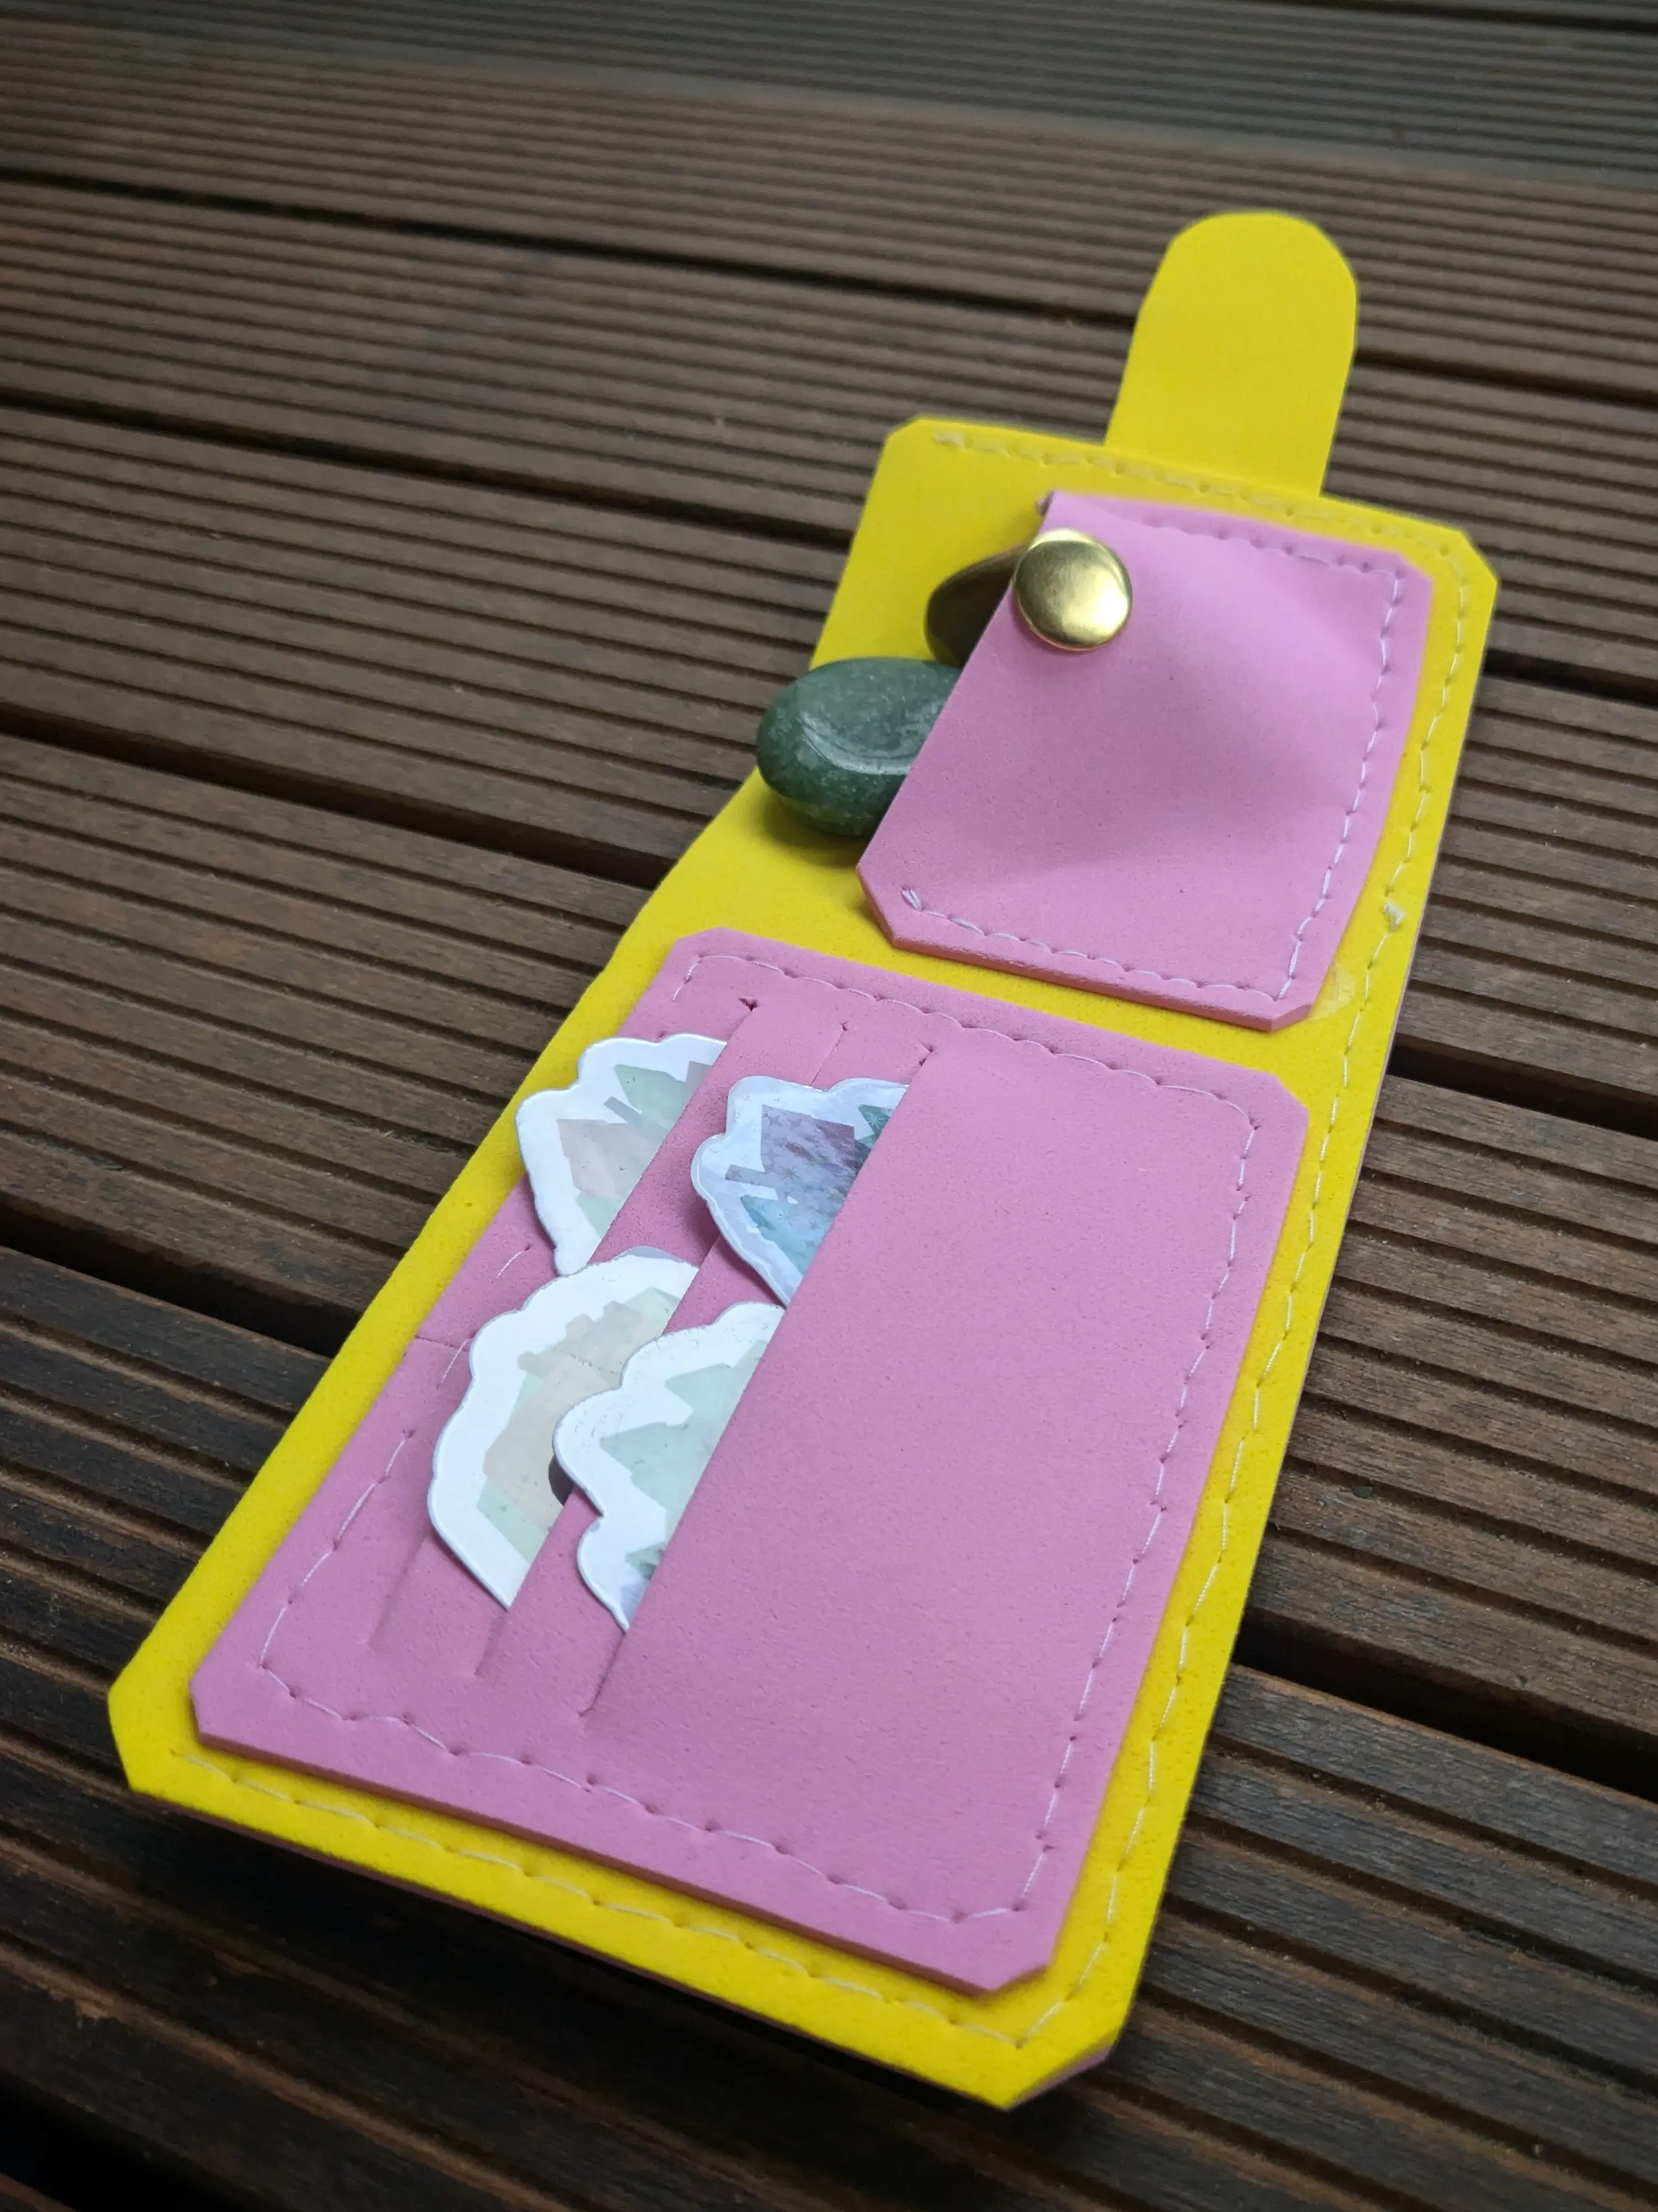
Just like I expected, this prototype highlighted some areas that need attention.
First of all, the coin pocket on the right will be hard to close properly with only one button without it leaving too big of a gap, meaning that coins could fall out.
My only idea to address this would be adding a second button, which probably won’t be enough - but is all I can do.
I’d love to add a flap to close off the pocket, but this just isn’t possible with cork as stiff as this one.
Second of all, the prototype showed that I need to make the wallet wider than I originally thought.
The ID card holder is both not quite wide enough, and too wide, as it overlaps with the center fold of the wallet,
making it impossible to close properly.
This can easily be fixed by making the wallet wider and adding some safe space area in the middle, to ensure nothing interferes with the center bend.
Making the proper wallet
🔵 Note
When I first planned this project, I wanted to design a pattern, which you can print, cut, and glue on the cork adhesive to easily make your own wallet.
However, given that the result is not what I hoped it would be, I decided to only share my making process and you’ll have to figure out the missing details yourself.
Maybe some day, I’ll be able to make a proper pattern I feel happy with.
Cutting the cork sheets
Before I could do anything else, I obviously had to cut out all the required cork pieces.
I used my foam prototype for reference dimensions and adjusted them based on the observations I made earlier.
Afterwards, it was just cutting them out using a ruler and utility knife.
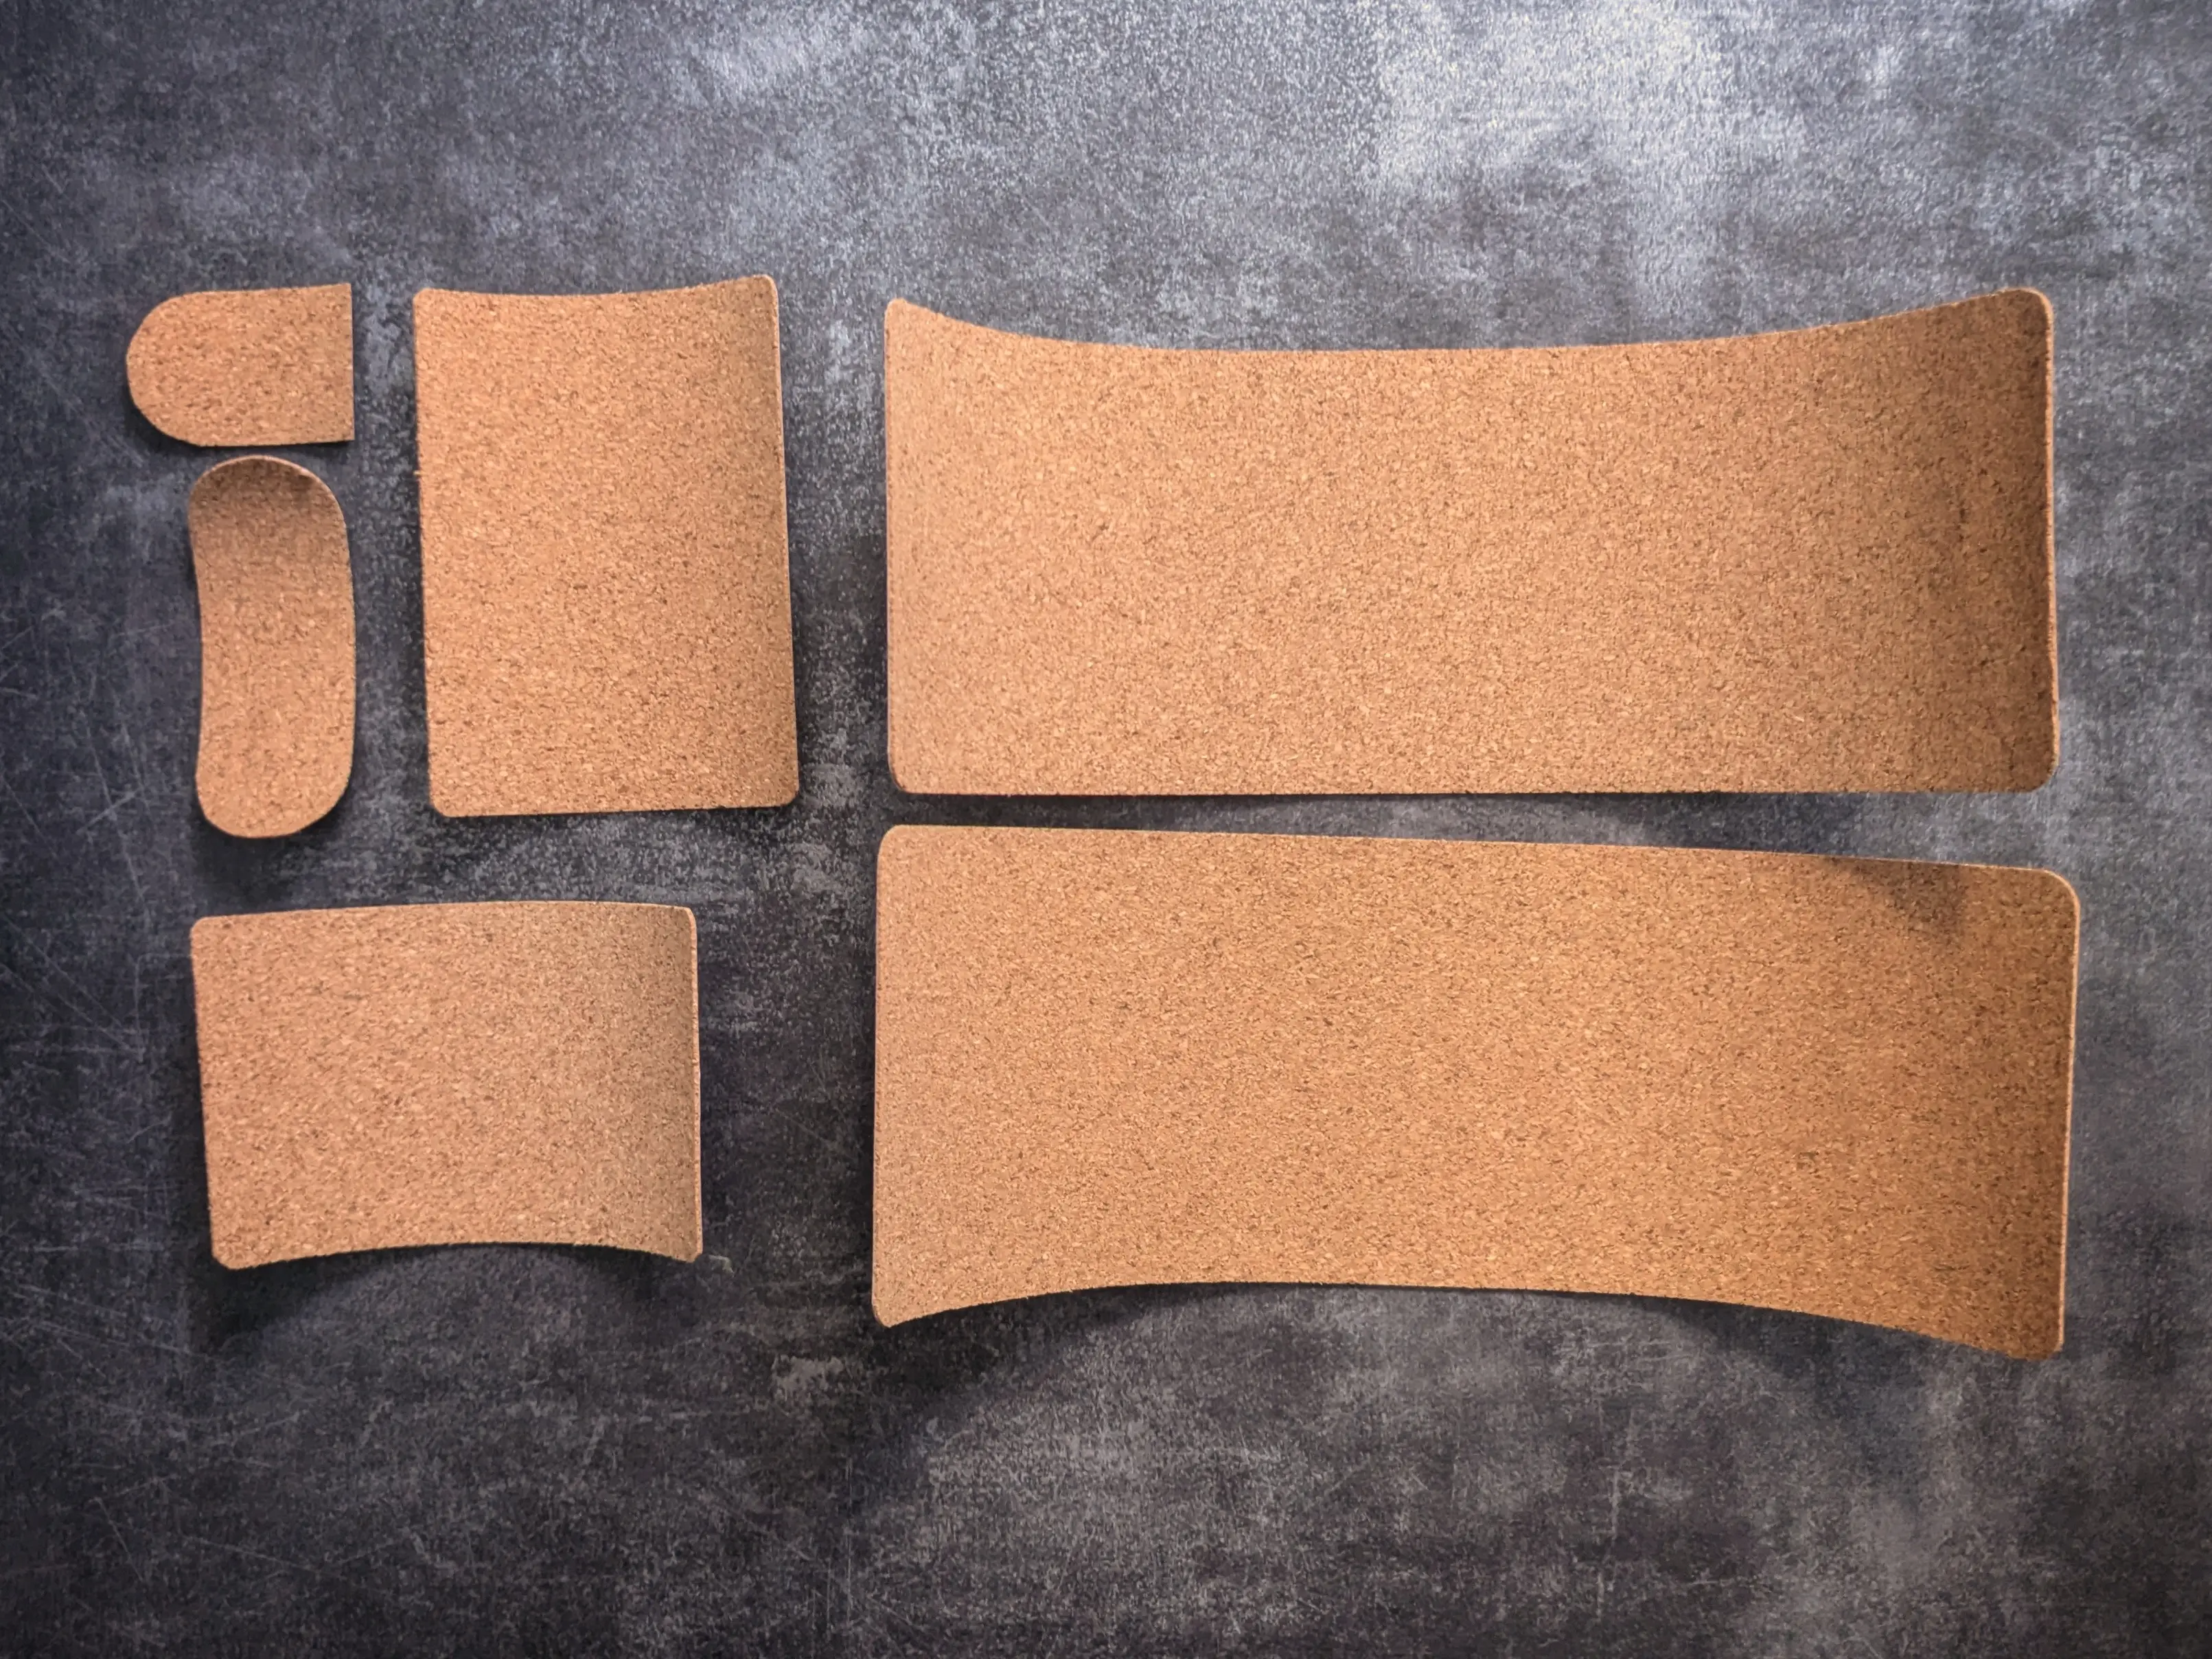
I made a table with all of the pieces and a small description, if you want to follow along.
| Reference | Amount | Dimensions (w x h) | Description |
|---|---|---|---|
S1, S2 | 2 (in total) | 24 x 8.5 cm | Inner and outer sleeve; size is based on the ID card holder and width of euro bank notes (about 7 cm). Besides a 0.5 cm seam allowance, it adds 1 cm of padding towards the middle |
I1 | 1 | 10.5 x 7.5 cm | ID card holder (Most of my cards are slightly wider than 8.5 cm, but I’ve added 1 cm for more give, to reduce the friction. An additional 1 cm of seam allowance is included for 5 mm on either side.) |
C1 | 1 | 11 x 6.5 cm | Coin-holder counter part to the ID card holder I1.ATTENTION: This is supposed to be cut as an isosceles trapezoid, with 11 cm on the top and 10.5 on the bottom. It will later be glued on a rectangular base shape opening it up as a pocket. |
L1 | 1 | 8 x 3 cm | Outer part of the closing latch; dimensions are based on the prototype; made to overlap over S1 by 3.5 cm |
L2 | 1 | 4.5 x 3 cm | Inner part of the closing latch; in contrast to L1, this does not overlap over S1 |
After cutting all the pieces, I rounded off most of the corners using my corner cutter and a pair of scissors, for radii the corner cutter couldn’t do.
| Reference | Radius | Where |
|---|---|---|
S1, S2 | 7 mm | everywhere |
I1, C1 | 4 mm | everywhere; it looked better at a smaller radius than the outside radius, and my corner cutter just so happens to support 4 mm |
L1 | 15 mm | everywhere, to create circular ends |
L2 | 15 mm | only on one of the short rectangle sides, so it lines up with L1, the other side sits flat against the wallet |
This left me with six cork pieces in total.
Assembling the button latch
I’ve decided that assembling the button latch first is the easiest, as it is a fairly low-stakes way of getting started
and nicely transitions into the outer shell assembly.
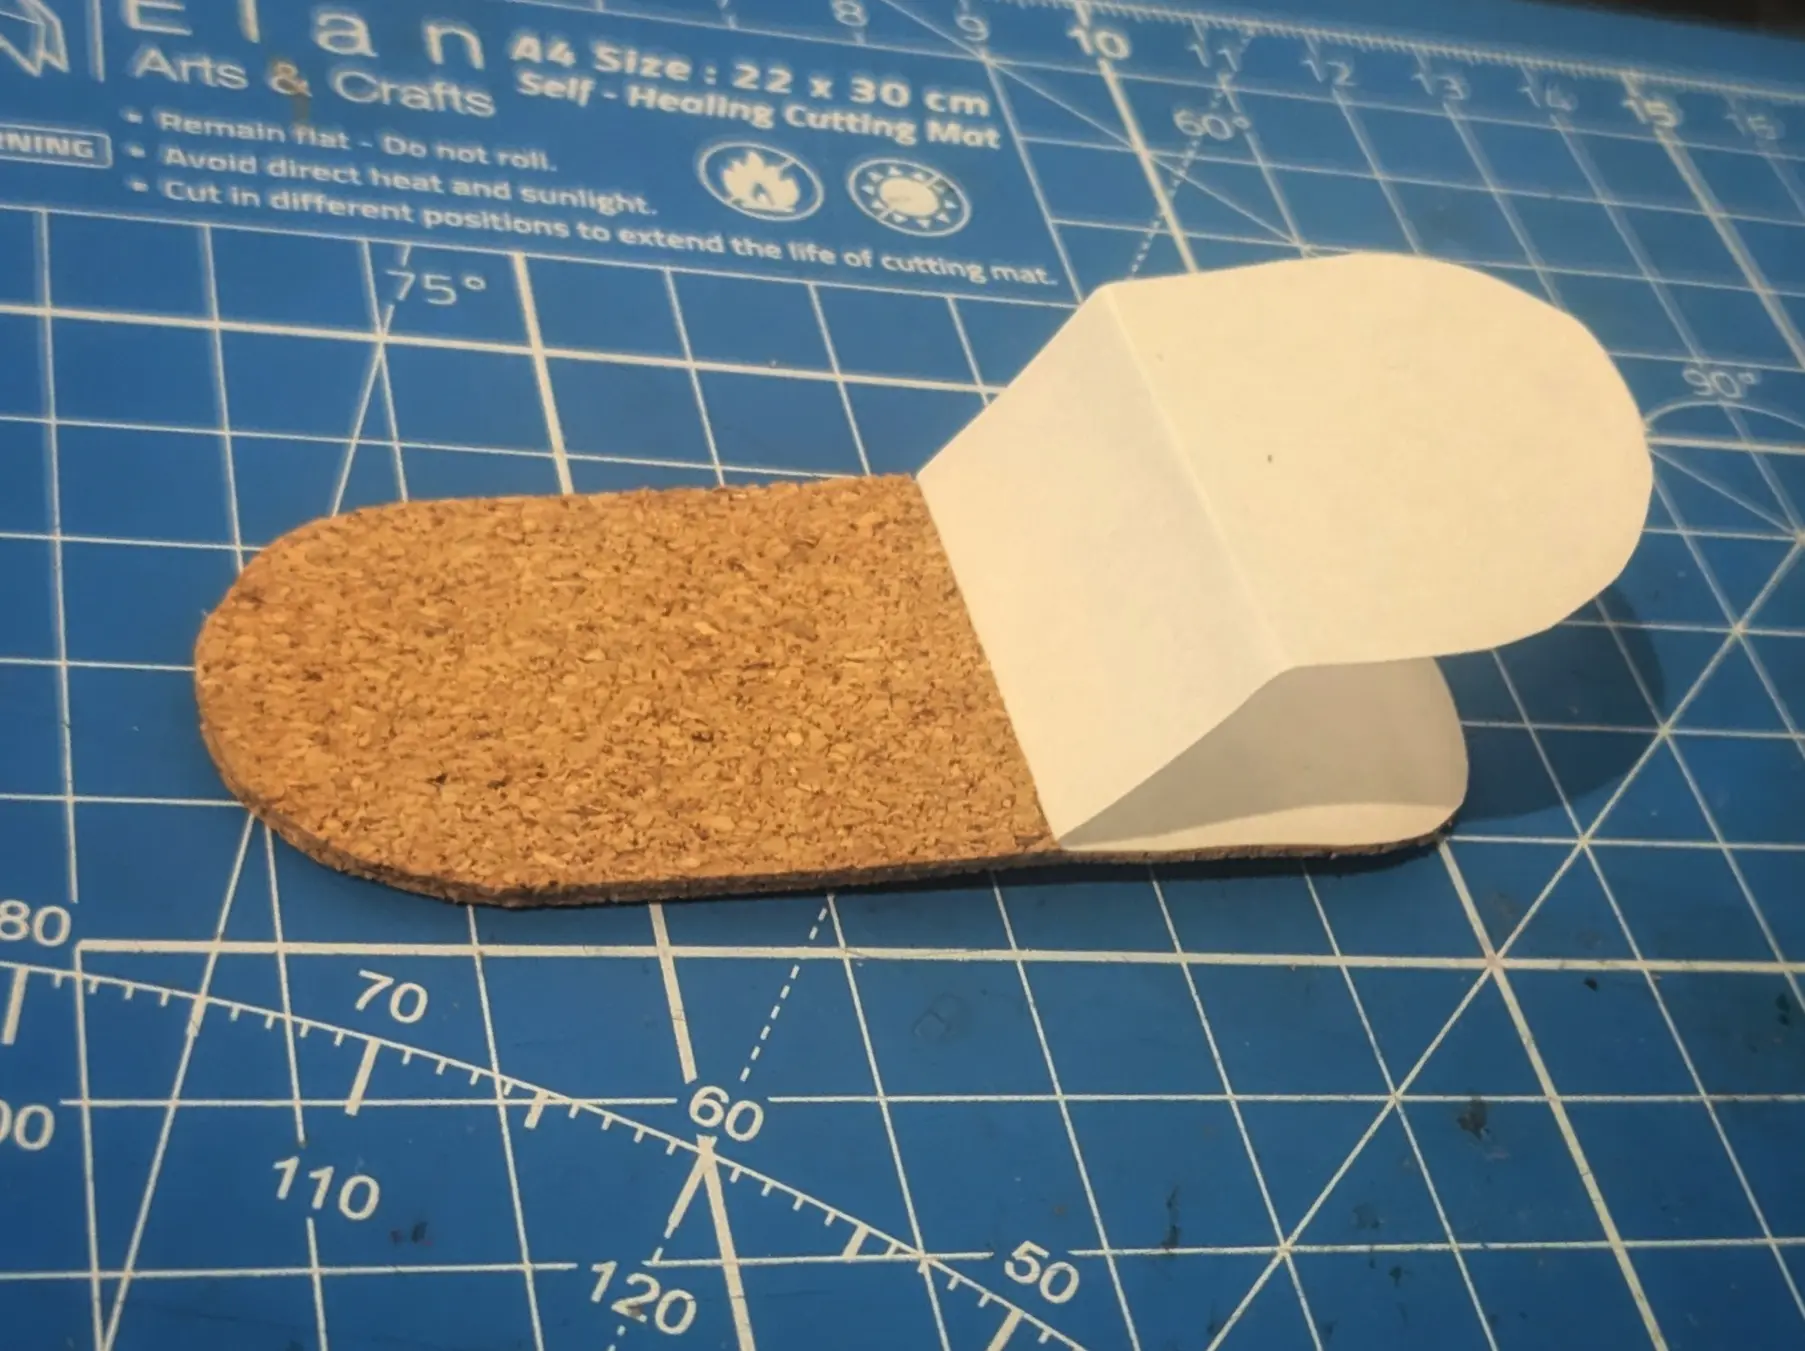
This step encapsulates combining L1 and L2 into one by removing the protective lining and sticking them together,
making sure to align the rounded end.
🟢 Tip
You might have noticed that I did not fully remove the lining from
L1.
That is because the last 3.5 cm will be attached to the outer shell (S1) later, and I’d rather not stick it to something by accident.
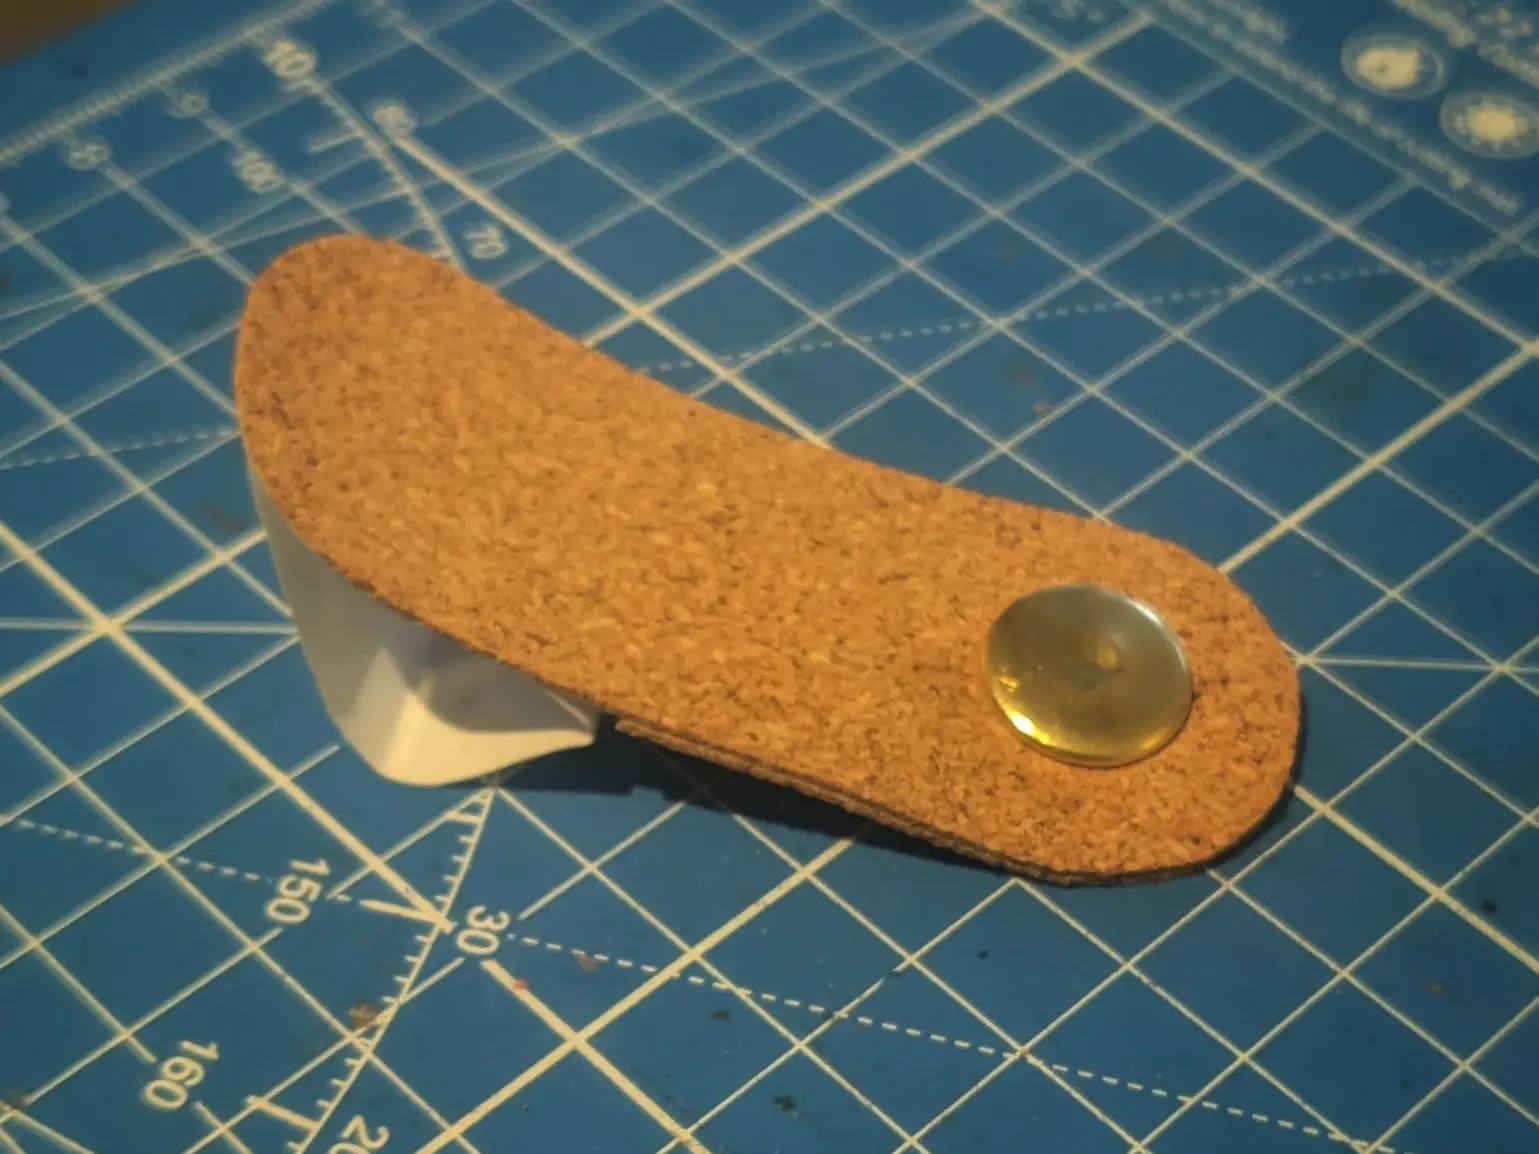
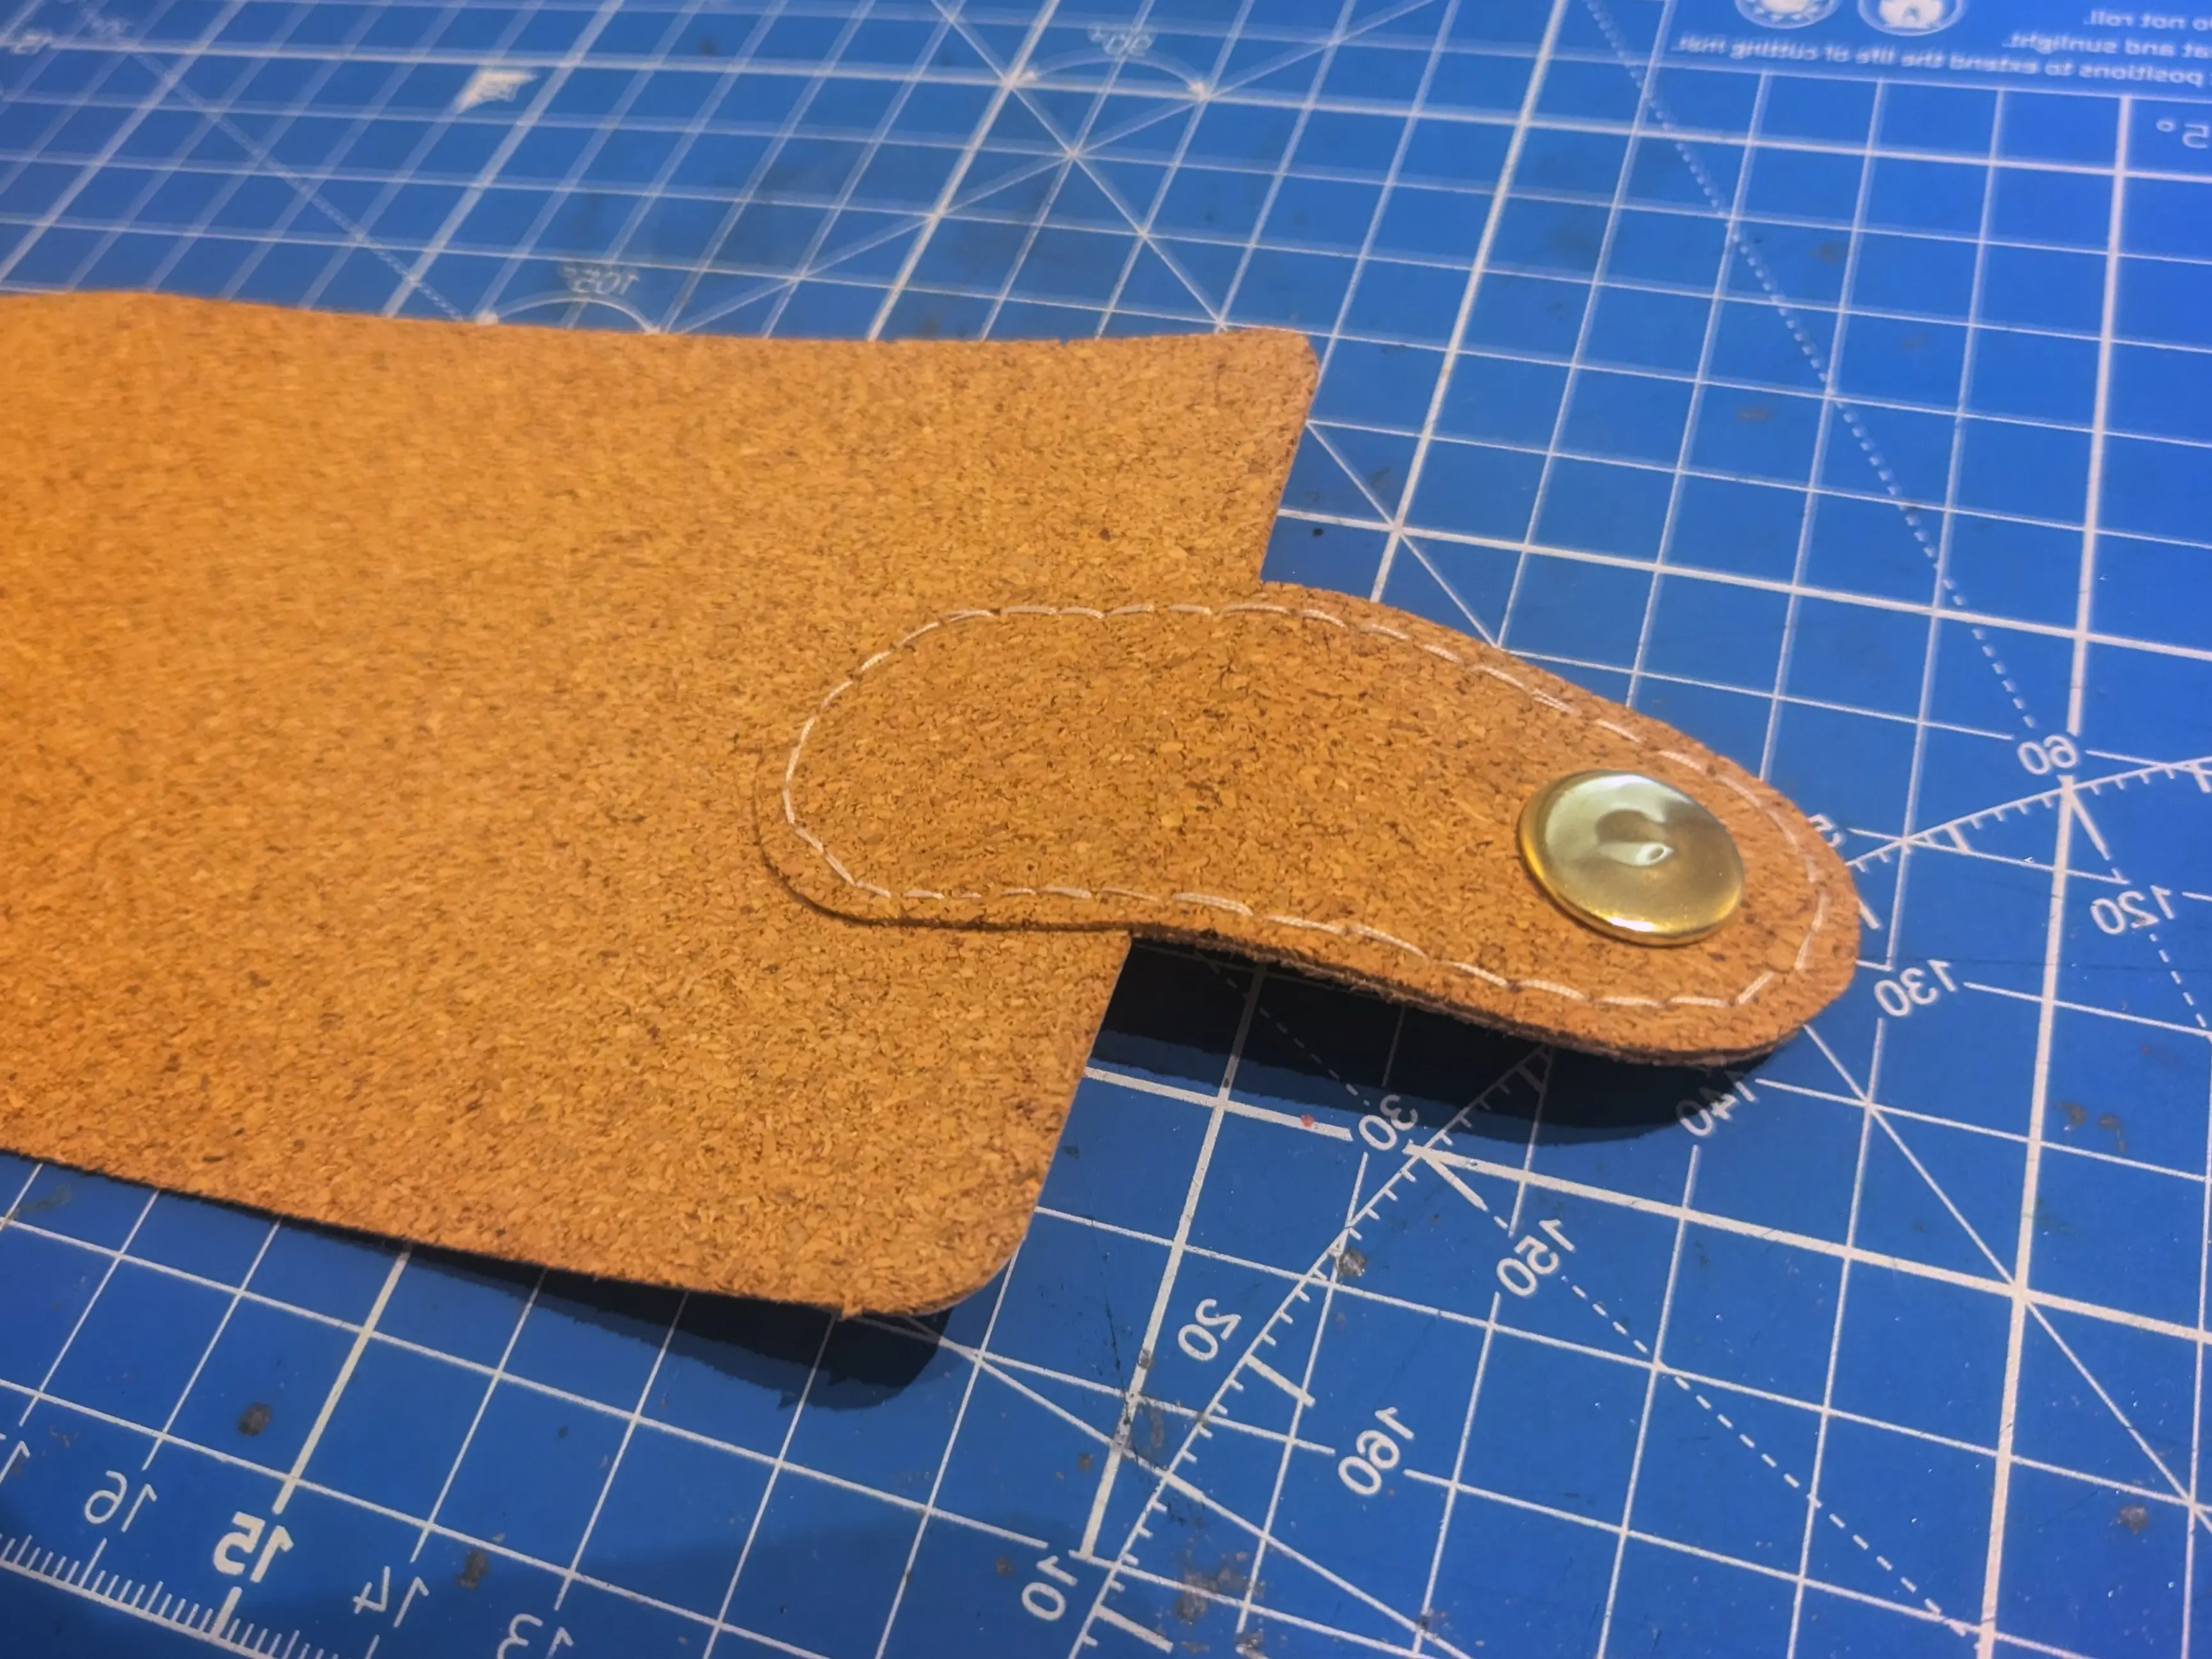
With the two pieces connected, it is time to add the female end of the button, which is used to hold the wallet closed.
I started by marking the center of the half-circle and using the hole punch that came with my button kit to punch a hole through the cork sheets.
With the hole in place, I added both sides of the button and followed the instructions that came with the kit to connect them together.
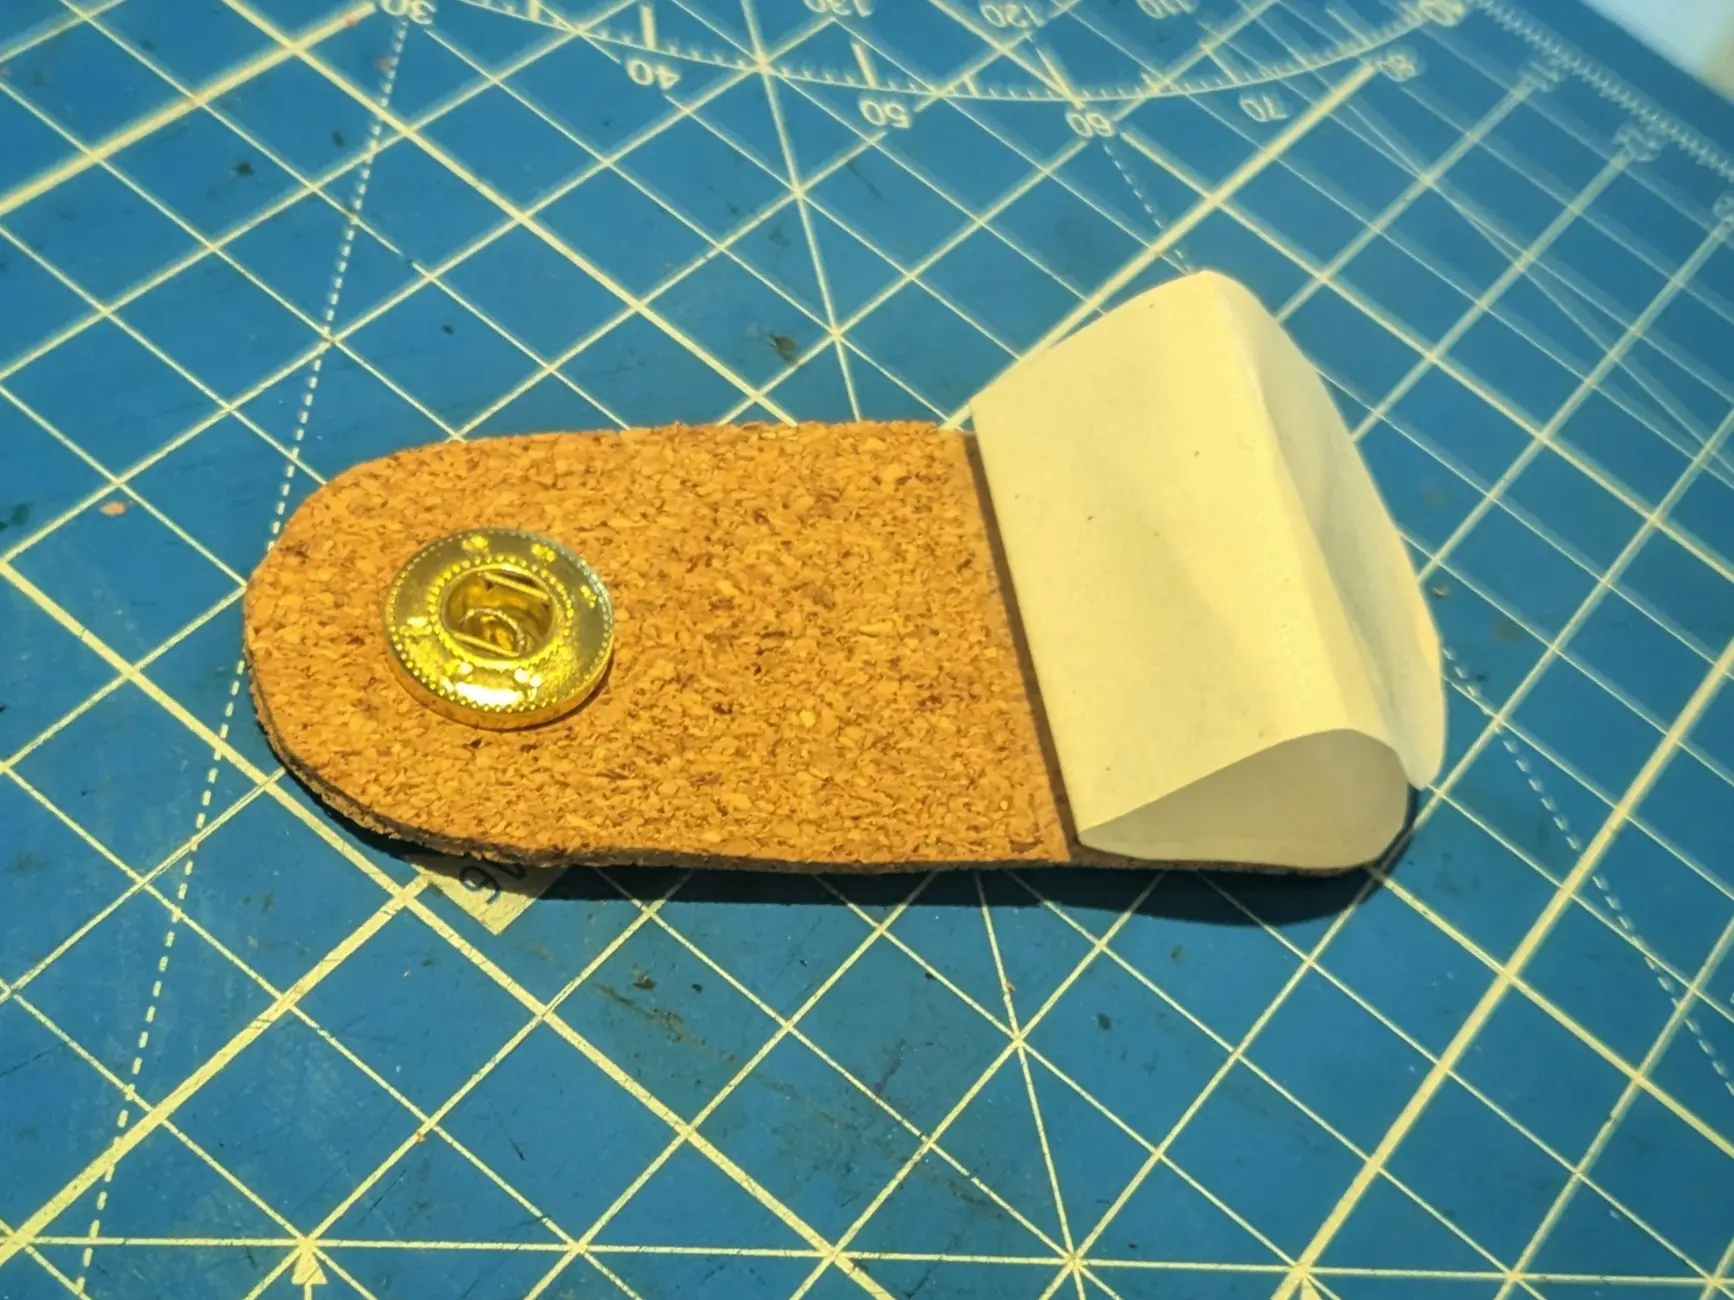
Once I finished assembling the latch, I centered it along the short side of the outer sleeve S1 and glued it down onto the cork side.
To make sure it was properly centered, I drew some reference lines onto the protective lining
and measured the distance to the corners on either side of the latch piece, before glueing it down.
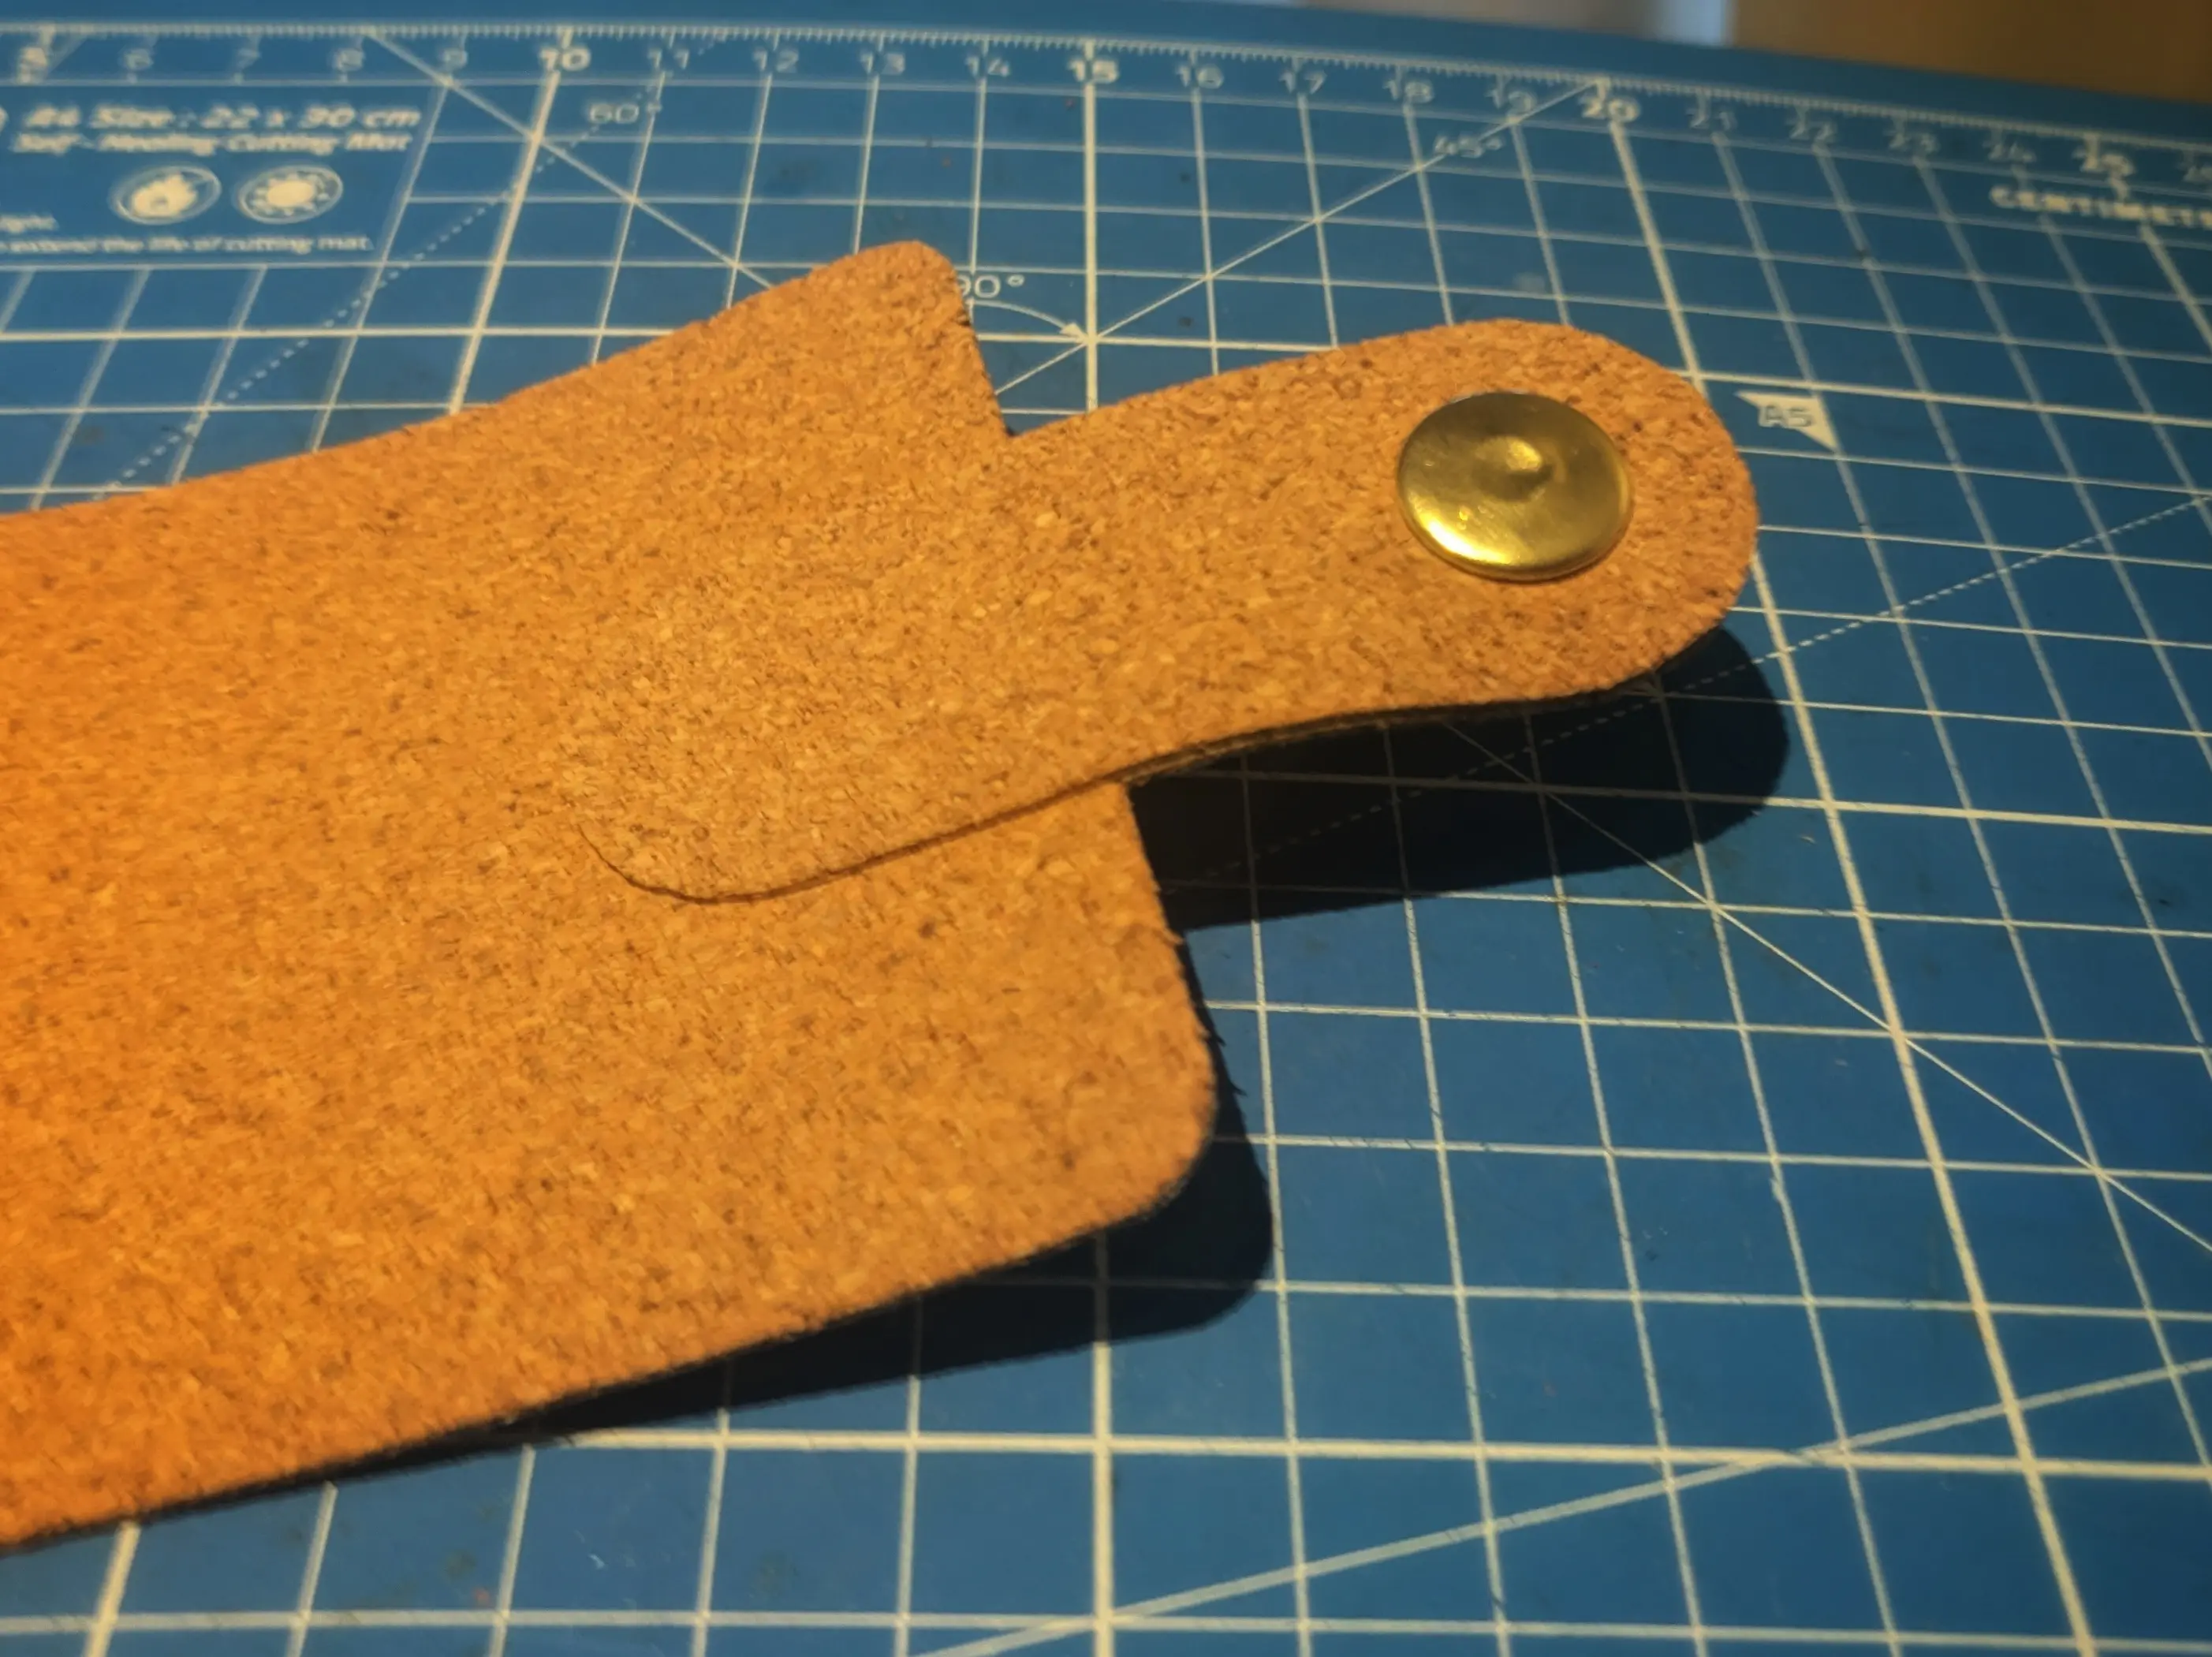
That is the female end of the latch almost done.
It still needs white accent stitches, but I’ll do those later, before I peel off the protective lining.
Instead, I’ll move on to the male part of the snap button, where the latch piece will connect to.
The latch is designed to overlap 3.5 cm with the outer shell when the wallet is closed, exactly how it is done on the back.
Given the 1.5 cm corner radius used, this means that the through hole will be 2 cm inset from the opposite side of the female latch we just glued on.
This is basically the same process as above, but this time I’ll add the male counterpart instead.
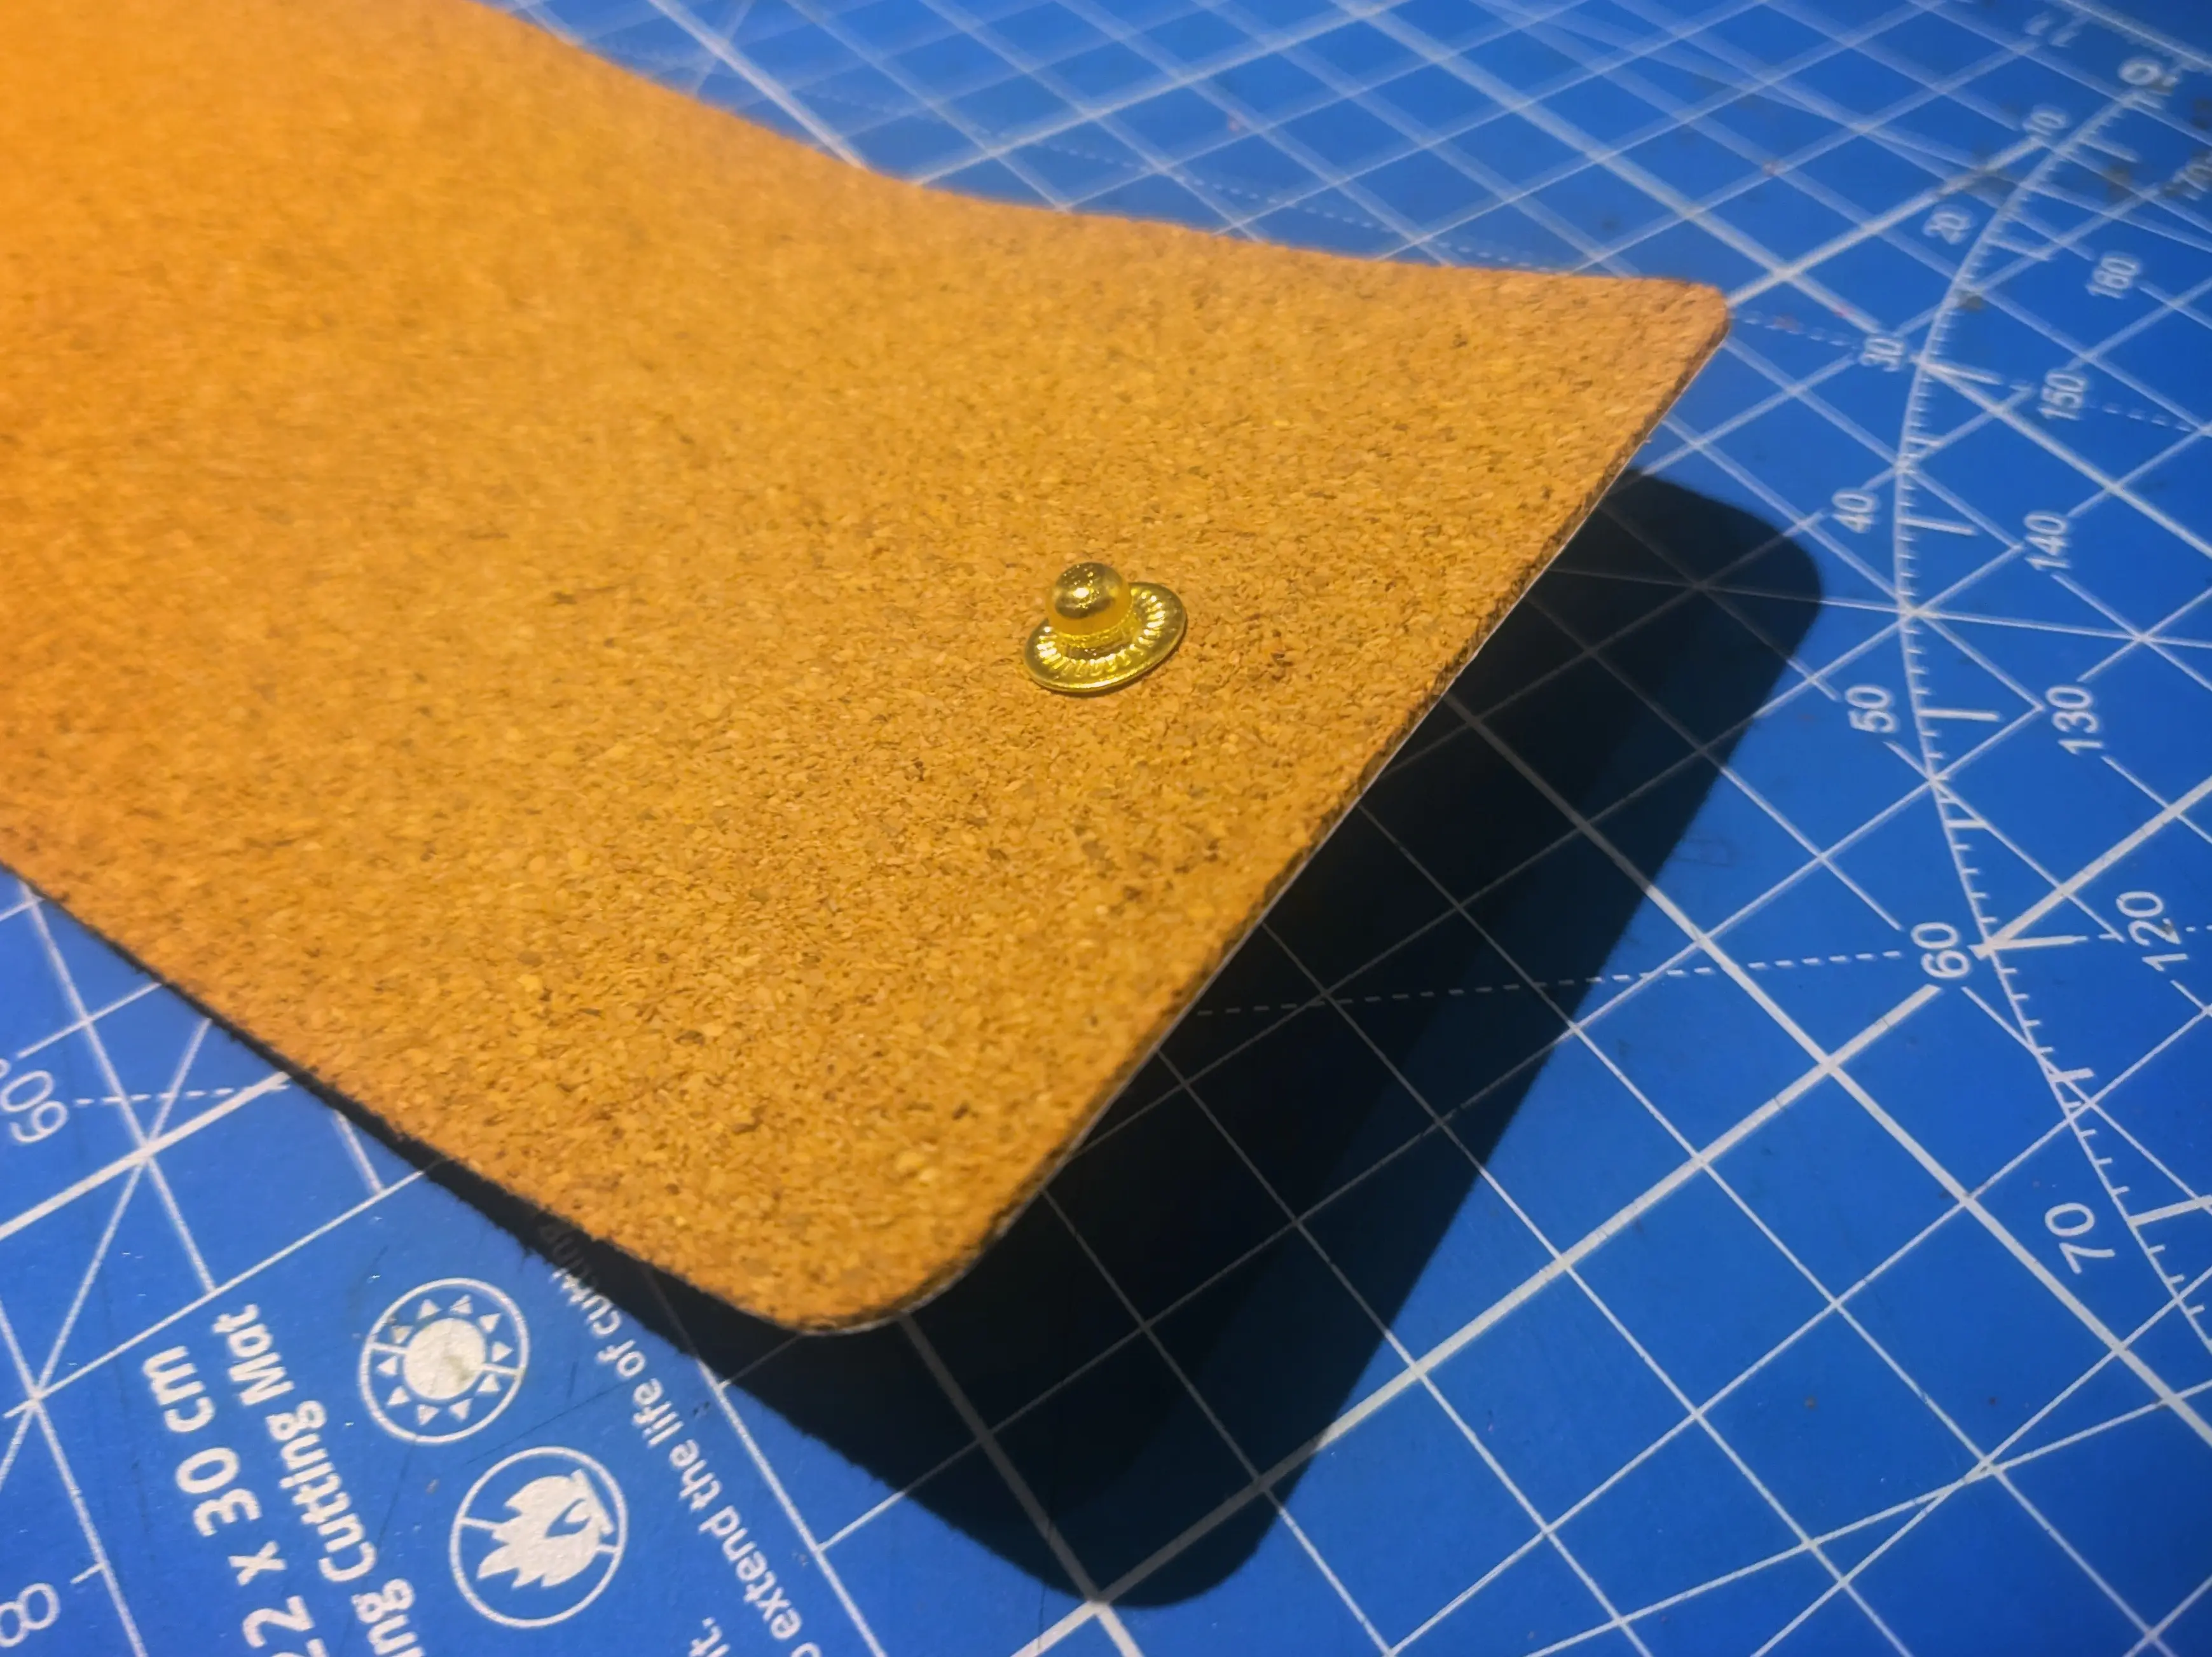
ID Card holder
At this point, I was pretty annoyed with the button kit I bought and decided to take a break from adding buttons and
moved on to the ID card holder I1 instead.
Before mounting it, I added slots for the cards and cut inner pockets from paper.
I decided to go with three slots in total, starting 1.2 cm from the top with a spacing of 1 cm.
To give myself enough space for the accent stitches and for the adhesive to stick to the inner sleeve S2,
I opted for 8 mm padding on either end of the cut.
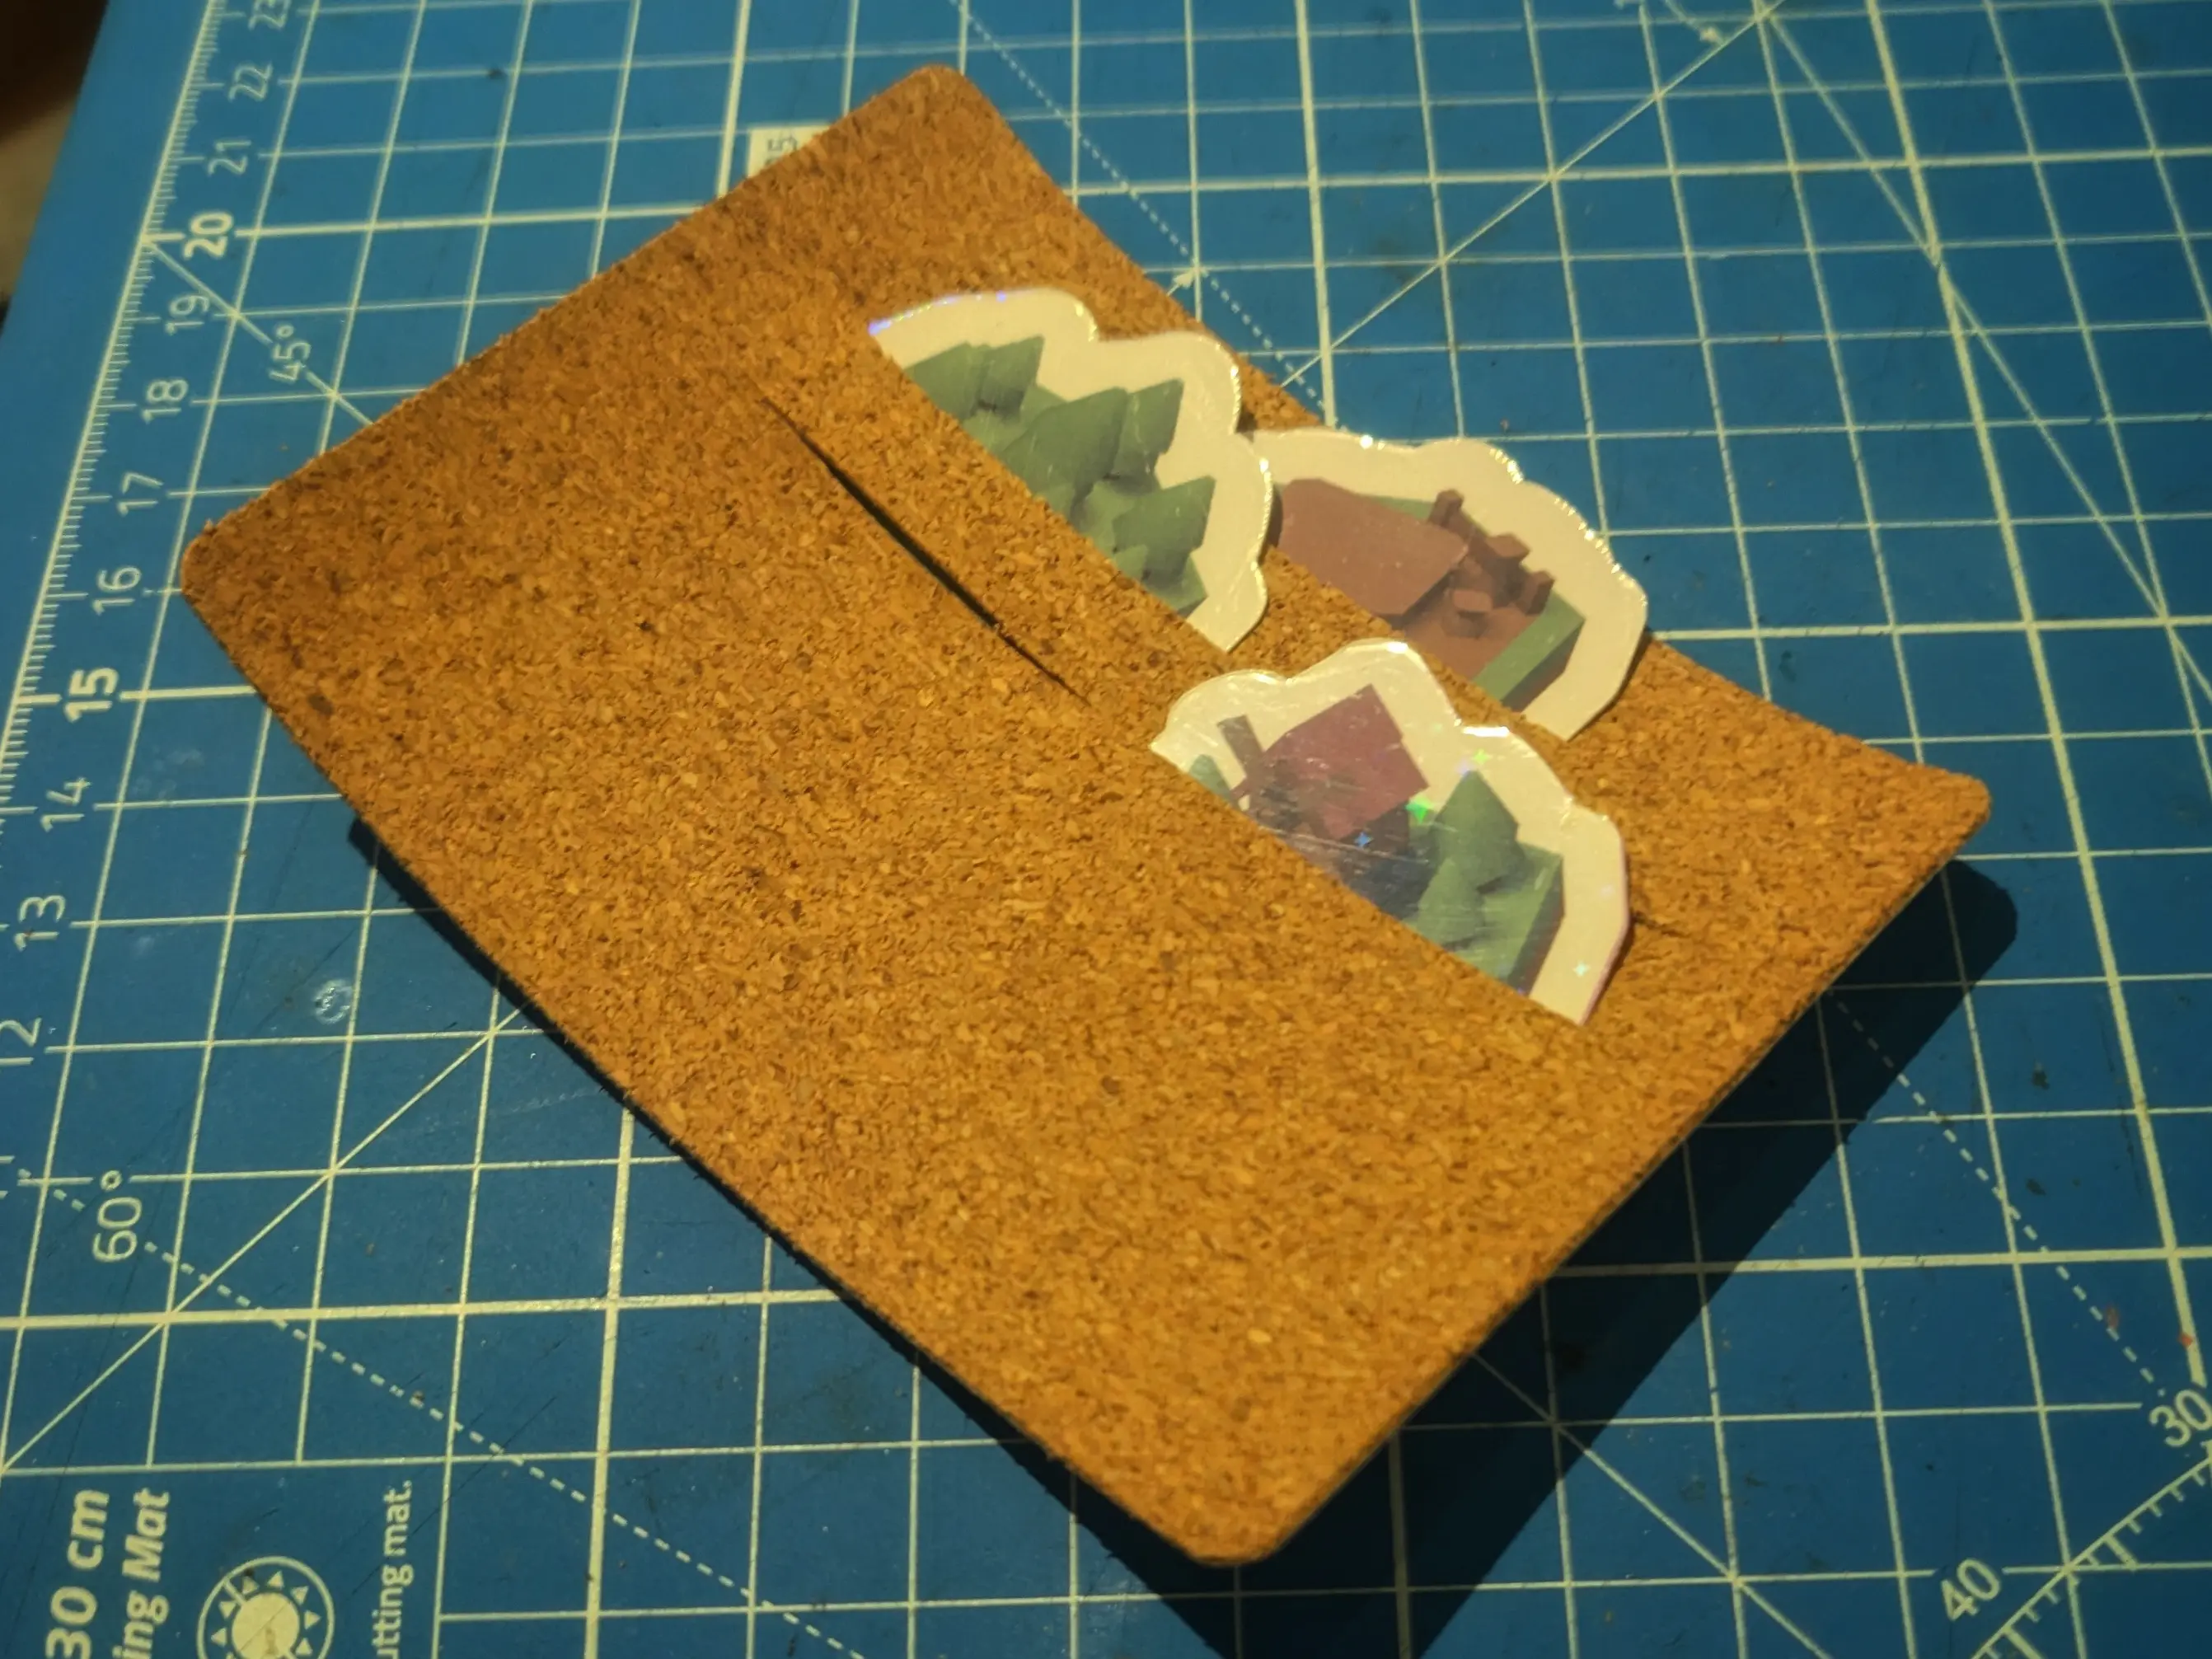
To protect the cards from the adhesive and to keep them at the correct height - each sticking out 5 mm above the previous card -
I cut inlay sleeves from paper.
They were then then glued to the bottom edge of the cut, and folded upwards to half way between the given cut and the one above.
By going off the position of the slots themselves and the distance between them, this results in the following paper sizes:
| Slot | Length | Fold at |
|---|---|---|
| upper | 10.5 cm | 5 cm |
| middle | 9.5 cm | 4.5 cm |
| lower | 8.5 cm | 4 cm |
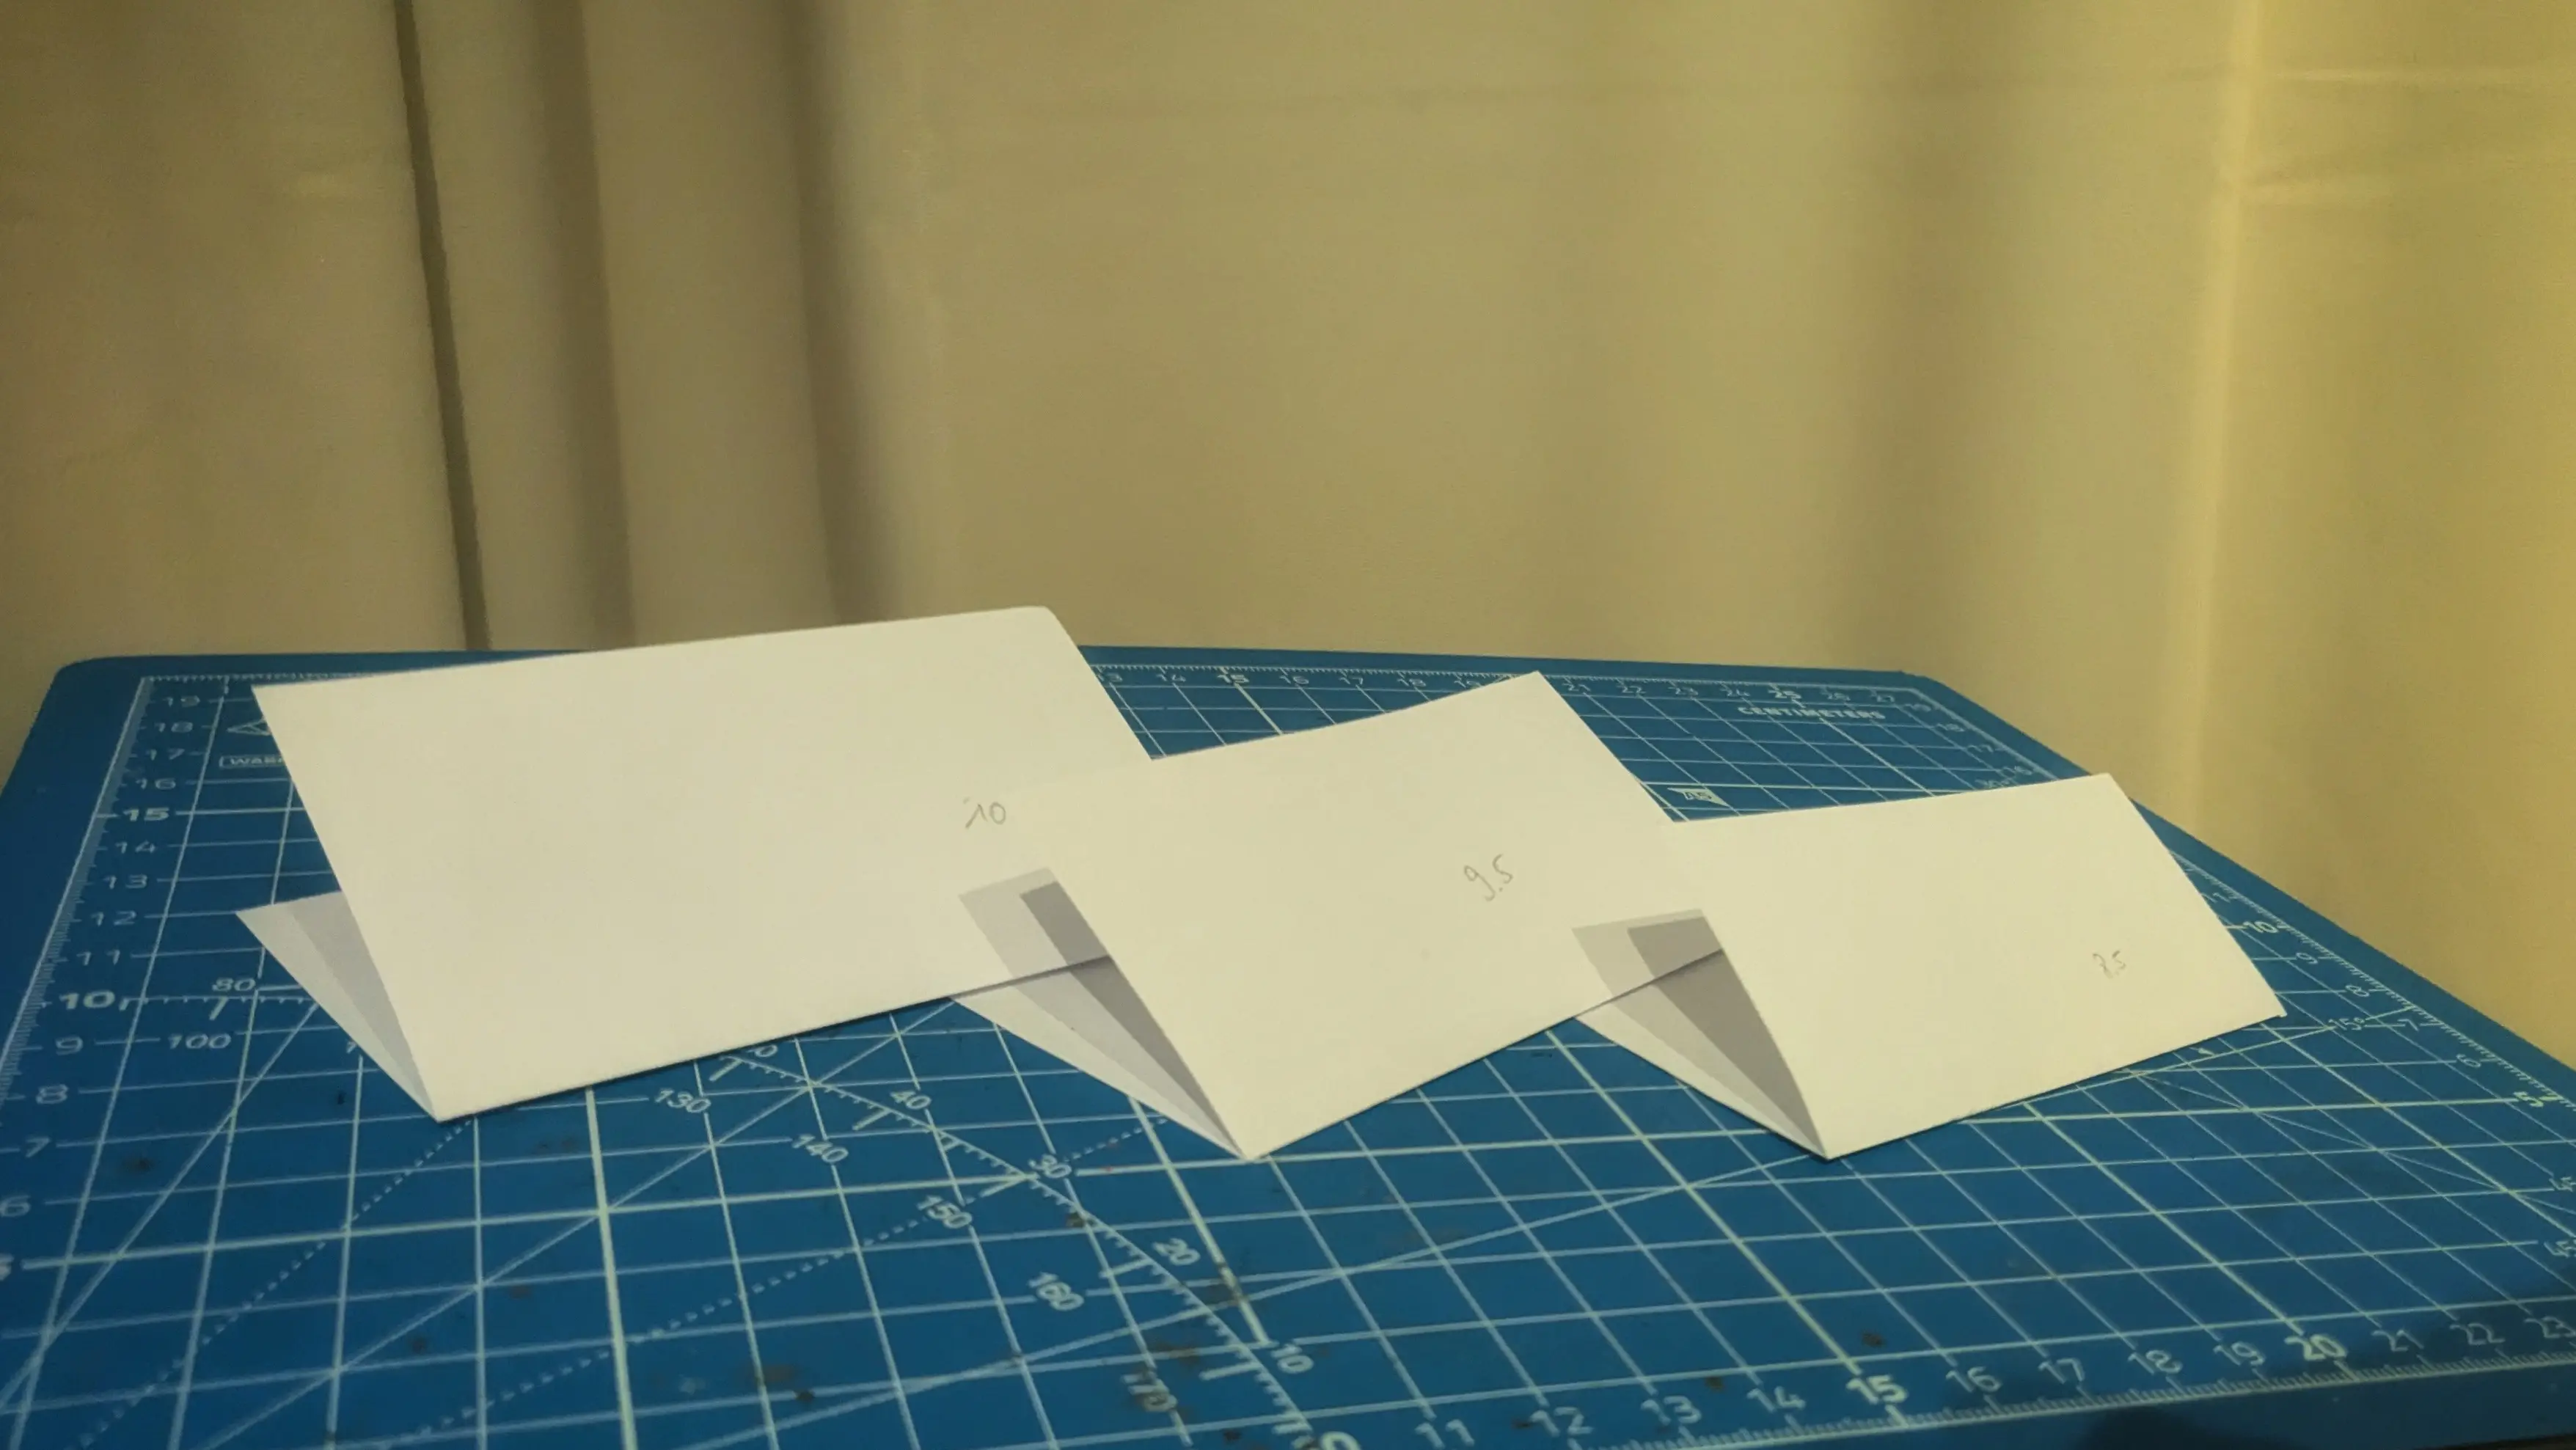
After cutting the inlays, I removed the protective lining on I1 and glued them down, as described above, starting on the bottom and working my way up.
This results in a staircase-like arrangement of the paper pockets.
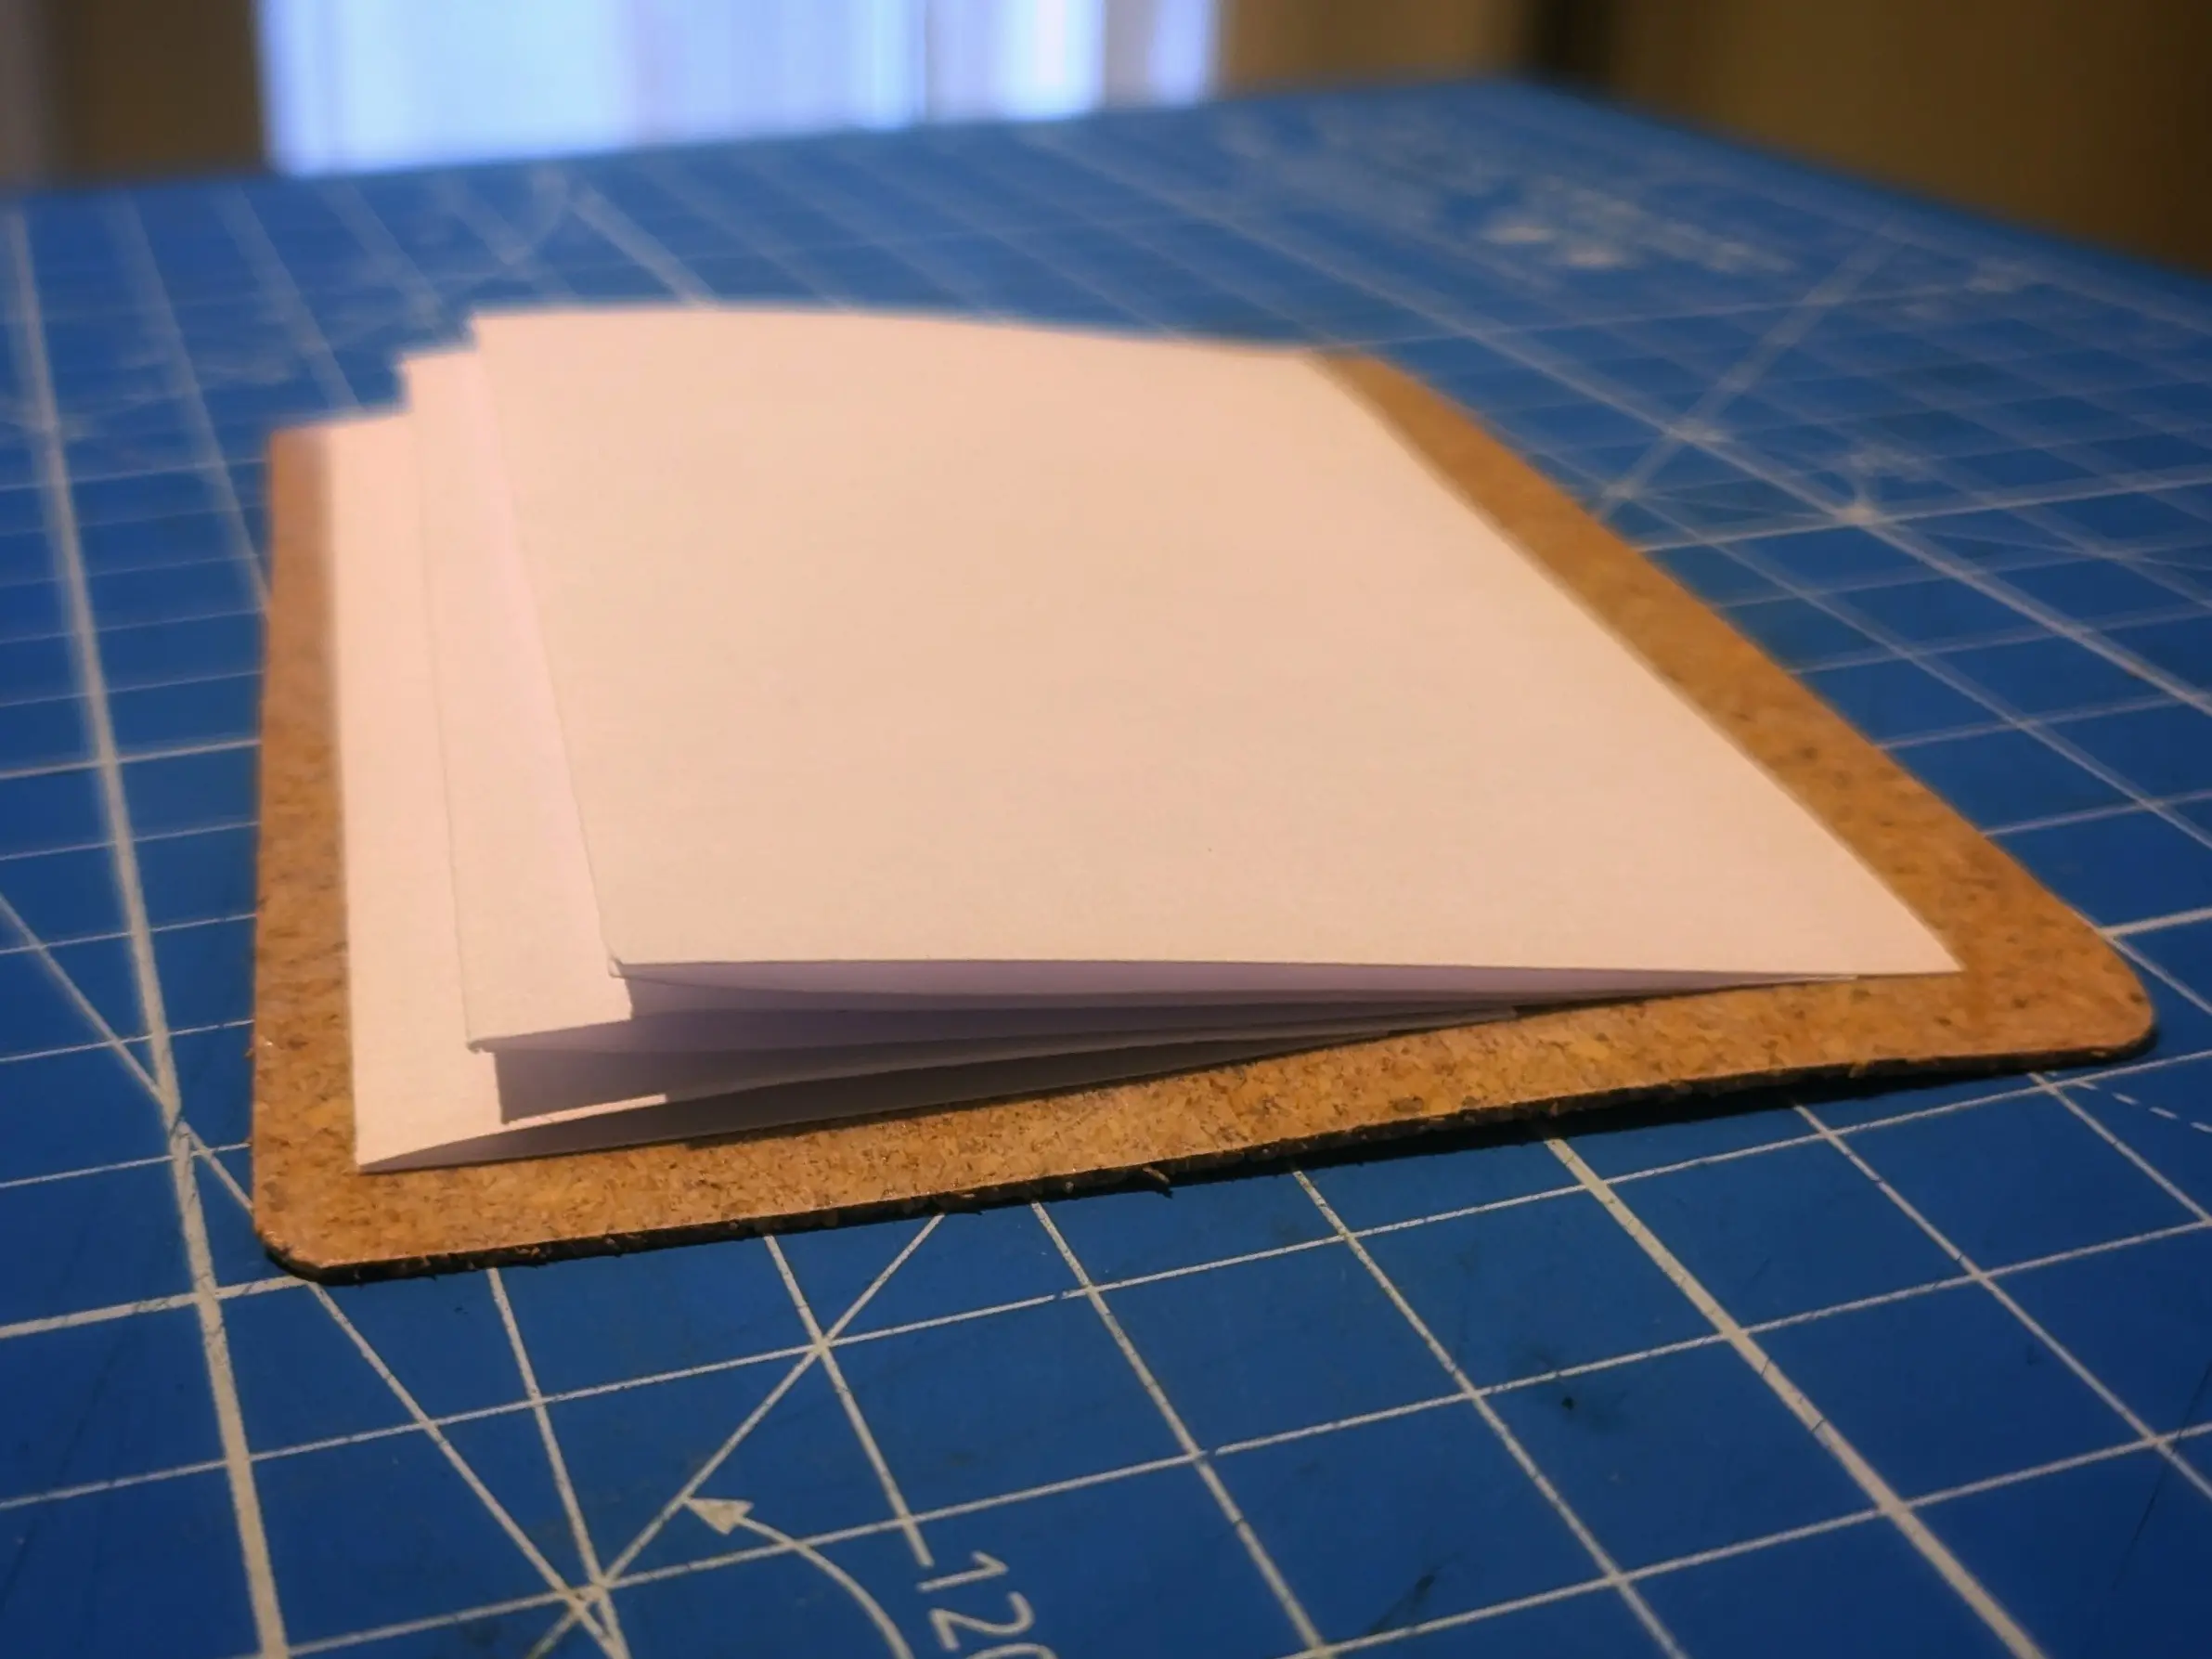
Lastly, I aligned the ID card holder I1 with the inner sleeve S2, making sure to leave 5 mm of space on the left, top, and bottom.
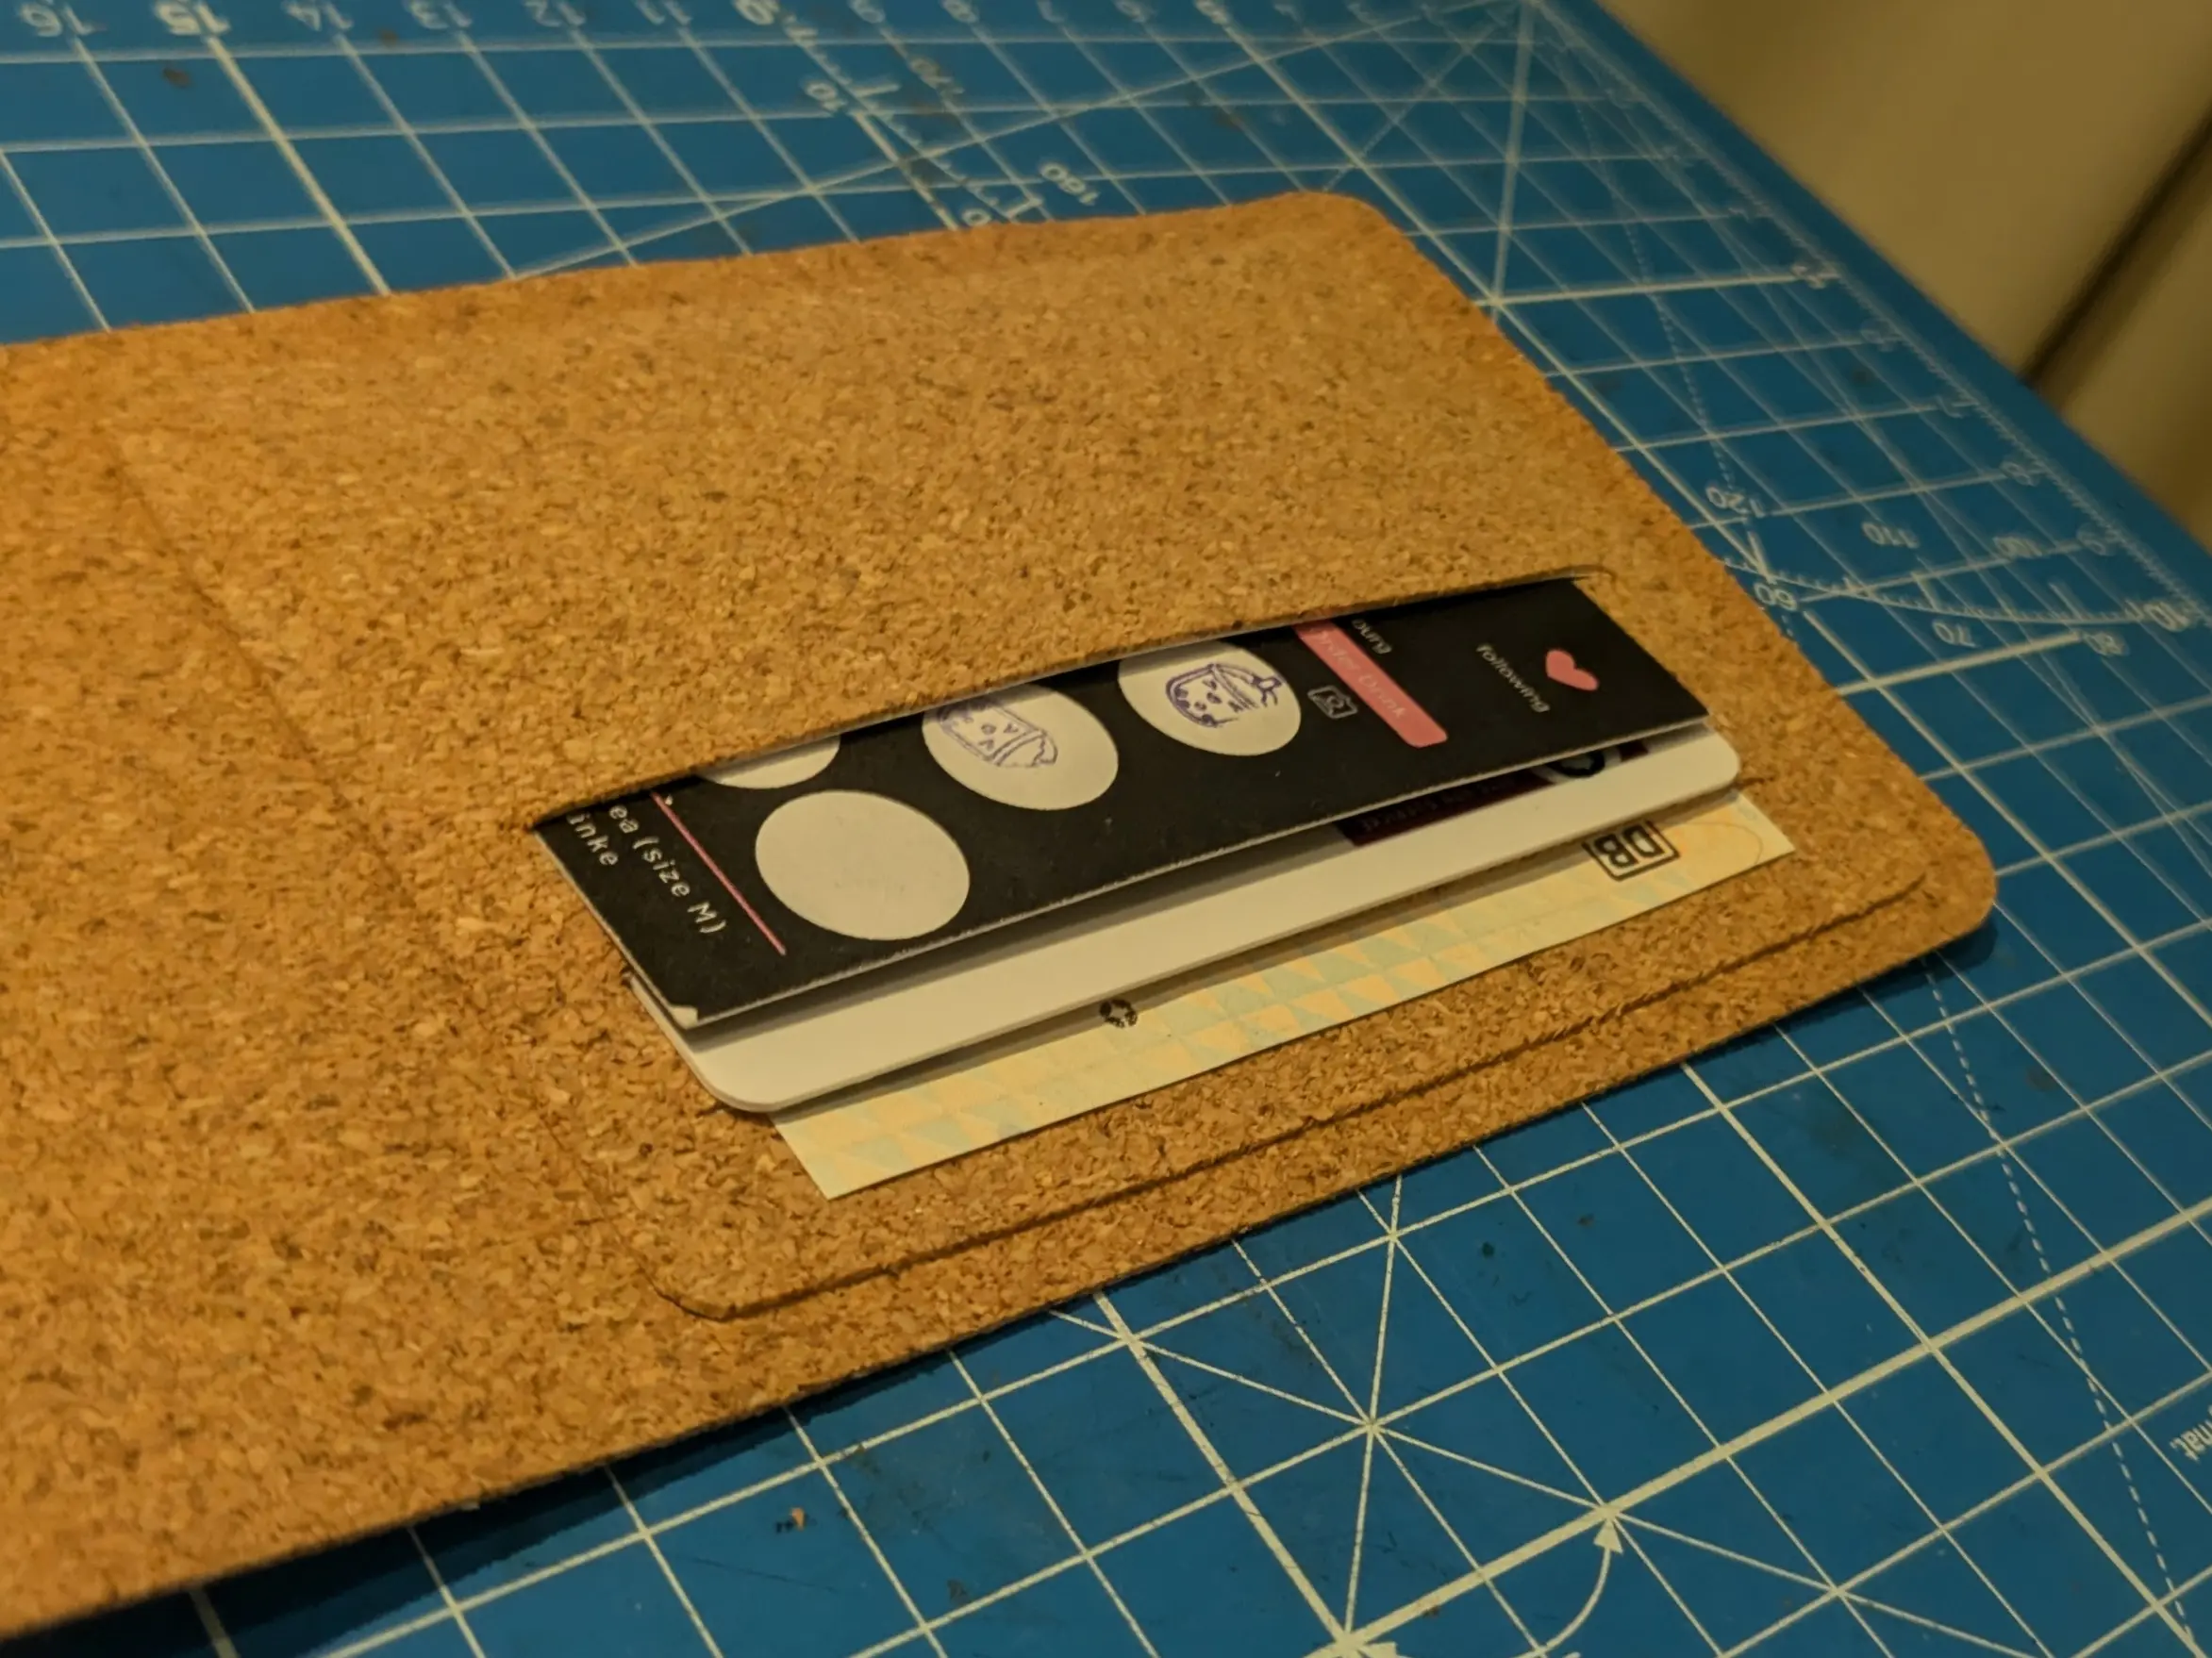
Similar to the closing latch, I’ll do the white accent stitches later.
At this point I sort of forgot how annoying installing the snap buttons was, so I moved on to the coin pocket.
A pocket for coins
Although it might seem counterintuitive at first, as the inner wallet parts are glued down to be rectangular,
the coin pocket C1 is cut as an isosceles trapezoid, which is not rectangular.
The idea behind this is that, by cutting the left and right edges at an angle, and gluing them down onto a rectangular base shape,
the excess material on the top will bow outwards, resulting in a larger pocket.
But before the C1 piece can be glued down, it is time to get out the snap button kit again - *shivers*.
If you remember from the prototype earlier, the pocket had a single push button to lock it shut.
However, this resulted in openings big enough for coins to fall out of.
As I still don’t have a better idea, I decided to add two buttons.
This won’t look nearly as good as one button, but it will have to do.
I decided to punch the holes in C1 at 1/3 and 2/3 of the width, spaced 1 cm from the top.
I then measured where C1 fits onto the inner sleeve S2, so I could also punch holes in the correct spots.
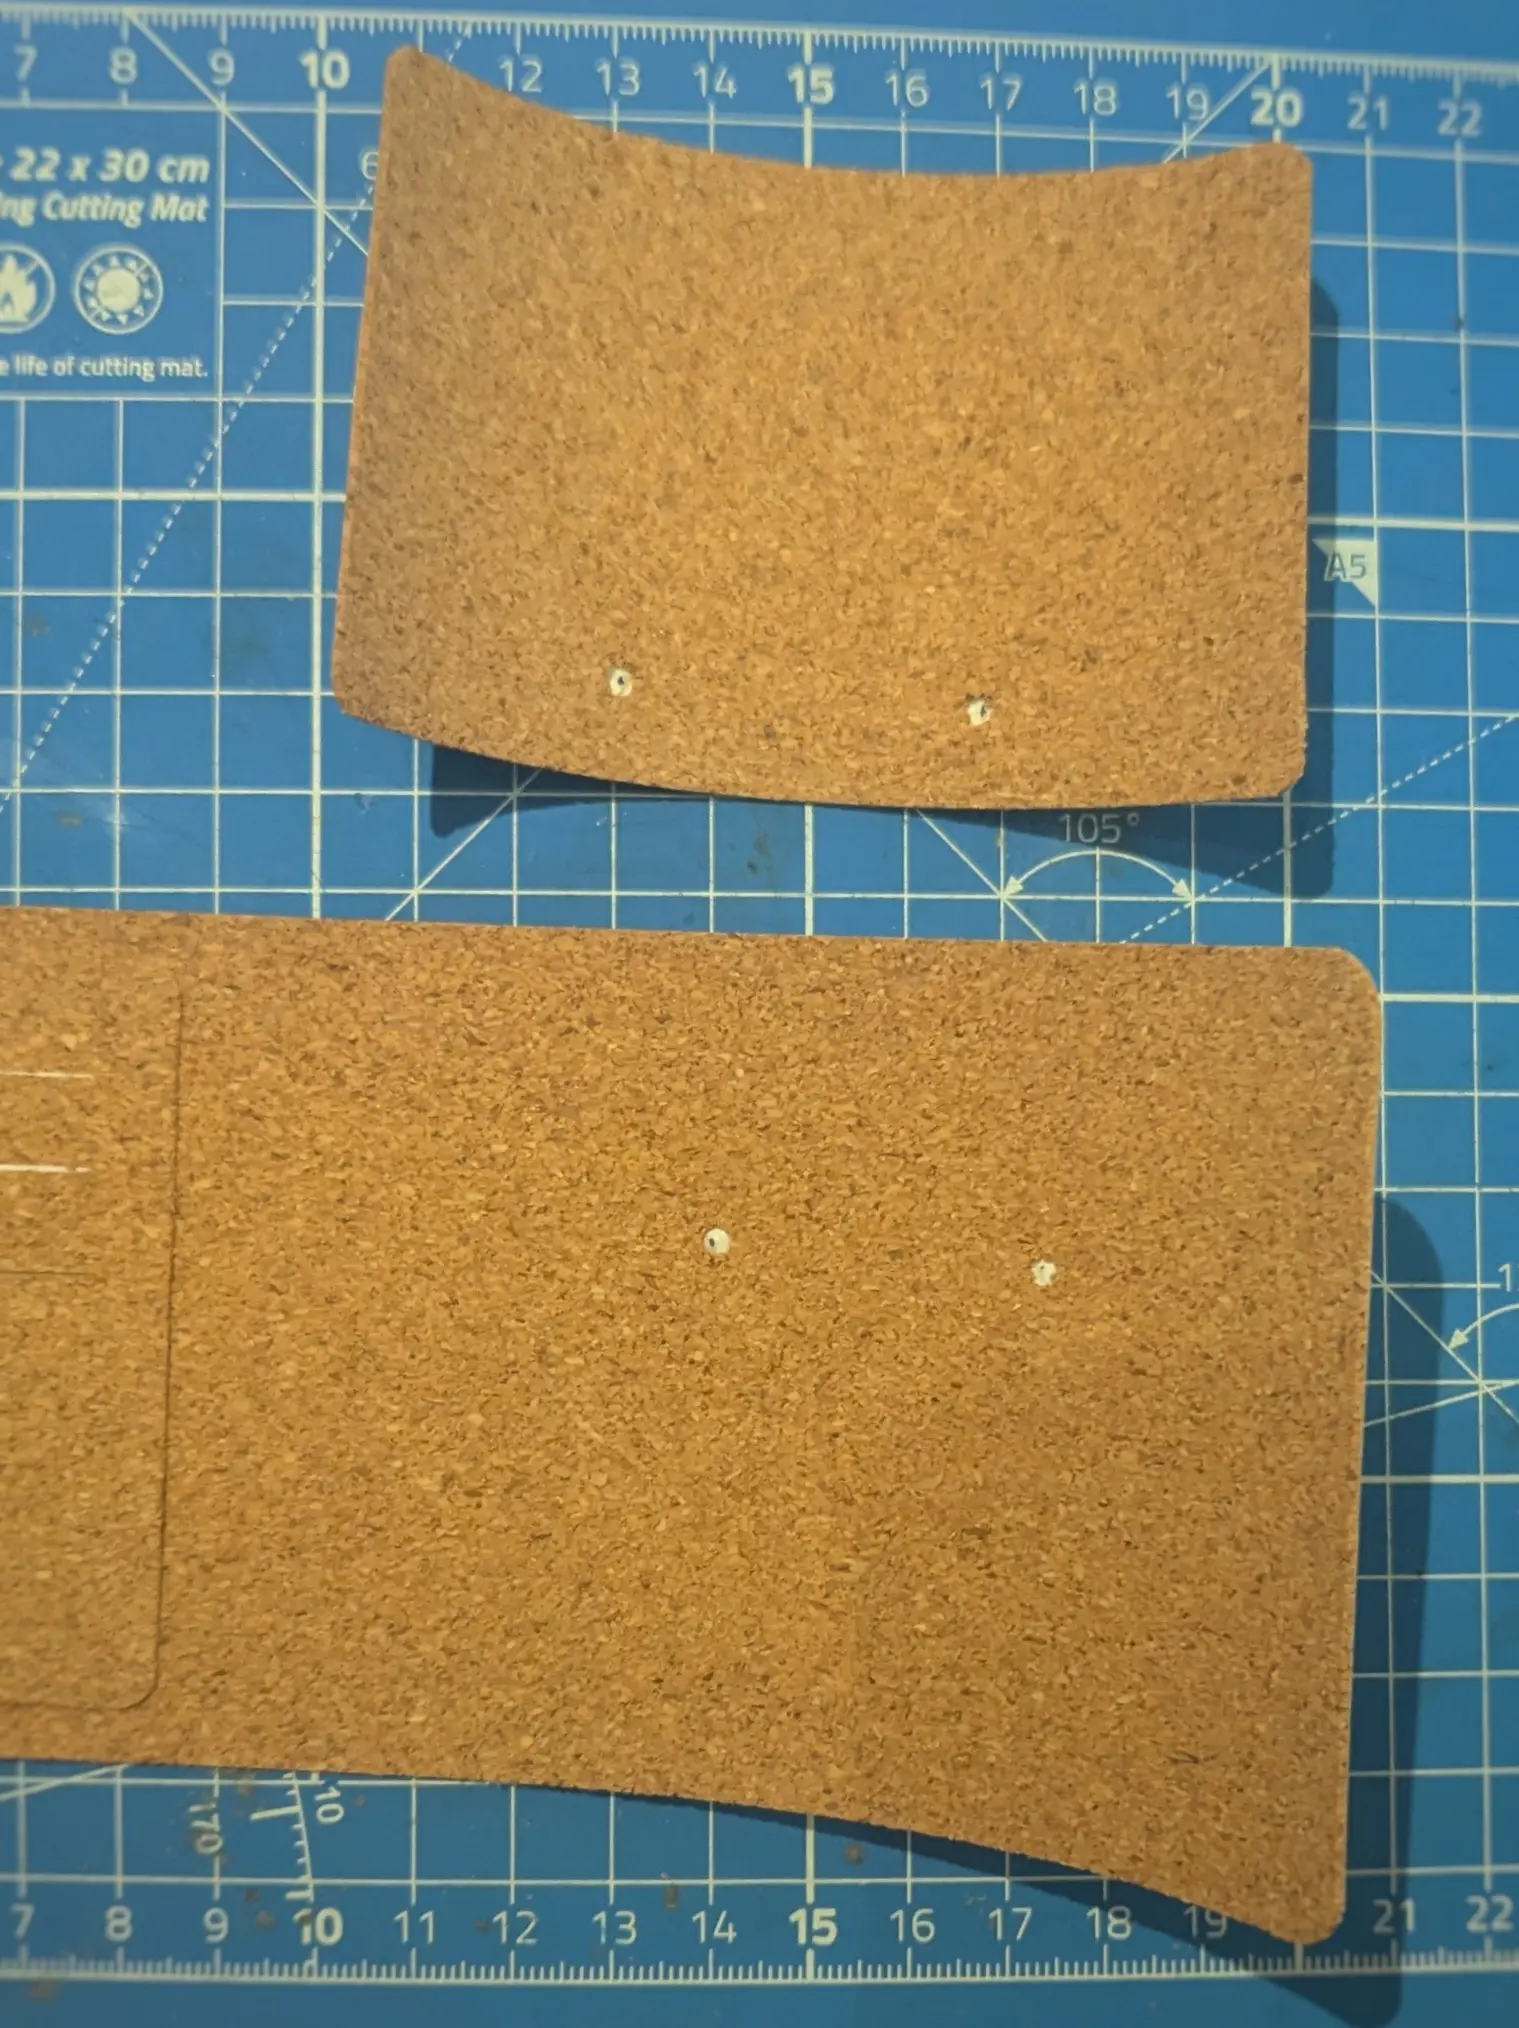
Before I could move on and install the buttons, I had to cut another piece of paper to fit,
which gets glued to the inside of C1 to cover up the adhesive on the inside of the pocket.
To ensure the paper fit perfectly onto C1, I copied the trapezoid dimensions and cut off 5 mm around the edges - except the top.
Finally, I aligned it with the top of C1, centered it, and glued it down, making sure to copy the punched holes.
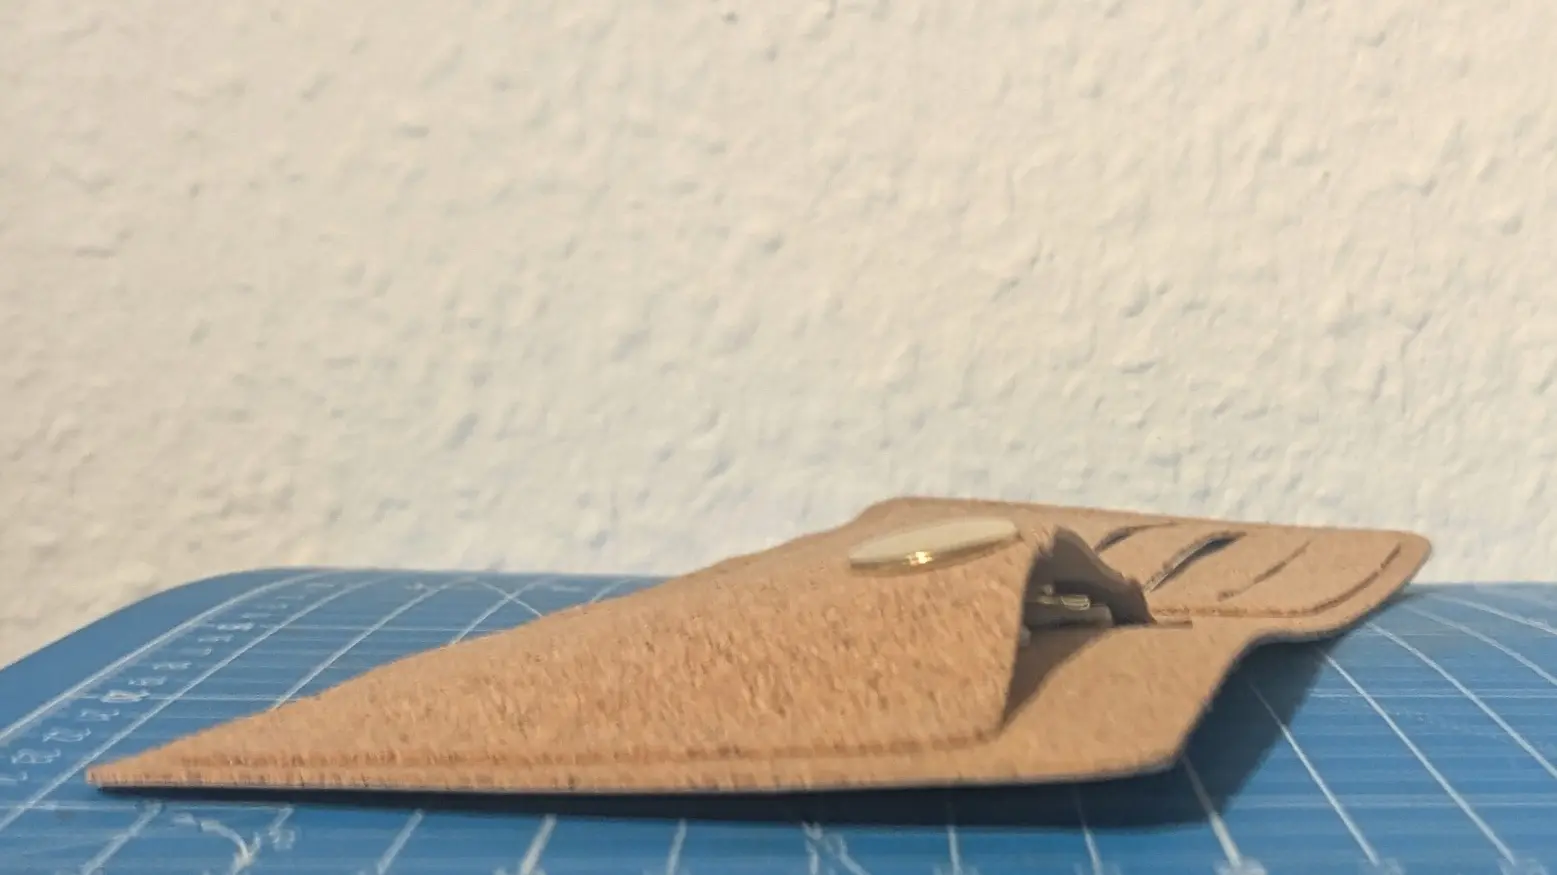
Inner yarn accents
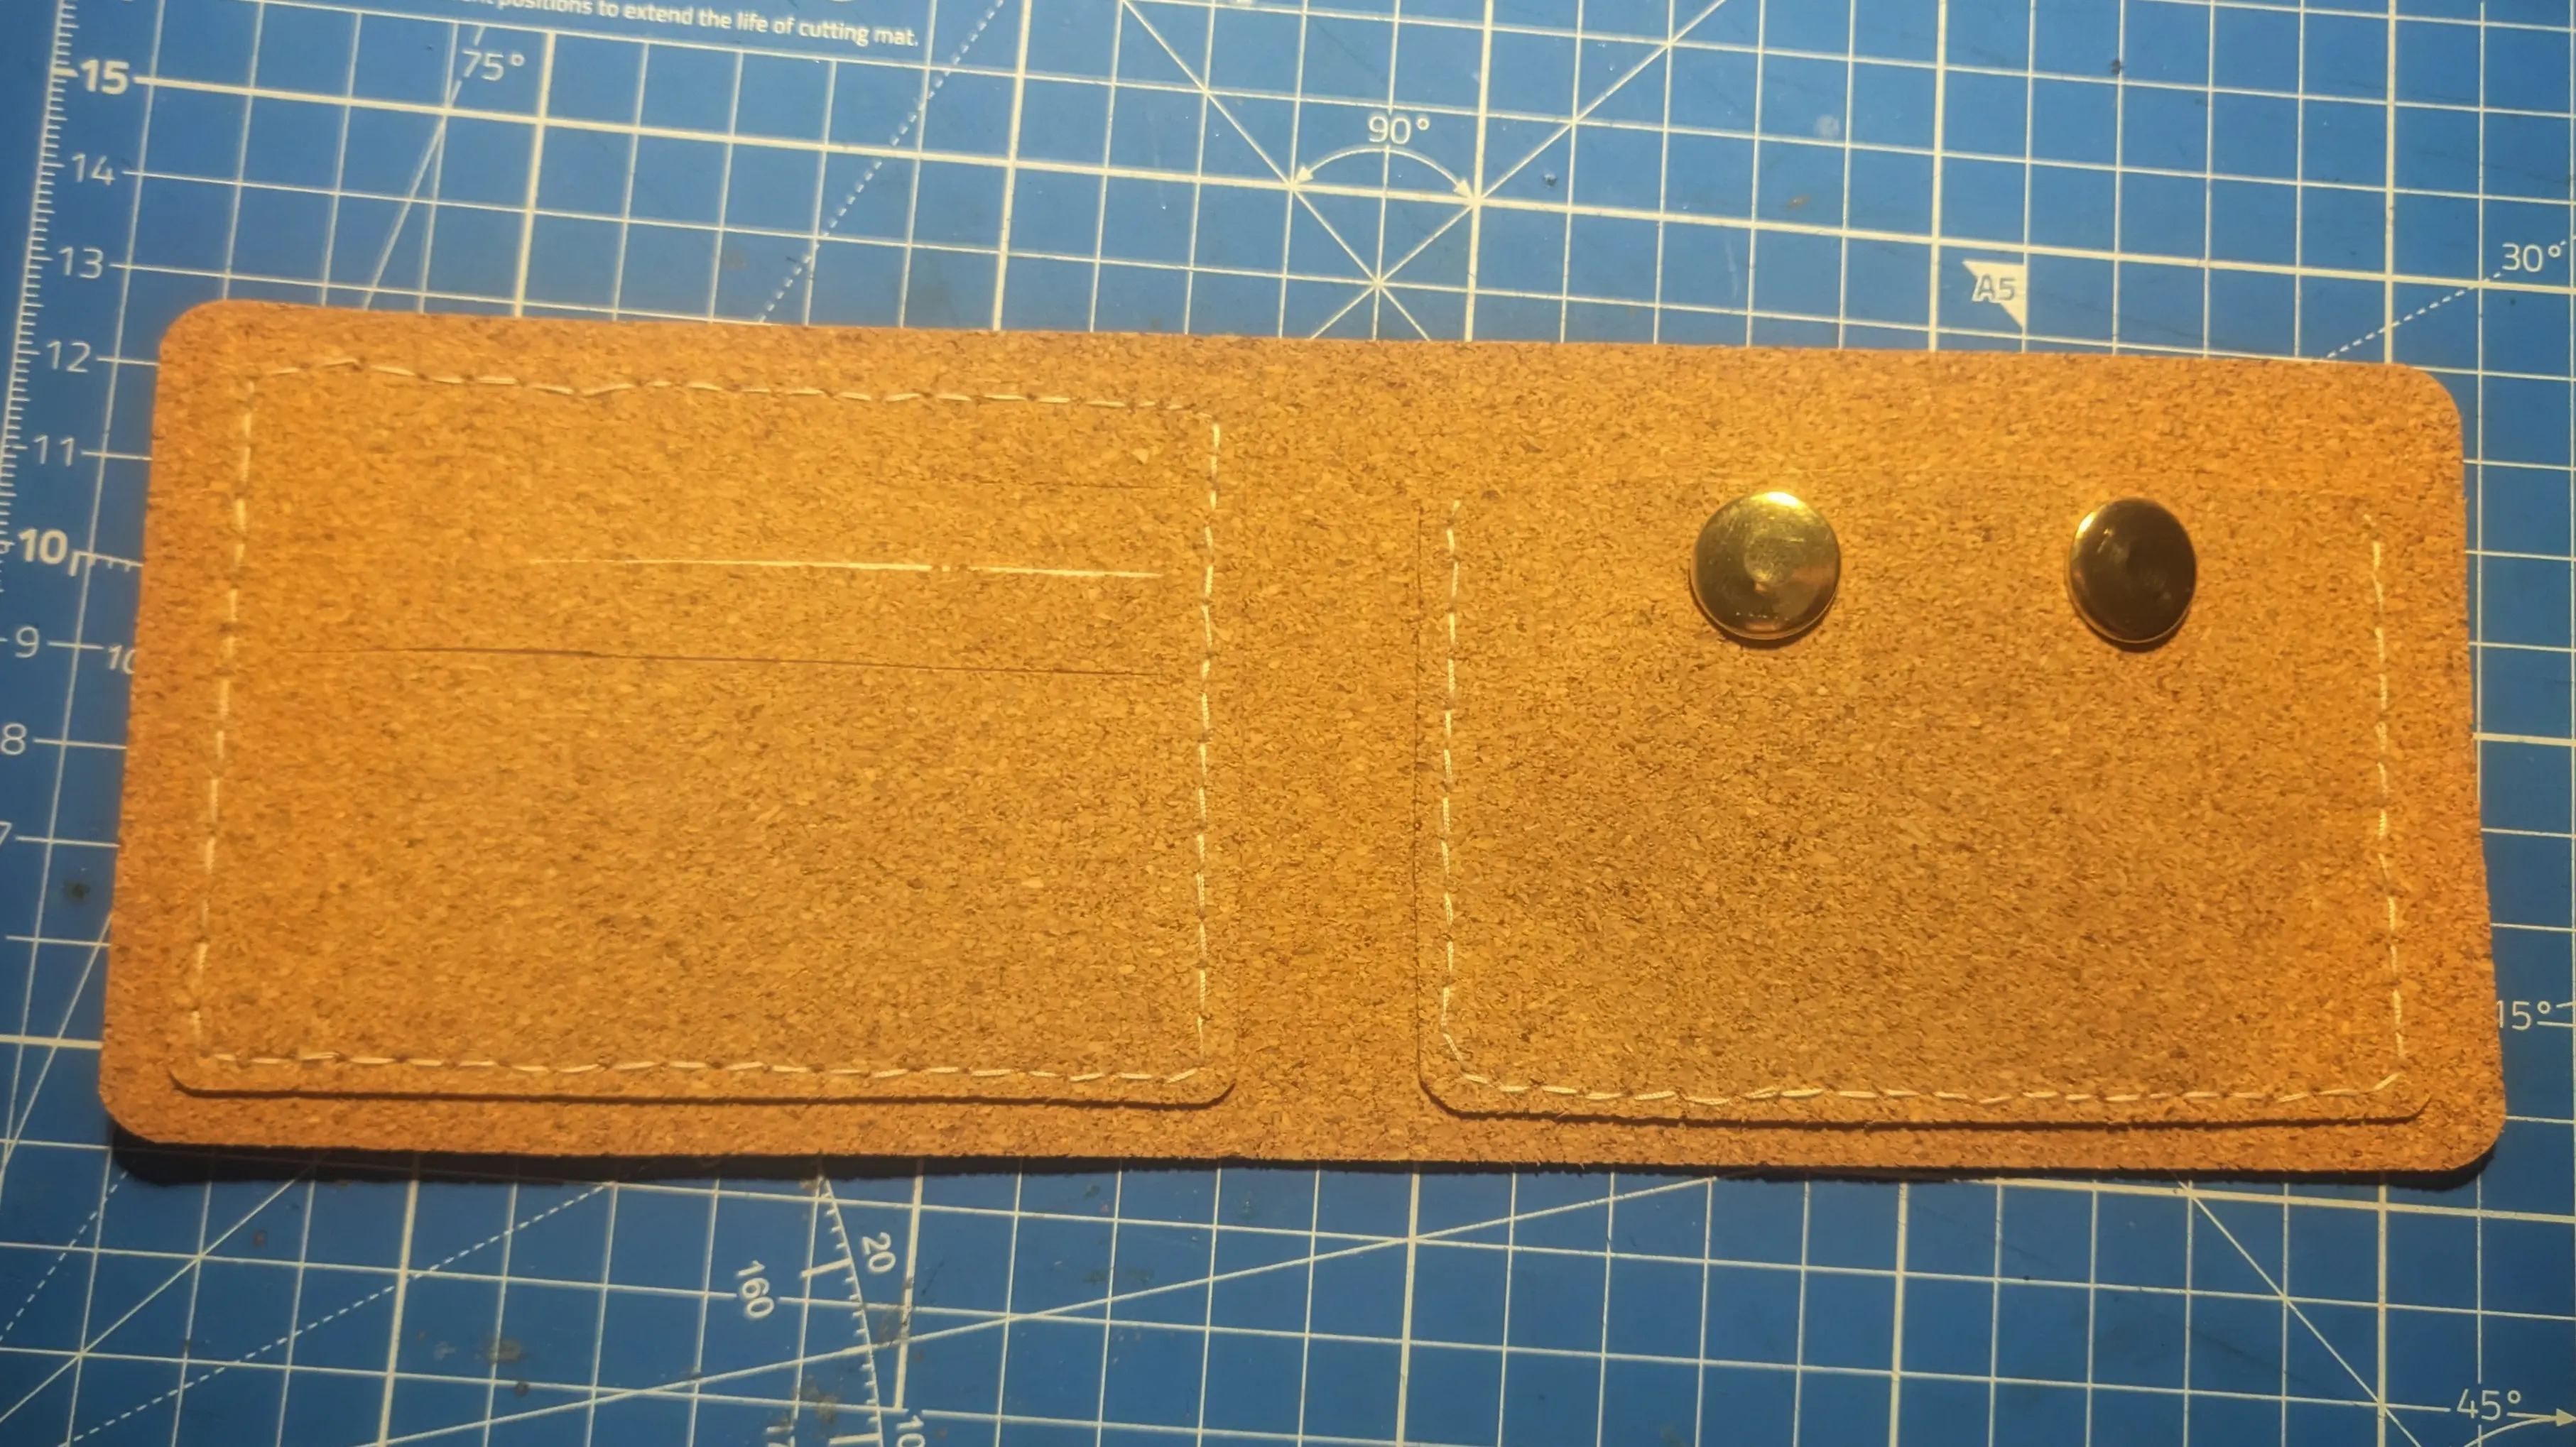
Before combining the outer and inner sleeves S1 and S2, it is time to sew on the white accent stitches.
I’m not used to hand sewing, so I just did a running stitch around the perimeter and looped around on the end, offsetting it by one hole
as to not leave any empty spaces.
It was actually quite therapeutic.
Final assembly
With both the inner and outer sleeve sub-assemblies being done, it is finally time for the final assembly.
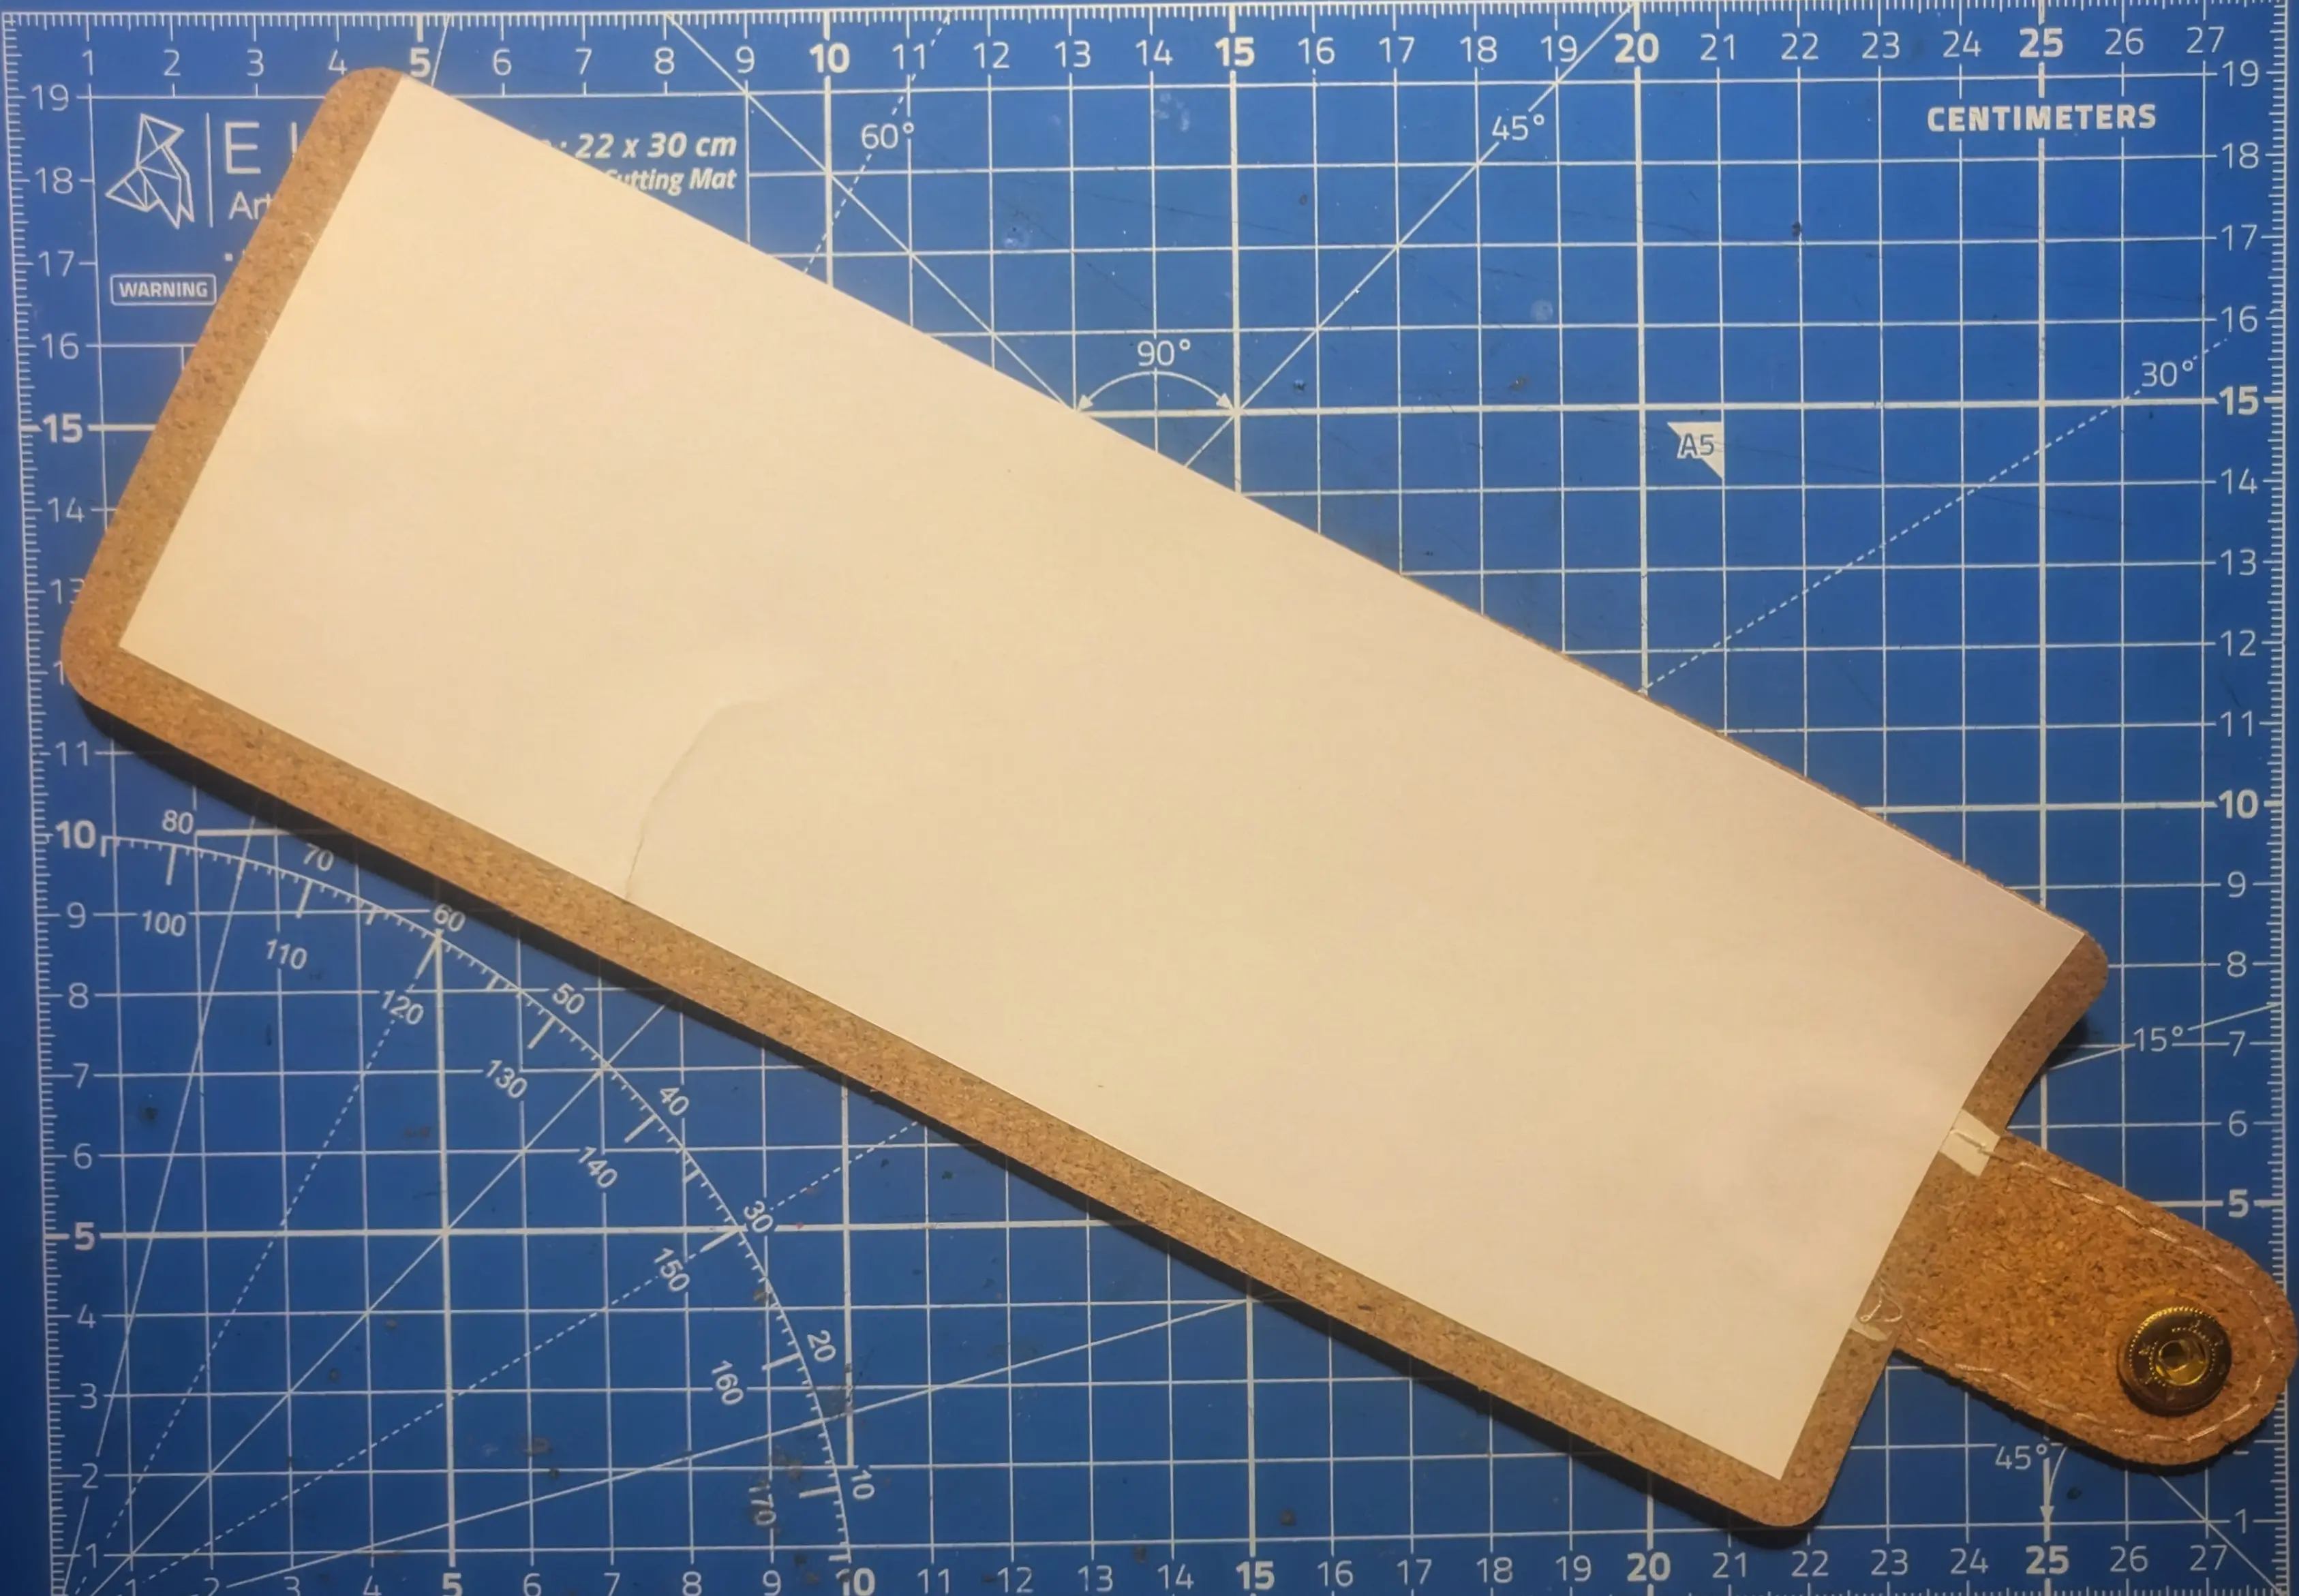
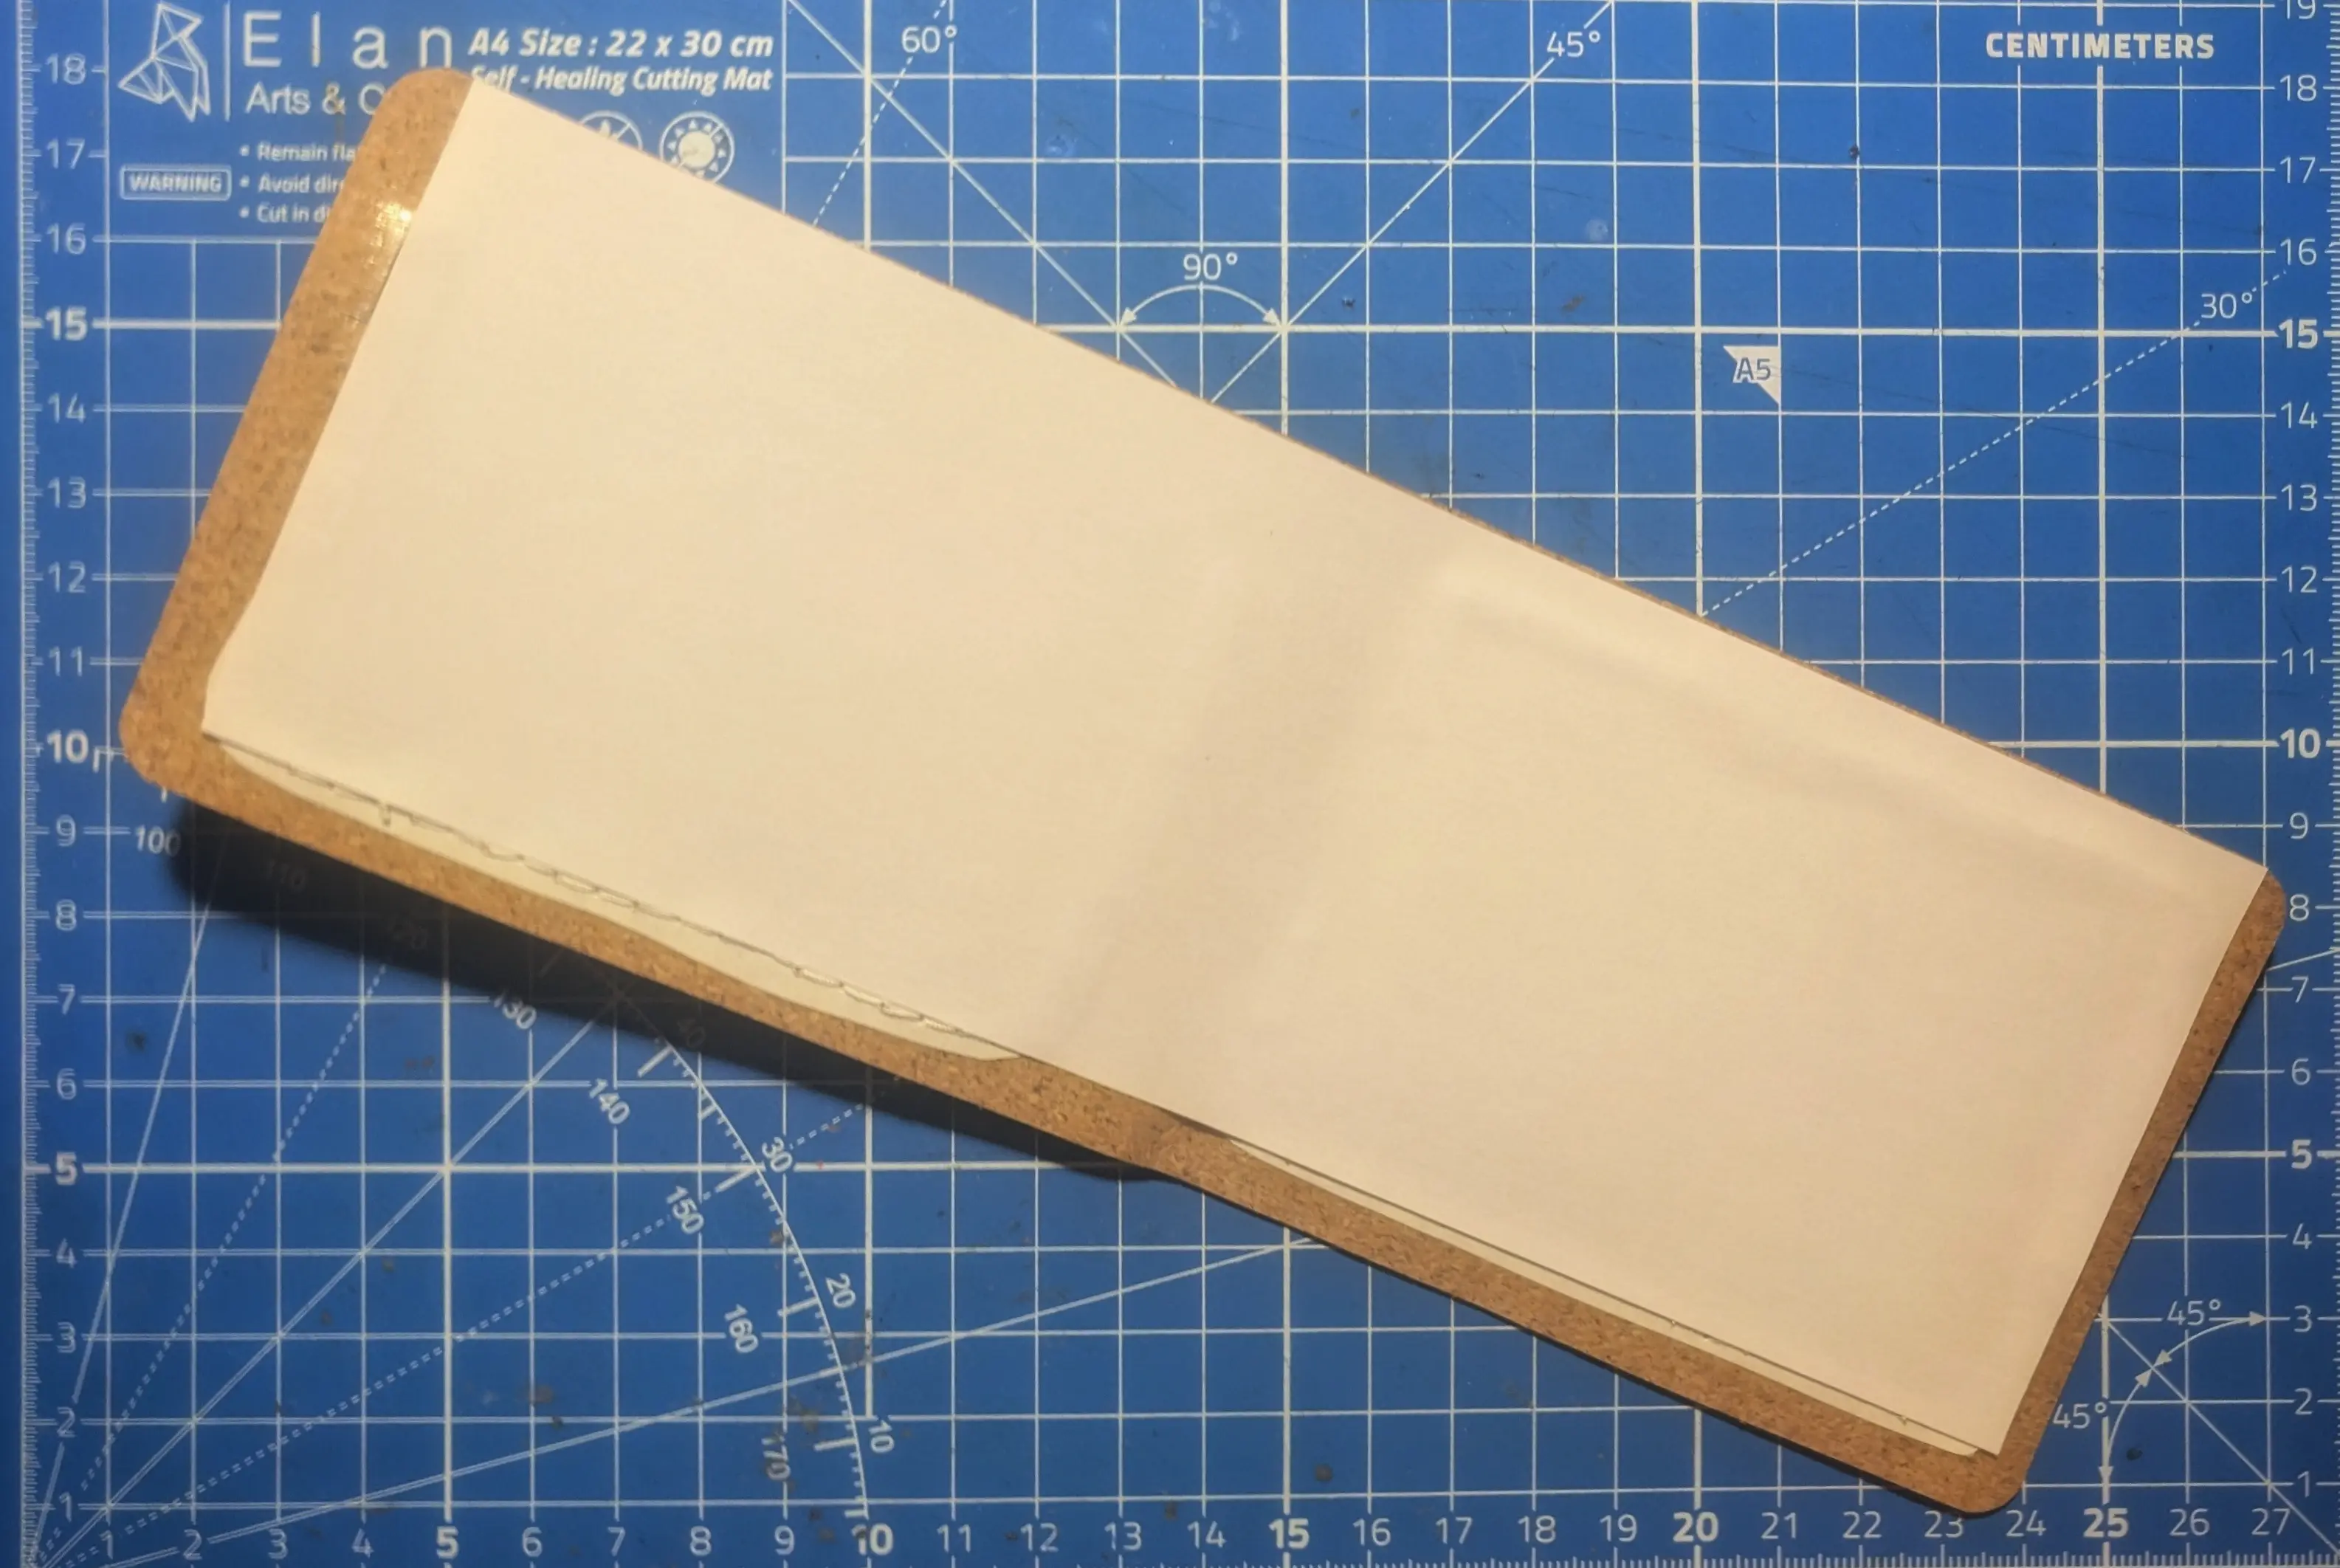
As I want to be able to store bank notes and receipts in between them, they’ll need a paper lining in between.
Just like I did with the coin pocket, I just cut this to the dimensions of the actual inner / outer sleeve
and then removed 8 mm on the left, right, and bottom.
Because removing the lining from the adhesive would break the hand-sewn threads,
I cut around them, leaving a couple of millimeters of lining behind.
Afterwards, I glued the paper lining onto the sleeves, making sure they were aligned with the cork sheet on the top and centered lengthwise.
🟢 Tip
As a last-minute addition, I decided to add some wide tape to connect the paper lining on
S1andS2so the bank notes wouldn’t touch the adhesive on the bottom.
I probably should have cut a 22.6 x 15.6 cm paper sheet and folded it along the middle - but when I realized that, it was too late.
Lastly, I stitched on white yarn accents along the outer edge.
And the wallet was done.
The final results
You know what is funny?
I’m writing this final thoughts section a couple of days after finishing the wallet.
And when I finished the wallet, I very much disliked it.
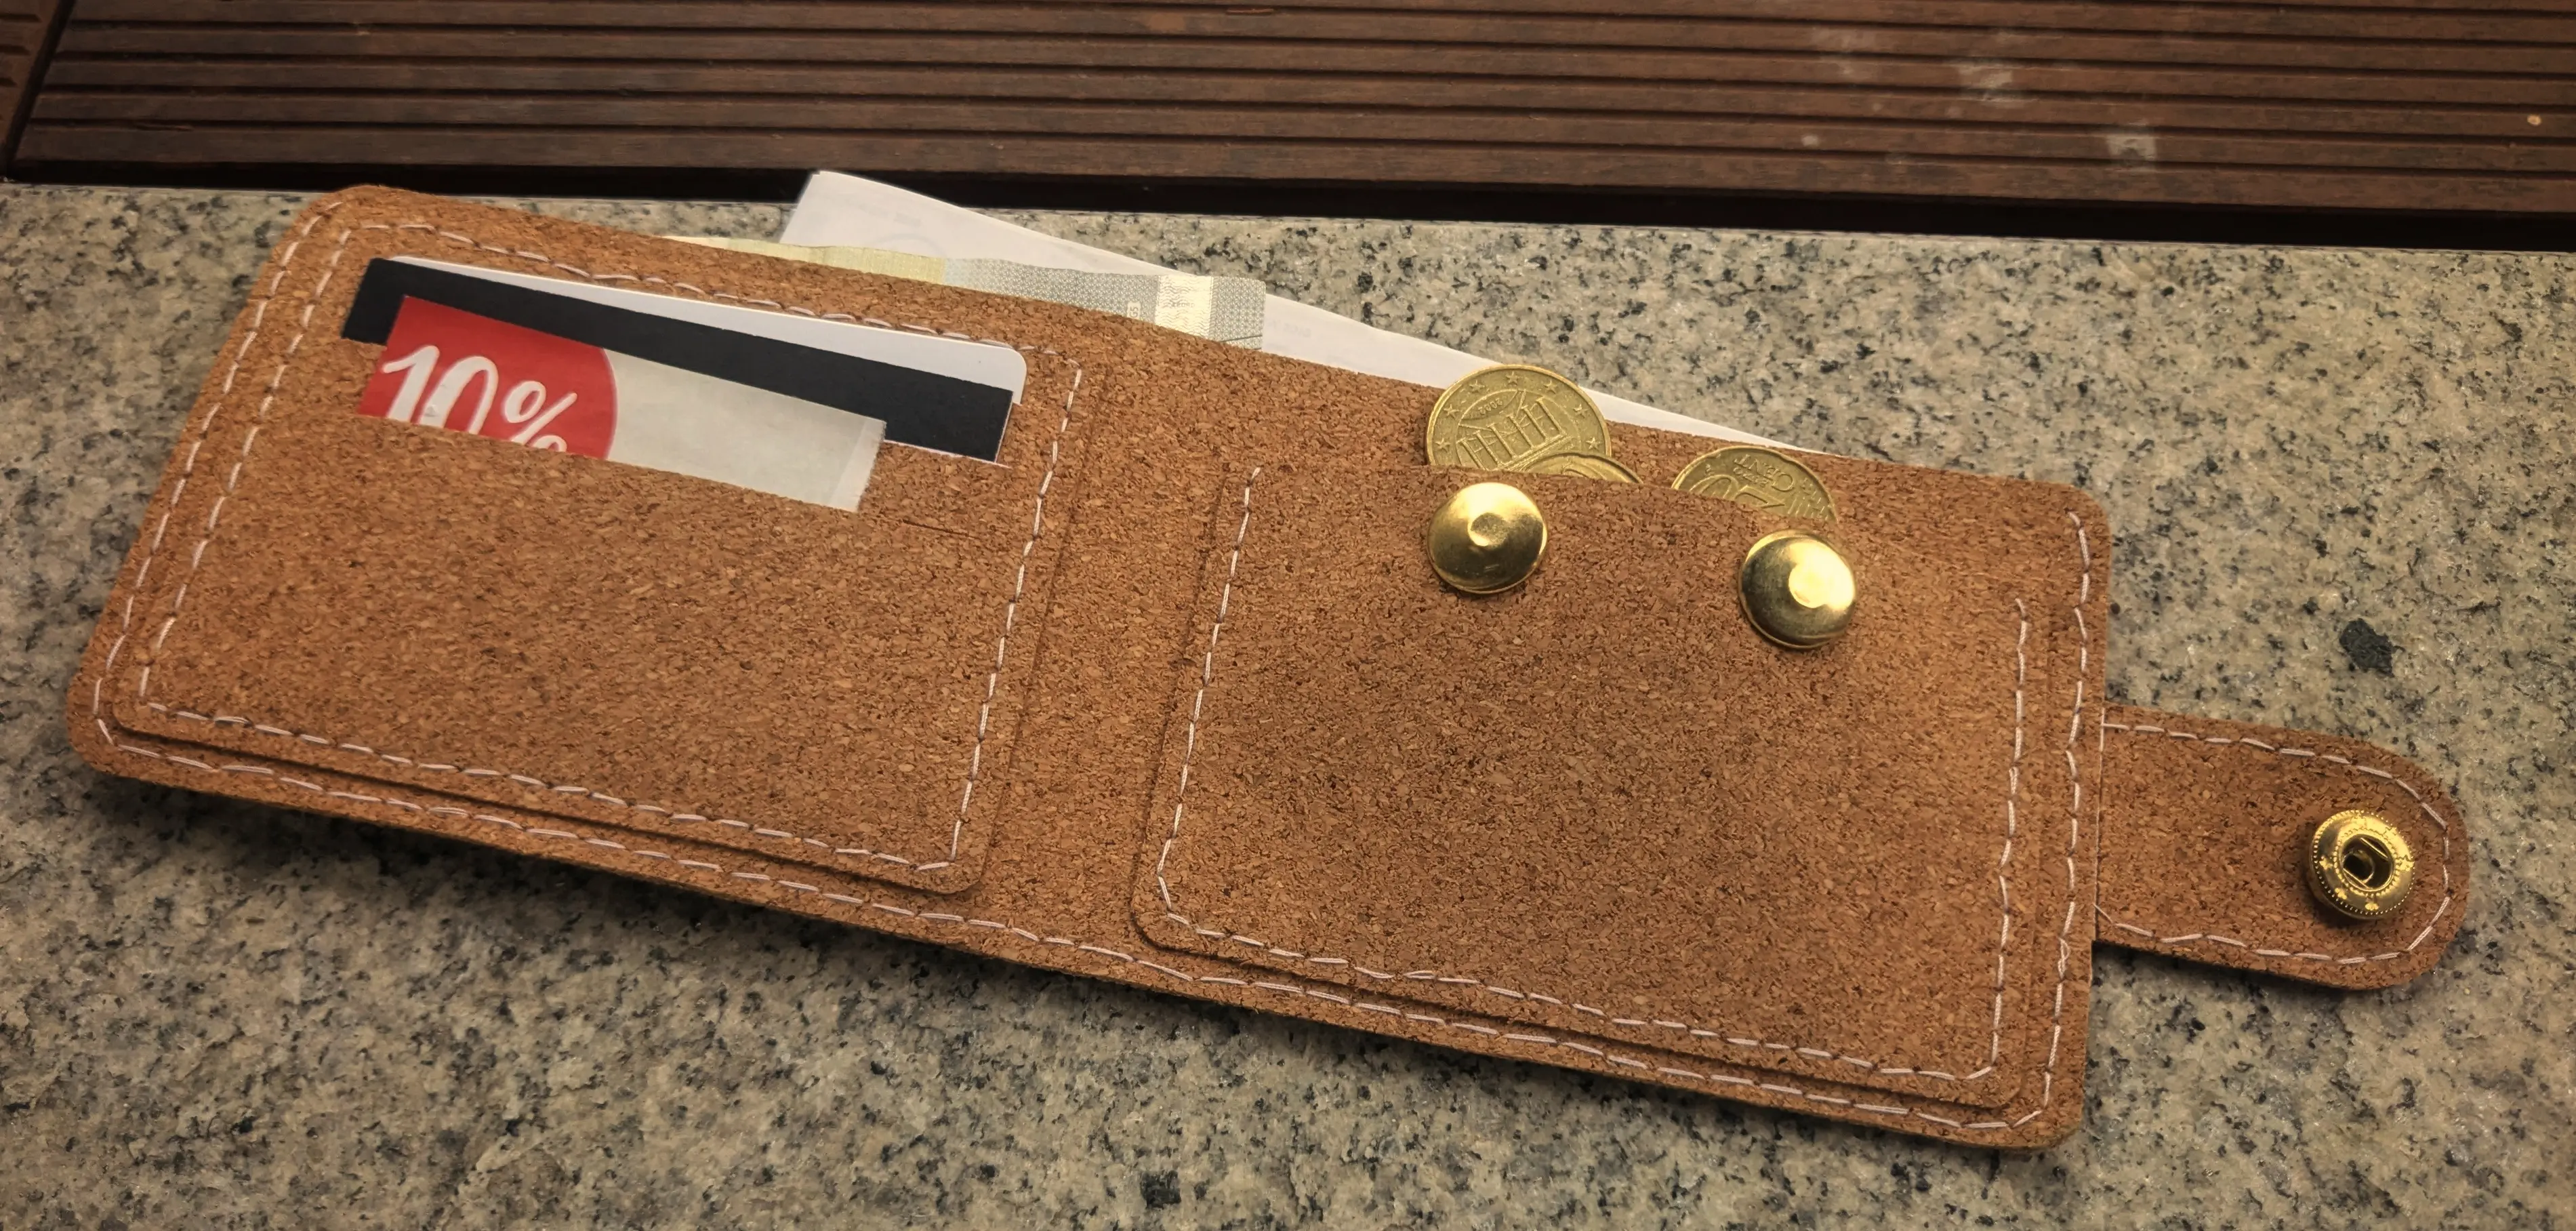
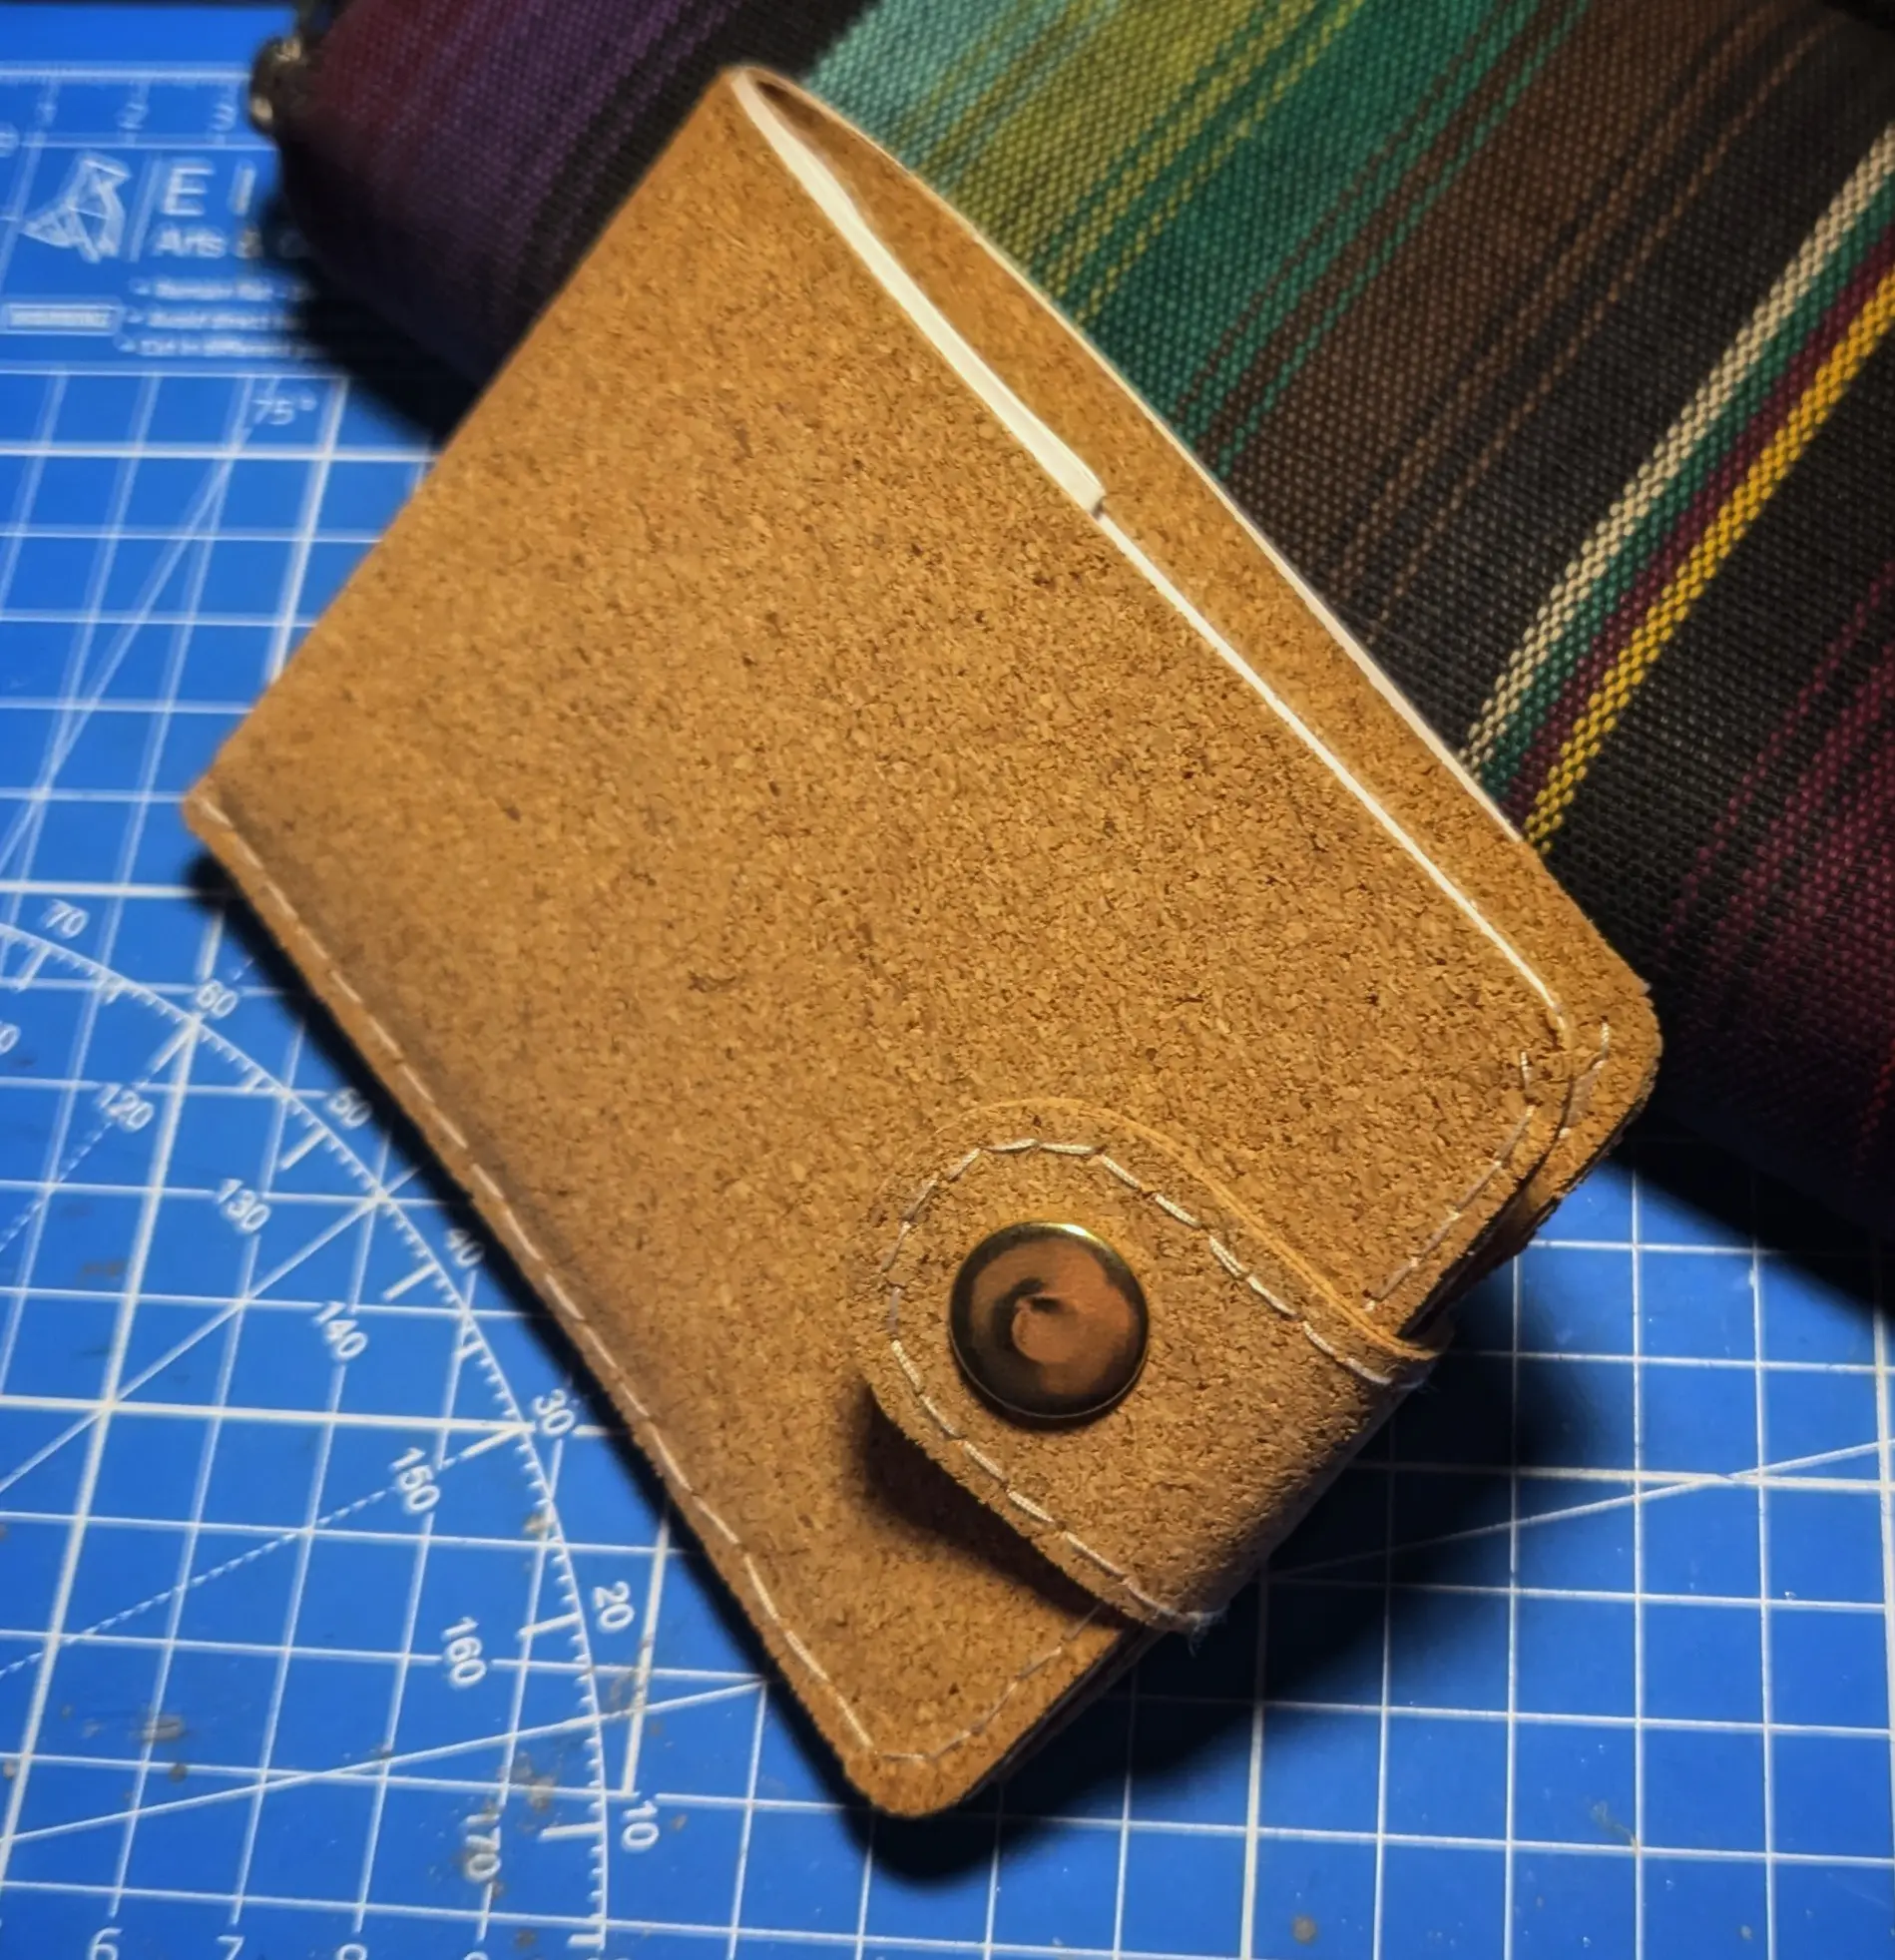
But after having it sit on my desk, just in my field of view, since then, I’m actually pretty happy with how it came out, at least from the outside.
It definitely doesn’t look like what I envisioned originally, but it also doesn’t look bad.
During the making process, there were definitely some times when I considered just dropping the project,
as it would never turn out the way I originally imagined.
Instead, I decided to push through and use it as a way to relax in the evenings and cool off.
And having something physical to work on helps with that a lot.
The wallet is by no means perfect; most of the buttons are broken (which is partially to blame on the kit I bought),
and the coin pocket would not keep coins in, even if they were working properly.
But if they would, I could actually envision someone using it, which says a lot, in my opinion.
When placed on a shelf, it actually looks kind of nice - so I guess I’ll be keeping it for now.
And maybe some day I’ll find the motivation to try this again - with the proper materials.